Disclaimer – This article is reproduced and translated here from the original page by Tsukurimaseu (We think). This article appears in Japanese HERE and was translated (Poorly) with Google Language Tools. Even though the words might not always make sense, this is an extremely detailed build, and the pictures tell the story.
— Introduction —
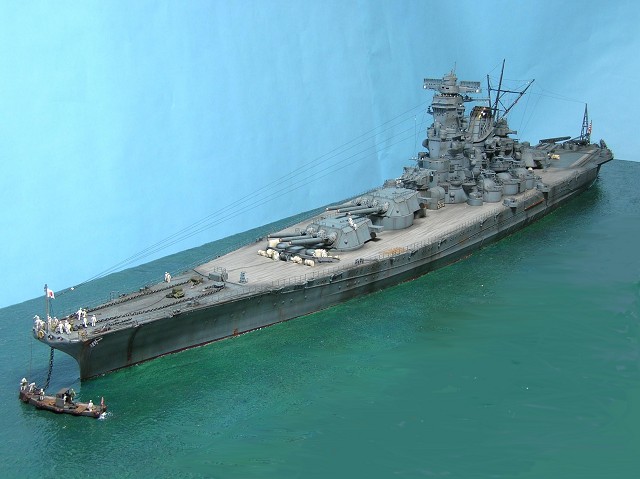
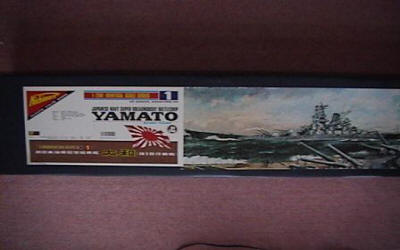
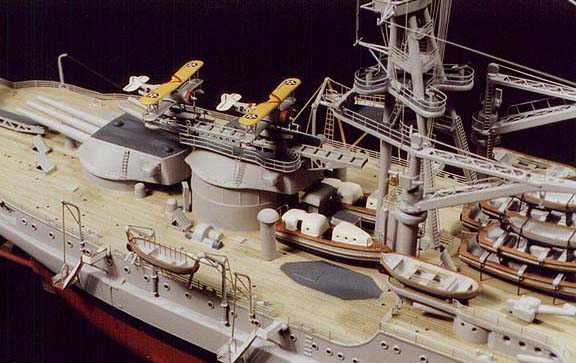
1 / 200 Yamato model Nichimo Corporation.
1m30cm greater length is about looking at the boxes in.
Once the stuff I want to make.
This model is the assignment of the size, perhaps because the old design to the fine details,
Representation is not much.
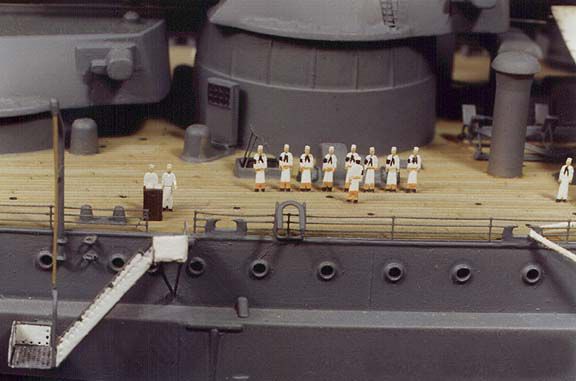
1944 to make six small offices around the image to be anchored off my Wu Mon,
I want to see.
Year 1997, I thought Heisei make this model one day to buy a 11 to 16 years from July at a time and rest for a little assembly.
This time, I had to put in the memorial and creating websites, I also have an expert, I think into the group.
Fix old bad decals and make them slide off the backing sheet paper
In this tutorial I show you how to Fix old bad decals – I show you how I reclaimed some Tamiya decals that even after more than half an hour in water, still refused to slide off the backing sheet. Reclaim decals that are no longer good for use. They have been subject to moisture or humidity previously, and now even after more than half an hour in water, they refuse to slide off the backing sheet.
**NOTE** – This article was written by Loren Perry many years ago, for another web site which unfortunately is no longer available. I was very glad to have found the article on an old floppy disc recently, and post it here now for the benefit of all.
Please visit Loren Perry and buy the best Ship Model Photo Etch parts at – Gold Medal Models
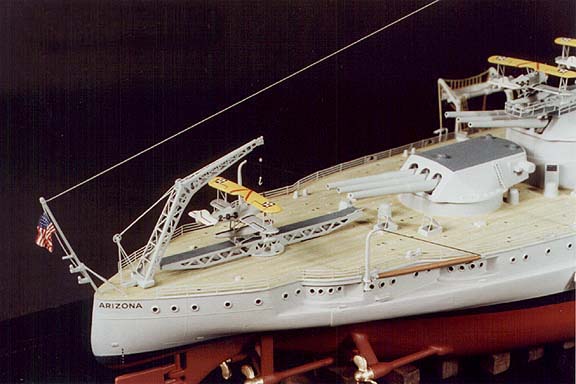
Wooden deck on the fantail of Loren Perry’s 1934 Arizona, built from the Revell 1/429 kit
One of the three colors is a paint, the other two are from Floquil’s range of model “stains”. They are: 1. “Mud” (a model railroad weathering paint), 2. “Driftwood” (a light gray stain), and 3. “Walnut” (a brown stain.) The entire process can be boiled down to four simple steps:* 1. Airbrush the deck with Mud.
* 2. Streak the deck with Driftwood.
* 3. Streak the deck with Walnut.
* 4. Repeat steps 2 and 3 as necessary.
This method is, fortunately, very simple and very forgiving. First one must airbrush the deck with Mud and allow it to dry at least 24 hours. In fact, this will be the very first color painted on the entire model – the grays, blacks, and other colors come after the deck has been prepared first. Once the Mud paint has dried, select your smallest tipped brush and open the bottle of Driftwood. You then dip the brush into the stain and then wipe the tip of the brush lightly over a paper towel until only a small amount of wet stain remains in the bristles. Now use the brush to streak the stain in narrow strips lengthwise along the deck (or parallel to the planking). Use random strokes until the deck is evenly streaked over is entire surface. When finished (the stain dries very quickly), open the Walnut stain and repeat this step. If the deck appears too dark, repeat the streaking process with the Driftwood until the deck starts to lighten up. If you want the deck to return more to the shade of the Mud paint, streak the deck with Mud in the same manner as the stain. By alternating back and forth between these three colors, you’ll find you have great control over the final appearance of the model’s wooden decks. And so long as you keep the stains and paint nicely thinned, there will be no visible buildup of pigment to obscure detail. And remember to keep the brush strokes about the width of a plank, or no more than two planks.
Some advantages of this technique: A. no great artisitic skill is necessary, only the ability to apply random paint streaks in parallel lines; B. a damaged area can easily be blended into the rest of the deck by applying more strokes in alternating colors as above; C. the process goes quickly – one Arizona model had its deck fully painted and streaked in about an hour (after the original Mud application had dried, of course.) A tip: purchase an inexpensive kit to use as your “guinea pig”. Use this kit’s parts to test your technique and refine it before you move onto your main project. You’ll find, as I did, that the final appearance of your model’s planked deck looks exceptionally convincing, both in photographs and to the viewer seeing it on display.
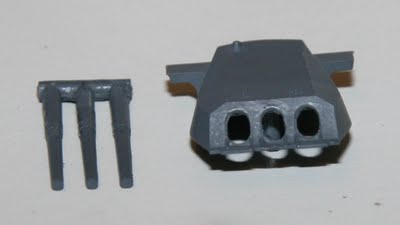
The revised 1/700 Tamiya Yamato has many corrections on the original release (Which I am building). One is that they have added blast bags to the 18″ guns. But for those of us with old stock, or building some other model without blast bags, there is a solution. It requires some Blu-Tack, skill, and believe me, much better results can be achieved than what I will show here (Instead of skill, I got Fat Fingers:-)
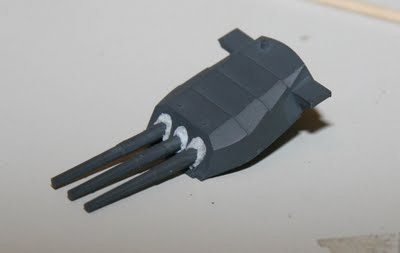
Here’ the two pieces that combined will form the gun.
Assembled, you can see the gapping holes around the barrels
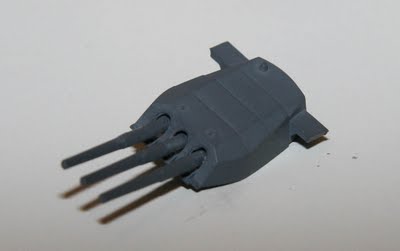
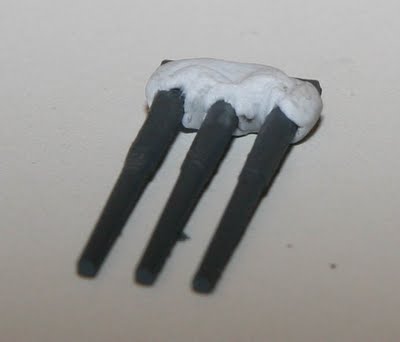
Roll some Blu-Tack between your fingers and flatten it out into a tube-shape so its about 1 1/2 inches long, and wrap it around the base of the barrels.
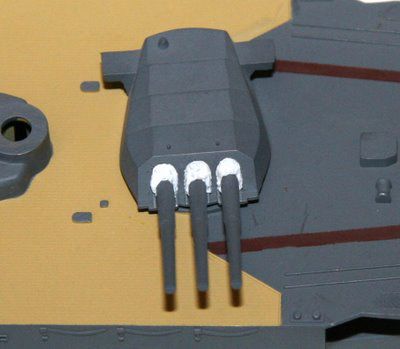
Then pull the barrels through the turret. The Blu-Tack will hold the barrels in place, and a small amount will protrude through the turret. This can then be shaped with a toothpick to make a convincing enough looking blast bag. Blu-Tack can also be painted.
Blu-Tack is very forgiving, if you botch it, just pull it out and start over.
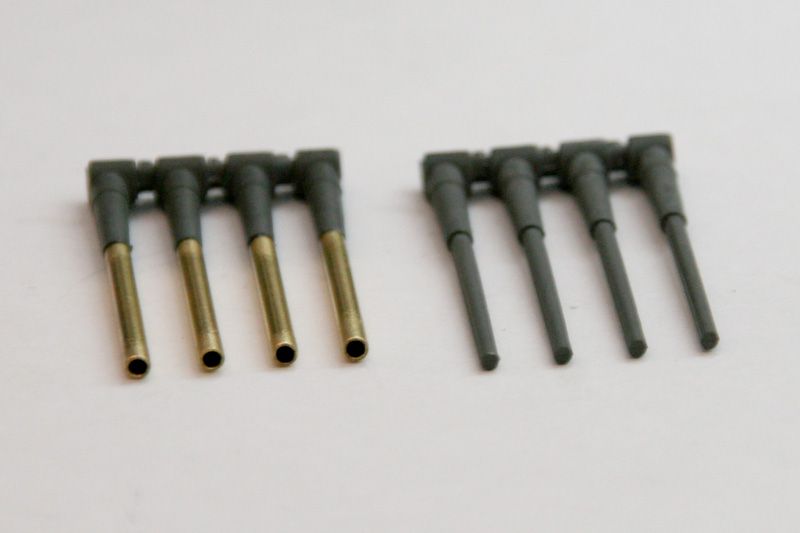
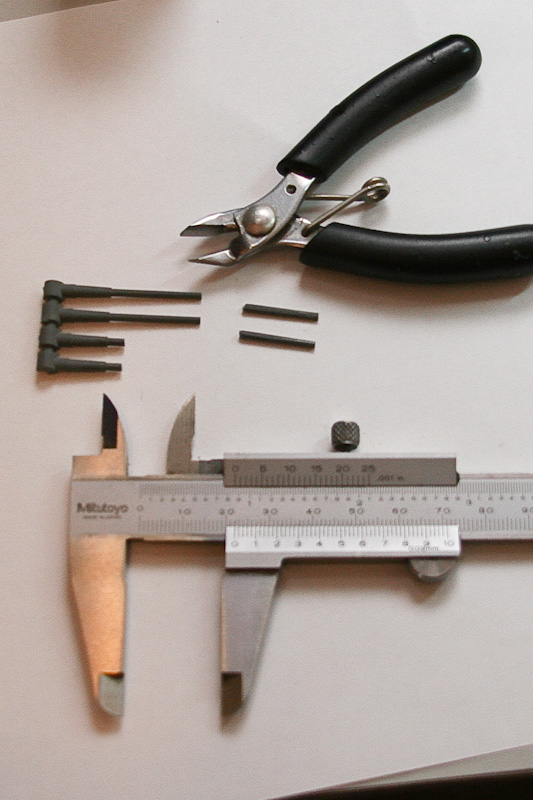
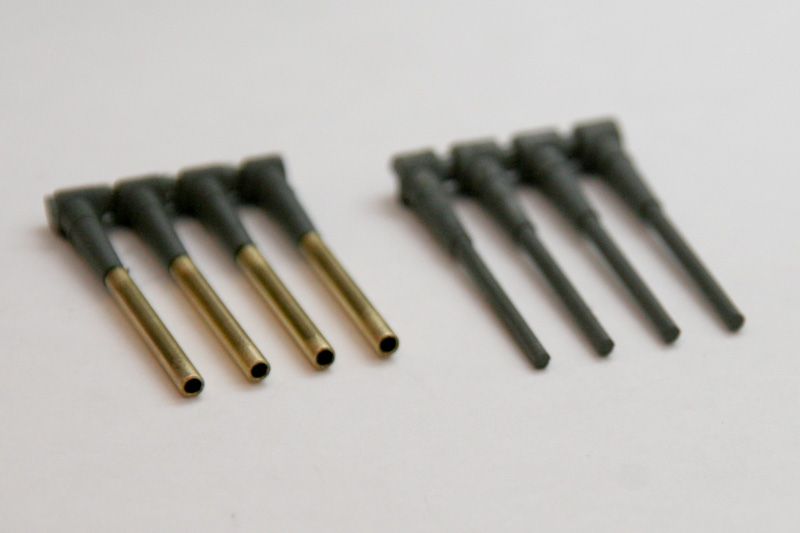
In this article I will show you how I upgrade the big gun barrels on 1/350 scale ship models. More often than not, the barrels that come with the kit are not very realistic looking, and in some cases they can be hideously bad. This is obviously very disappointing, as the rest of the kit is quiet good quality. I have developed a very simple and quick way to make those barrels look a little bit better.
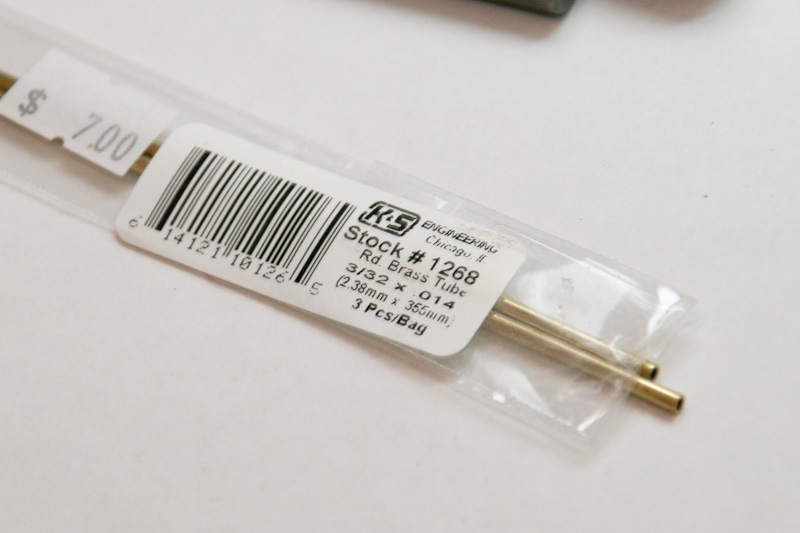
In the “Scratch Building Supplies” section of your local hobby store, you will be able to find some brass tubing, which is perfect for replacing those solid chunks of plastic. Try to find some that is as close to the diameter of the molded plastic guns as possible. In this article I am replacing barrels on Tamiya’s 1/350 Prince Of Wales, and a length of 3/32 rod looks right for the job here.
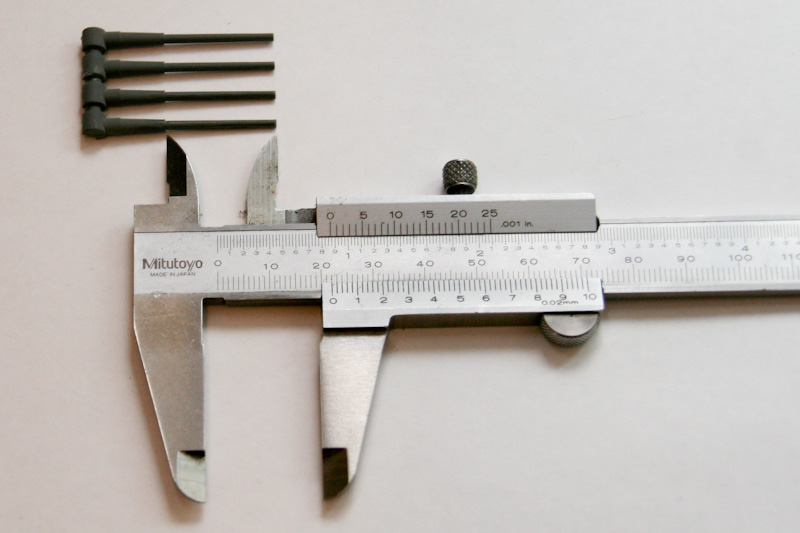
To get started I will use a set of vernier calipers, or some other device for measuring accurately to find out the length of the section I will be replacing.
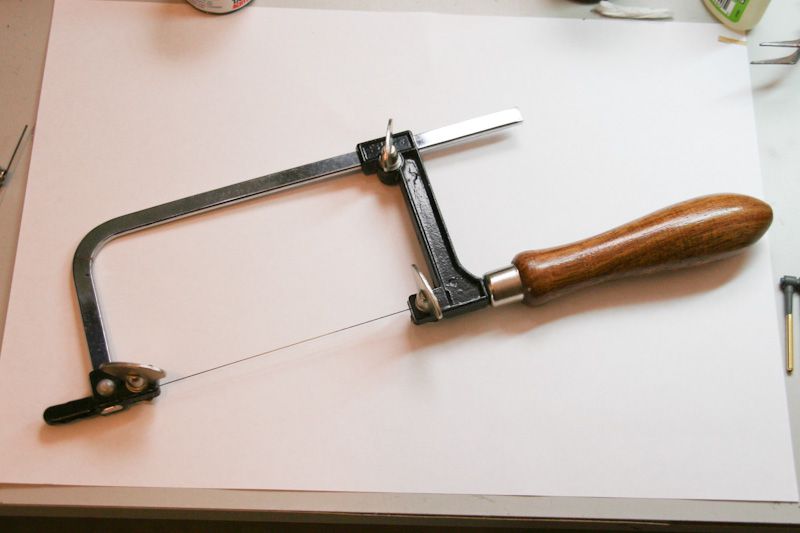
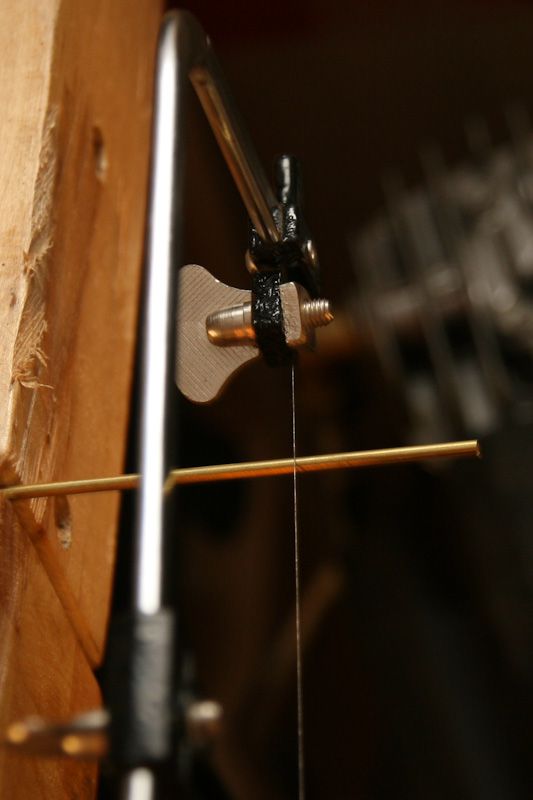
To cut the brass tubing, I used a “Jewelers Saw” that I purchased from my local hobby store. It has an extremely fine blade and is great for precision cutting.
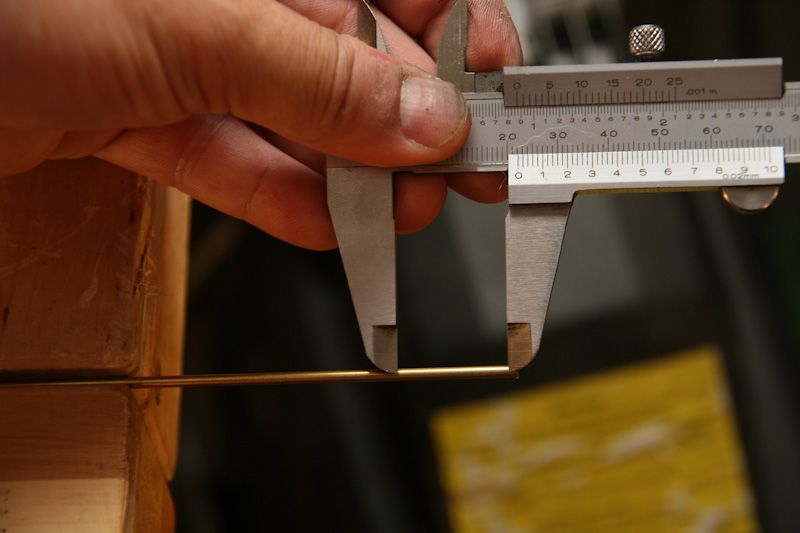
I secured the brass tube into a soft jawed wooden hobby vise (so as not to crush it) and used the measurement I took from the plastic barrels to mark out the lengths of brass I needed to cut.
Then it was time to get down to business and do some cutting.
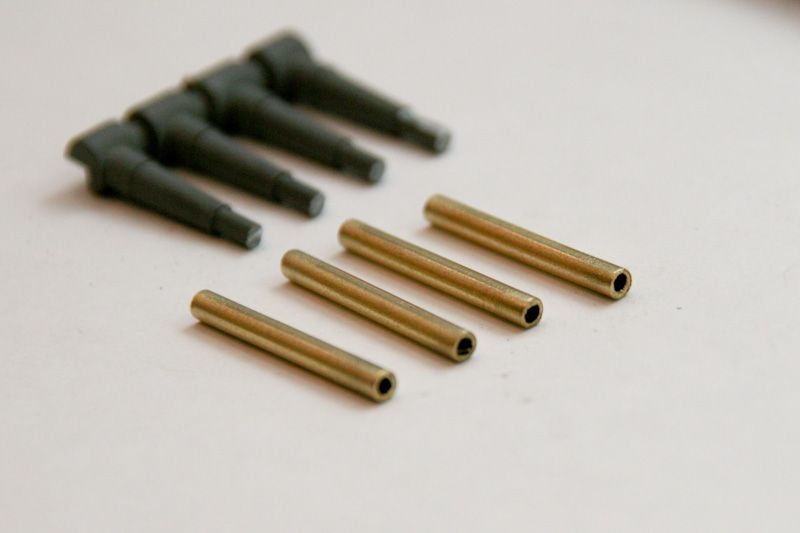
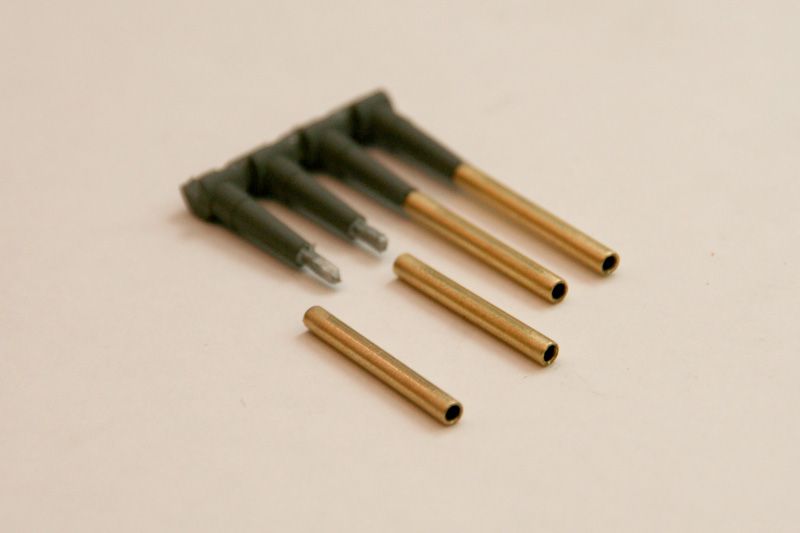
Once you have your new barrels cut, make sure you check their length and shape so they are all identical.
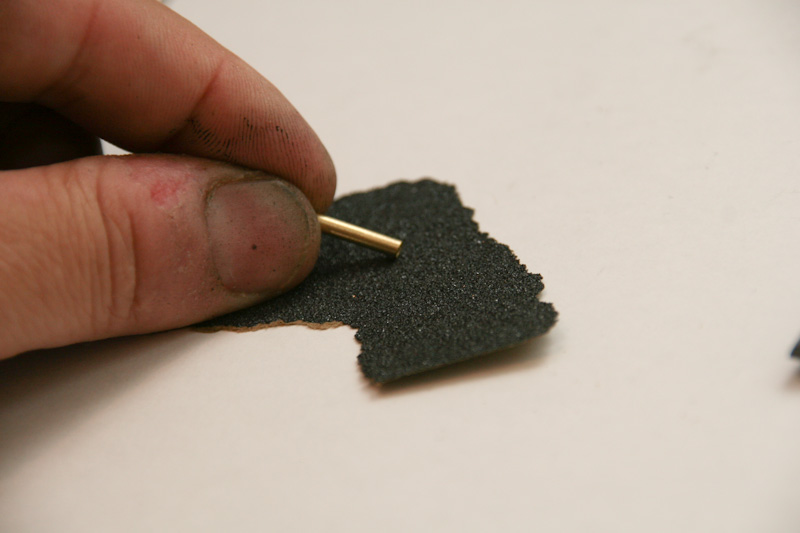
To clean up the outside of the new barrels, simply twist/rotate them between your fingers while the tip is in contact with some fine grade sandpaper.
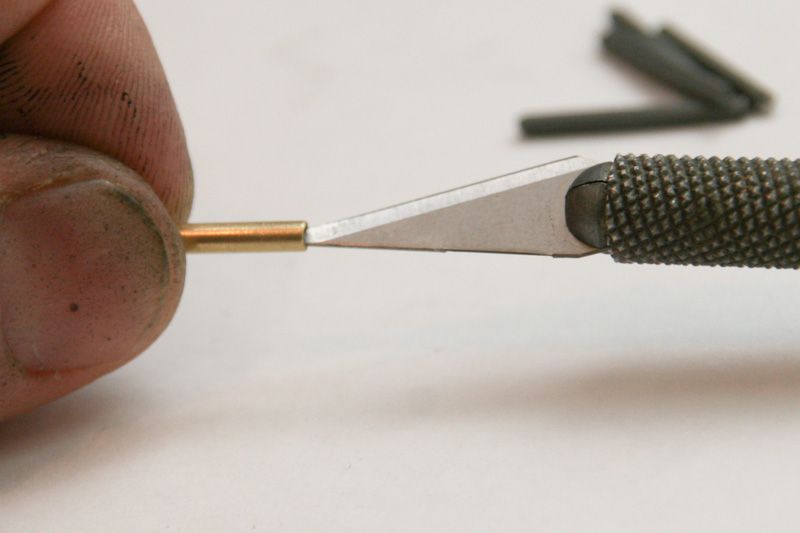
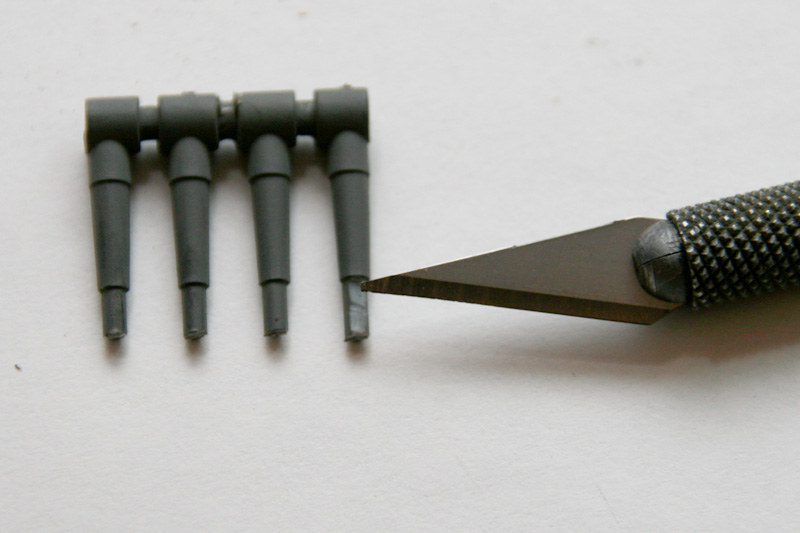
The inside of the barrel can also be easily cleaned by using an X-acto knife or scalpel.
Once your new brass barrels are cleaned up and ready to go, you can start to remove the old barrels. **IMPORTANT NOTE** – DO NOT remove the entire section, leave roughly 5mm of the old barrel in place as illustrated below. This is how we will mount the new barrels to the old frame.
Take your X-acto knife/scalpel and start “Whittling” away at the 5mm section we left behind, so it fits snuggly inside the 3/32 replacement barrels.
The trick here is to be slow, and patient. remove a little, then test fit, remove a little more, then test again. This is the best way to ensure a snug fit, and that the barrels sit perfectly parallel on the frame.
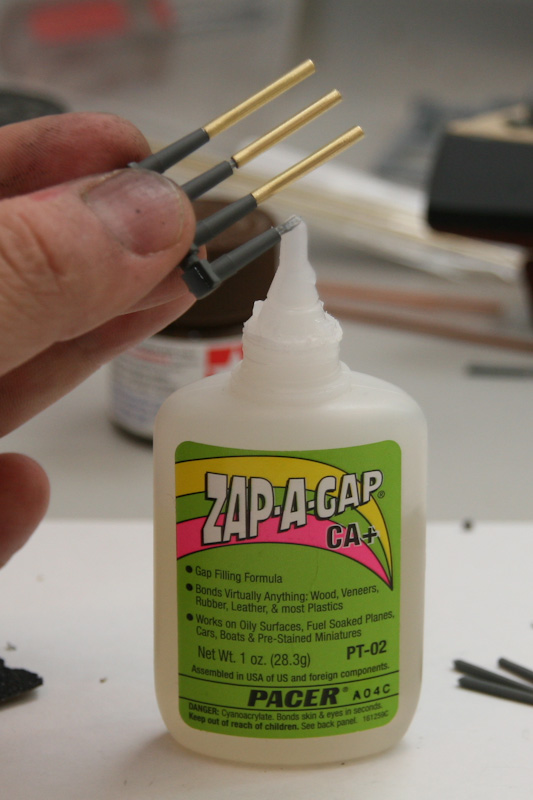
Once you are happy with the fit, and that everything lines up correctly, take your preferred glue and apply it to the 5mm section you have just “whittled”.
Once all barrels have been glued onto the frame, line everything parallel, and leave it to dry. Once it’s dry, you can spray your primer on the brass in preparation for the final color.
Disclaimer – This article is reproduced here from IPMS Stockholm without permission – I know this is a really bad thing to do, but SO many good articles have disappeared from the internet over the years, and I couldn’t stand to lose this one, so I have saved a back up copy of it here.
PLEASE Visit IPMS Stockholms original article by Omami HERE.
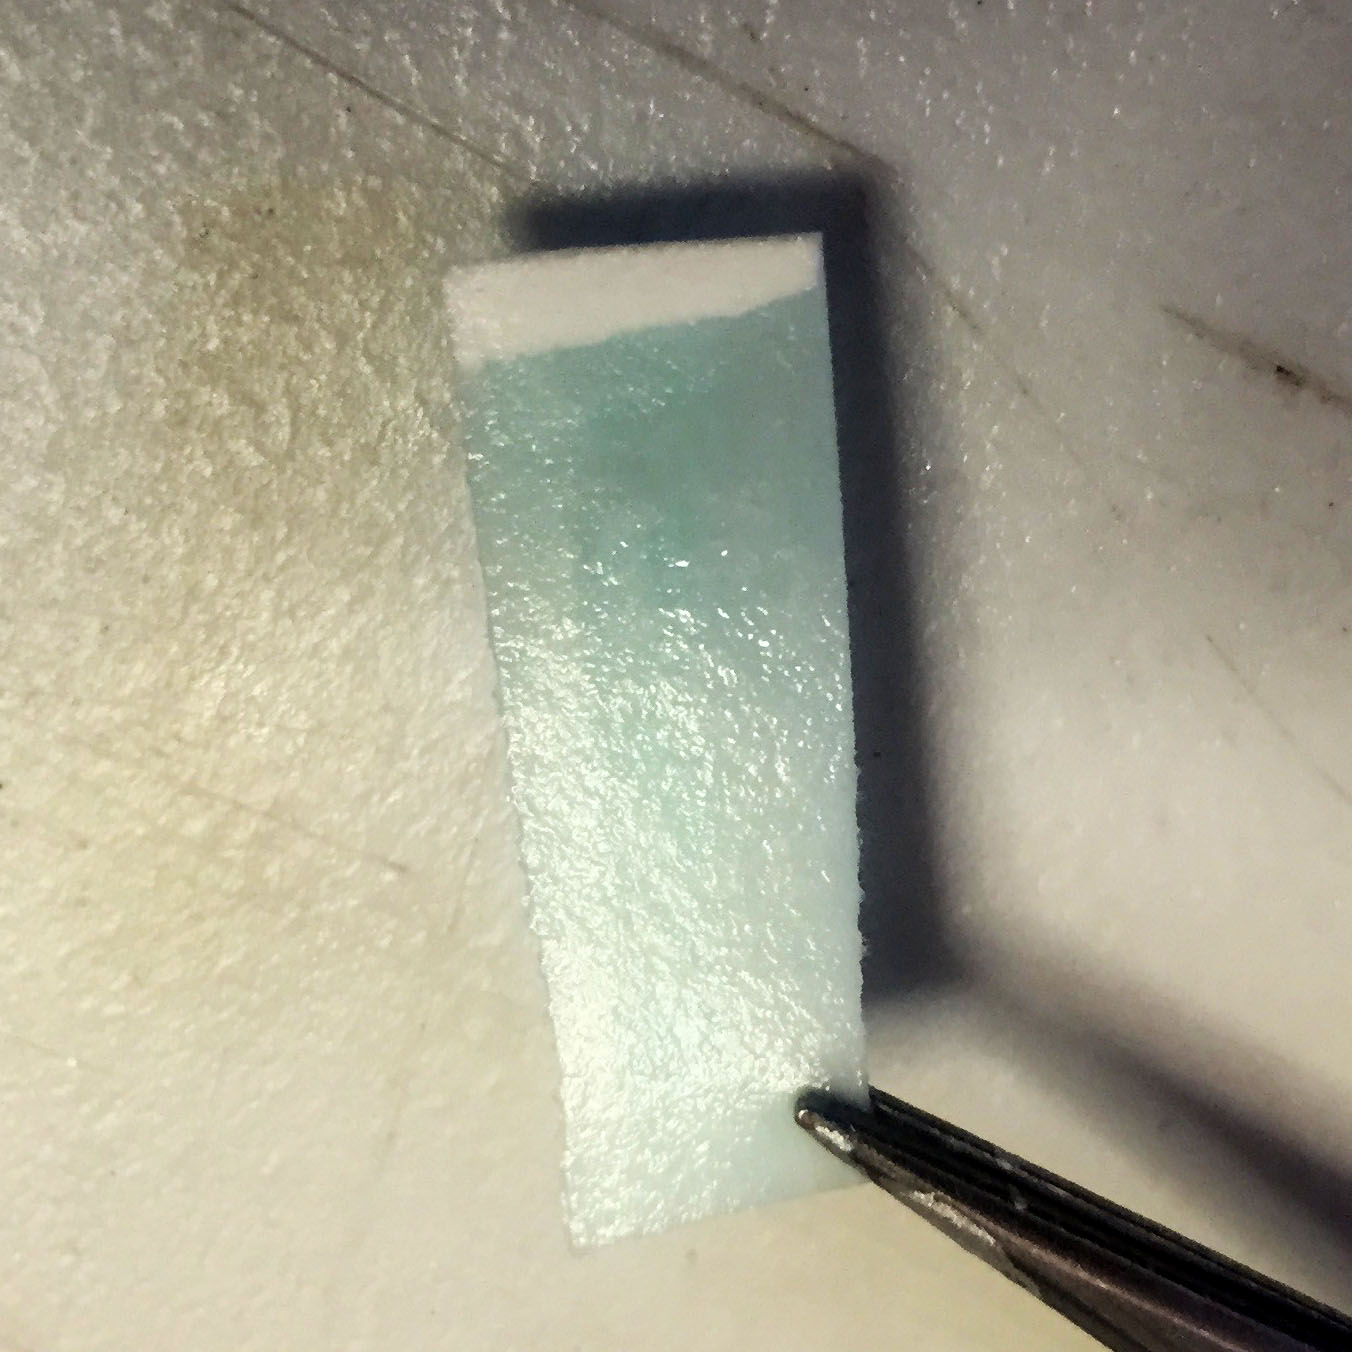
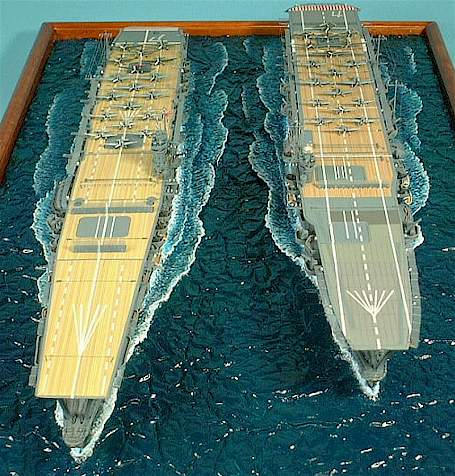
Replicating elements of nature in miniature is one of the more tricky aspects of modelling, requiring not only the “engineering” knowledge of a subject but also a bit of artistic sense.
For ship model builders such as myself, water base can really make or break a good model. In this article I would like to show you how to produce a realistic sea base for ship model, with rough water surface, surf and wake. I have perfected these techniques during my own project of modelling the IJN Task Force, Carrier Division 1. The Task Force consists of the aircraft carriers Kaga and Akagi steaming side-by-side on a single base.
Before we begin, let’s consider the qualities of our subject.
Despite of what we all know about water, deep water basins seldom look transparent, especially when seen from a distance. Rather than that, water has colour and forms a glossy, highly reflective surface. These qualities of water are especially appropriate to replicate in scale, particularly when dealing with ship models in smaller scales such as 1/700.
Having performed this most basic analysis, let’s move to a step-by-step description of how to produce a convincing sea base.
We use cookies on our website to give you the most relevant experience by remembering your preferences and repeat visits. By clicking “Accept”, you consent to the use of ALL the cookies.
This website uses cookies to improve your experience while you navigate through the website. Out of these, the cookies that are categorized as necessary are stored on your browser as they are essential for the working of basic functionalities of the website. We also use third-party cookies that help us analyze and understand how you use this website. These cookies will be stored in your browser only with your consent. You also have the option to opt-out of these cookies. But opting out of some of these cookies may affect your browsing experience.
Necessary cookies are absolutely essential for the website to function properly. This category only includes cookies that ensures basic functionalities and security features of the website. These cookies do not store any personal information.
Any cookies that may not be particularly necessary for the website to function and is used specifically to collect user personal data via analytics, ads, other embedded contents are termed as non-necessary cookies. It is mandatory to procure user consent prior to running these cookies on your website.