Keep your network drives and servers clean of DS_Store, AppleDouble, apdisk and even Thumbs.db files with BlueHarvest

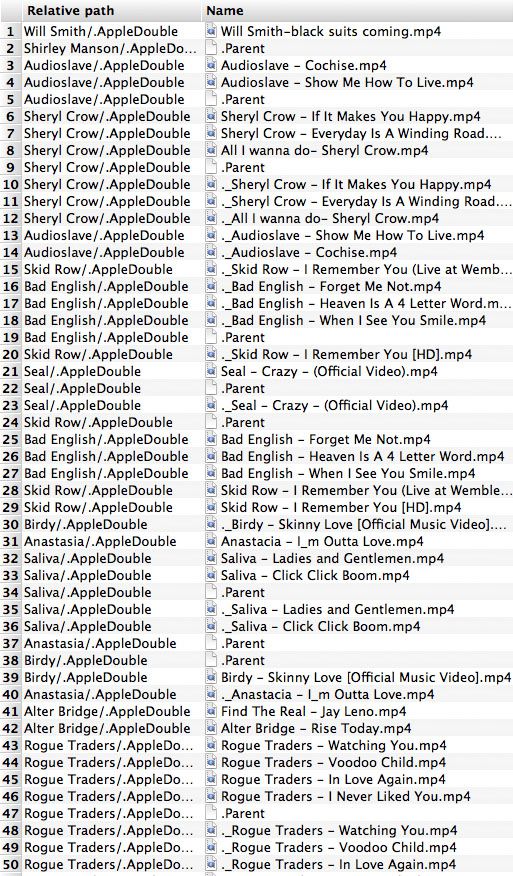
Lately, My WDTV Live Hub has been REALLY slow. In an effort to see what was going on, I mounted the drive in my FAV Linux distro PUPPY LINUX. What Puppy Linux showed me, was ALL of the thousands of files that my Windows and Mac OS X computers had been creating and hiding on my drive without my knowledge. When I have accessed my shared drive with my Mac, it had been creating DS-Store files and .AppleDouble files in each folder, and my Windows machines have been creating Thumbs.db files.

AppleDouble-FilesIt was pretty easy to delete these files, but my question was “How can I stop this Madness from happening again?”. After a little Googling I found a program called BlueHarvest. I downloaded the trial version, and I have to say, within 15 minutes, I had paid my $15 US and had a license key that was good for 3 different Macs. If You are sharing drives or a server in a Mac/Windows/Linux environment, YOU NEED THIS PROGRAM!

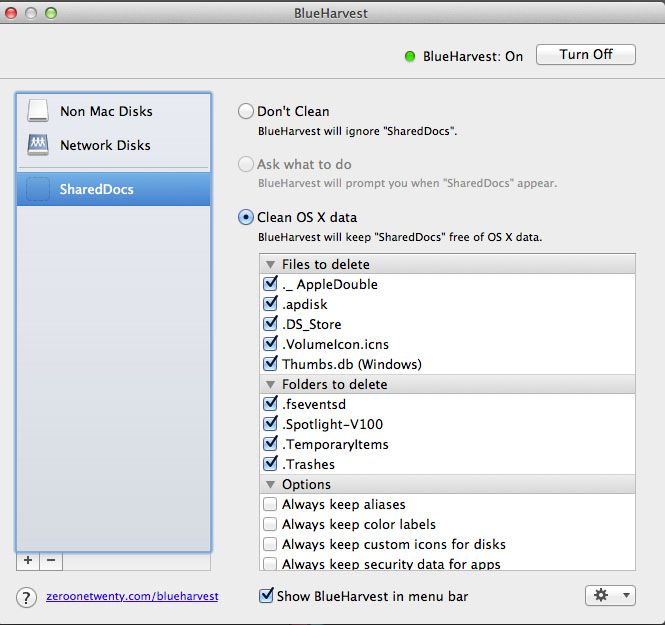
After installing, you tell BlueHarvest which drives and folders you want it to monitor, and the file types you want it to clear, and it deletes them as soon as they are created.

BlueHarvest Window

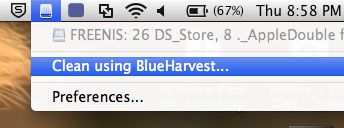
BlueHarvest not only prevents these files, it is also the quickest and easiest way there is to clean up a drive of existing files. I have a 8TB server running FREENAS, and to clean it up, all I did was click the BlueHarvest icon in my menu bar and select “Clean Using BlueHarvest”

blueharvest-menu-barThen I selected my server…

Freenas-Capture

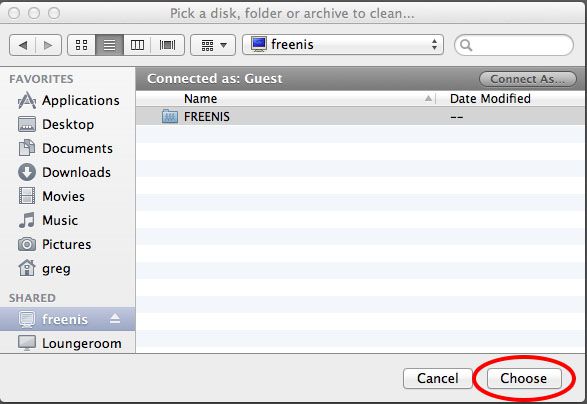
And then BlueHarvest went to work – check out the result!

blueharvest-complete
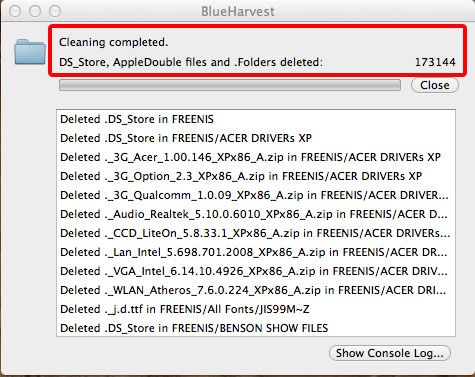
It cleaned out 173144 files from the drive!

And at $15, BlueHarvest is a gift! Download the 30 day trial HERE.

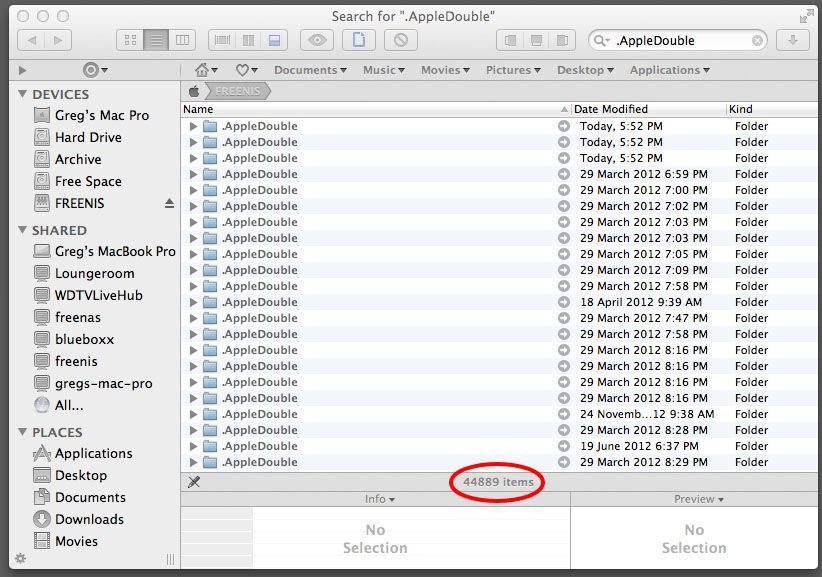
**UPDATE** – Ive been using this program for a few days now, and it has been really cool watching it delete these annoying files as soon as they are created. That part has been working great. However, I have been playing around with a program called Total Finder today, and it shows Hidden/Invisible files. I ran it on my Freenas server and to my surprise, it turned up nearly 45000 .AppleDouble files.

BlueHarvest-FailI opened up BlueHarvest and initiated another clean on the drive, and after it scanned it reported it had cleaned 4 files. I ran Total Finder again, and it still came back with almost 45000 files.

Quick and Easy way to Clean Up and Speed up your Mac with ONYX

Onyx For Mac IconIn my opinion, the best first step to speeding up your Mac is to repair your permissions and run disk repair as outlined in my article Speed Up Your Mac Article HERE.

The next step is to clean your caches, rebuild your indexes, and run your macs daily, weekly and monthly maintenance scripts. This can all be done easily with the FREE and very powerful ONYX.

FREE Download Onyx from Titanium’s Software.

Once you have ONYX downloaded and installed, its a good idea to make sure that you have backed up ALL of your stuff. Like using any cleaning program, things can get moved or lost, so make sure you don’t get caught!

When you are satisfied your files are safe, go ahead and open ONYX. The first thing you will see is a alert box that asks if you want ONYX to check the S.M.A.R.T status of your hard drive. S.M.A.R.T stands for Self-Monitoring, Analysis and Reporting Technology. Most hard drives these days monitor their own performance and try to anticipate if a failure is imminent, and if their is something wrong with your drive, you will be notified after this test. It is well worth doing.

Onyx SMART screenOnce this has completed, the next alert will ask if you want to verify your drive. If you have already performed this task because you are following on from my first “Speed Up Your Mac” article this is not necessary. If you haven’t already done this, it is well worth doing as it will find any drive errors. This process can take some time, and it will require all other programs to be closed, so if you decide to run it, go get yourself a coffee and some fresh air after you begin.

ONYX Verify Start Up VolumeWhen Verification has finished, ONYX will ask you to type in your password to give it permission to make changes and clean thing up.

ONYX Password Box

You will now see the main menu bar for ONYX.

ONYX Main Menu BarAs you can see, this program has a lot of in depth features and can do a lot of different things, but for this tutorial, we will focus on cleaning up quickly and easily. To start cleaning, press the “Automation” button. You will now see the Automation screen.

Onyx Automation Defaults

The safest way to proceed is to accept the defaults and press “Execute”. If you are following on from my first “Speed Up Your Mac” article you might want to un-check “Repair Permissions” as you will have already done this. Other wise, leave it checked. If you are like me and like living on the edge, you can go ahead and check/un-check the items you feel necessary.

*BE WARNED* – As with every clean up program, there can be unwanted side effects, so proceed with caution!

For me personally, I do change it up as I like to clean my system deeply, and I am happy to put things back how I like them after the cleaning (such as re-arranging my icons how I like them on my desk top again). I also like to execute my Macs built in daily, weekly, and monthly maintenance scripts. Below is how I use ONYX.

*NOTE* – I take no responsibility if you copy my settings and loose something.

ONYX OptionsWhen you are happy with your cleaning options, its time to press execute.

Quit Open AppsONYX will tell you it is going to close any other programs that are open, so again, make sure you have saved your work.

Onyx In ProgressONYX will now start performing maintenance. In most cases this will take some time, so if you didn’t stretch your legs, get a coffee and some fresh air before, now is the time. When ONYX has finished, a dialogue box will appear. Click OK.

ONYX Maintainence Complete

ONYX will now want to restart you computer.

ONYX RebootRestart your computer and you are all done!

Clean Up And Shrink VMWare Fusion Virtual Machines With Ease

vmware-logoIts always bugged me how large and bloated my Virtual Machines become. I recently installed XP Pro and ran Windows Update to get it up to scratch, and the raw install Virtual Machine file was a little over 3Gb. I installed a few of my favorite video editing/converting apps (Including Premiere Pro – about 2Gb in size), converted a few files, and within days, the size was over 12Gb? It really doesn’t make sense to me why the virtual machine would blow out to that size so quickly. Its also a real annoyance when you want to backup/copy your virtual machine elsewhere for safe keeping, and your file is unmanageable.

Thankfully, the folks at VMWare have provided a solution to this bloat. Open VMWare Fusion, but don’t open any virtual machines. From the menu, select “Window” and then “Virtual Machine Library”. Right click on your obese machine and select “Get Info”.

clean-vmware-virtual-machineYou will now see a summary of your Virtual Machine.

clean-vmware-virtual-machine-2You can see from above, I can reclaim over 7Gb of size! Click the “Clean Up Virtual Machine” button.

clean-vmware-virtual-machine-3Now is one of those “Go get yourself a cup of coffee” moments. It does take a while, so be prepared for some down time.

clean-vmware-virtual-machine-4Presto! The 12Gb Virtual Machine is now a much more manageable 5.2Gb!

Reclaiming space on a iPhone, iPod Touch or iPad

iPhone Capacity StatsMy iPhone/iTunes has been bugging me for a while now about how my phone is running out of memory, and it won’t let me load more music, or take new photographs or video. My first instinct was that I should clean house, and move some photos or songs off it, and whilst it was plugged in to my Mac I noticed something interesting in the storage capacity stats window:

iPhone Capacity Stats1.03 GB of Other? I would much rather have an extra GB of music and photos than a GB of “Other”! So, I did a little bit of research and it looks to me that “other” is stuff like contacts, calendars and emails etc, so no joy to be had there,  but it is also log files, history, cache, and other gunk that is meaningless to most users. There were also reports in the Apple forums that you can reclaim “some” of that space with a full system restore. So I thought I would give it a try!

I started by making a full backup of my phone. Once my iPhone was plugged in to my computer, and it showed up in iTunes, I right clicked on it and selected “Backup” from the menu. It took a few minutes to copy everything over.

Select Back Up from MenuOnce that was all done, I went to the “Summary” window and clicked the “Restore” button.

ITunes Restore ButtonAfter clicking the usual procession of Ok’s, Yes Please’s, and I Understand’s, it set about completely wiping my iPhone.

Restoring iPhone WindowOnce it had erased the memory, it began uploading the 4.3.5 software installation, powered on and off a few times, and then I got asked if I wanted to restore my phone from the back up I created, or if I wanted to start my phone from fresh again. I clicked “Restore from Back Up” so it would reinstall my apps, contacts, music etc etc and off it went again It did take some time to completely erase, and re-install the software and my files and info (about 15-20 minutes), but it was well worth it!

Reclaimed MemoryMy iPhone went from 1.03GB of “Other” down to 0.24GB of “Other”! That’s nearly 800KB of “Other” that can now be used for photos and music!

Woo-Hoo!