iOS 7 on the iPhone is really great, but it can drain your battery fairly quick. I have identified 3 ways to save power that REALLY work!
httpvh://youtu.be/wMu79khieC8
To get started, drag from the bottom of your iphone screen upwards.
This will reveal the Control Center.
In control center, the first trick to saving power is to turn off any transmitters you are not using. For example, BlueTooth or Wifi. If you use Wifi at work, but not at home, turn Wifi off at home to save power.
The next power saving tip is to turn down your screen brightness. The lower the better for battery life.
The BIGGEST drain on your iphones battery in my opinion is apps that are running in the background, that you are not using. When most of us finish using an app we press the home button to close out of it, but it is still actually running in the background. You need to “Terminate” the app out of your iphones memory for it to be completely closed. To do this, double click your home button, and see everything that is still open, running and in memory on your phone…..be prepared, there’s probably going to be a lot.
To terminate apps out of your phones memory, slide/push their preview windows to the top of your screen.
Once you have closed all of the apps your are not using right now, it’s time to get into the habit of closing all of your open apps using this method a few times a day. Before using this method, I would be looking for my charger by 3-4pm. Now that I terminate running apps through the day, I still have around 50% power left in my phone when I get home around 5-6pm.
Power Cycling sounds like riding a bike really fast up a hill, but in the technology field it refers to a way to get everything back online when things aren’t working right, or you have to recover from a failure or freeze.
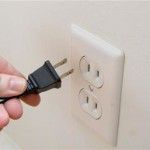
A Power Cycle is achieved by turning everything off safely, disconnecting the power sources, and leaving everything to sit for a in-determined amount of time (some say 30 seconds, some say 30 minutes).
I find Power Cycling makes all my devices talk to each other quicker. As I have a somewhat sophisticated home network, yanking the cord on everything from time to time allows new routing tables to be created, and old machines that are no longer connected to the network (That may have been a Master Browser (Machine that tells other machines where everything is located)) to be removed from the environment.
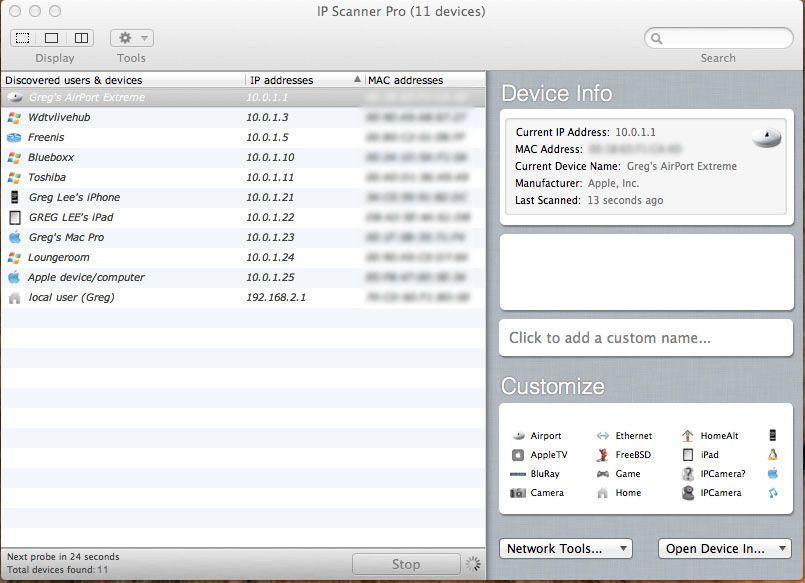
We’ll use my network as an example to go through the procedure, as things do need to be done in a specific order. Using a IP Scanner (There’s lots of free ones available – just Google IP Scanner) I generated this view of my home network.
To begin a Power Cycle, I turn all off the Computers and my Server off. Once they are safely and completely shut down I yank the power cords from the sockets (This is important, if it is still plugged in, there is still power going in, keeping things in memory – So YANK IT!). With my Laptops, I take the batteries out. Next, I shut down and unplug my WD TV media machines and the “Elements” hard drives attached to them. My iPhone and iPad are now shut down by Pressing and holding the Sleep/Wake button (Power Button on top right side of device) for a few seconds until the red “slide to power off” slider appears, and then slide the slider. Lastly, My Airport Extreme Router, D-Link Switch, and ADSL Modem are all disconnected from the outlets.
Now I go throw a tennis ball with my Dog Benson for about 10 minutes. This allows plenty of time for any power left in the devices to drain away, and all caches and memory to clear.
After playtime I get ready to restart everything. First, I plug the modem back in and let it initialize and connect to the internet. Then I turn on my Switch, and my Airport Extreme Router is next. When they are all operational and happy, I turn my computers on one at a time, beginning with the one I use most, first (So it can become the Master Browser). Once it is up and connected to the internet, I turn the next one in my usage order on, and let it connect, then the next, etc, etc. Then, I boot up my WD TV Live Hub and reconnect the “Elements” storage drives, and lastly, I power on my iPhone and iPad by holding down the Sleep/Wake (Power Button on top right side) for a few seconds until I see the silver Apple logo appear.
Everything should be back up, running, and happy!
Some people will tell you there is no advantage to power cycling. I personally, do believe it helps, and if you are undecided, Try it for Yourself and make up your own mind! What have you got to loose?
As mentioned in THIS post, I bought a WD TV Live Hub unit a month ago, and I have been fairly happy with it so far. The premise/purpose of the unit is good, it is well featured in hardware, but the firmware/operating system is not as good as it could be, given the potential of the units hardware capabilities. I have found it to be slow, kinda clunky, and a bit frustrating when it comes to finding media quickly, as I have a large collection. The current version at time of writing is 2.07.17. Since purchasing the machine I have tried several versions of the firmware, and have settled/rolled back (using WD’s own rollback instructions and previous OS builds on the WD Firmware Rollback Page) to version 2.04.13, which in my opinion, and the WD Community opinion, seems to be the best offering so far.
Last week however, my 3 week old unit simply refused to boot. It didn’t work. I would press the power button on the remote and see the screen above, and then the unit would just turn itself off. I tried the using the power button on the unit, and it yielded the same result, automatic shut down after the loading screen. I was quiet enraged. My wife gathered up the units box, dug the receipt out, and was set to drive me back to the store to exchange the unit, when I proceeded to do what any grumpy male geek with a failing piece of technology would do – I took to it with a screwdriver, pried it open and voided the warranty!
I did learn a lot about this unit during this process though, and will share it with you now – and as always, I am sharing MY experience! Should you CHOOSE to try to replicate my experience with your device, and FAIL, it is completely your own fault, and I take no responsibility what so ever!
After Googling the symptoms, it appears that this is a VERY common problem with this unit, and the folks at WD refuse to acknowledge it as an issue. However, there is a VERY simple fix, but it does involve opening the unit. Inside the box is the main PCB (Printed Circuit Board), and there is a smaller PCB for the POWER button connected to the main PCB with a few wires. This seems odd for the power button to be on a different board, but it is a gift from god that it has been designed this way. It seems that something on the smaller power PCB, or perhaps the power button itself shorts/fails, hence as soon as you start the unit, the switch thinks its been pressed and it turns the unit off.
The cure, simply disconnect the smaller power button PCB. YES, you read correctly, just disconnect it! There is a power button on the remote you can use to switch the unit on and off anyways. The ironic part of this is that I actually found it harder to open the unit than disconnect the power button PCB. My first instinct was to crank on the thick chunky bit of plastic with the scallop shapes, but I soon learned that this was just an aesthetic, the actual lid is the thin piece above the groove in the aesthetic scallop bit.
To open the case, take your preferred case opening screwdriver and insert it between the thick bit and the thinner top panel at the back of the unit above the composite (yellow) video output.
Once you have made a gap you will see the fastening tabs that hold the lid on, and its just a matter of forcing the top upwards and gently pushing the fastening tabs towards the inside of the case. Below shows you the different types of tabs you will need to defeat to lift the lid.
Once you have the lid off, its a simple matter off locating the power button PCB, and the wires that join it to the main PCB. The power button PCB wires mount to the main PCB underneath, but the white terminal is easily visible, and requires little effort to disconnect. I just flicked it of with the screwdriver I used to open the case.
Once the wire is disconnected, you can re-fit the top panel, plug the box in again, and watch your unit boot back into that familiar home screen!
Now, if you want to win a prize (Charlie Sheen’s Tiger Blood), look closely at the photo’s in this article and be the first to comment with the reason why everybody who reads these articles should take extra special note of my disclaimers, and why Australian Geek Guys die younger than American Geeks!
We use cookies on our website to give you the most relevant experience by remembering your preferences and repeat visits. By clicking “Accept”, you consent to the use of ALL the cookies.
This website uses cookies to improve your experience while you navigate through the website. Out of these, the cookies that are categorized as necessary are stored on your browser as they are essential for the working of basic functionalities of the website. We also use third-party cookies that help us analyze and understand how you use this website. These cookies will be stored in your browser only with your consent. You also have the option to opt-out of these cookies. But opting out of some of these cookies may affect your browsing experience.
Necessary cookies are absolutely essential for the website to function properly. This category only includes cookies that ensures basic functionalities and security features of the website. These cookies do not store any personal information.
Any cookies that may not be particularly necessary for the website to function and is used specifically to collect user personal data via analytics, ads, other embedded contents are termed as non-necessary cookies. It is mandatory to procure user consent prior to running these cookies on your website.

 iOS 7 on the iPhone is really great, but it can drain your battery fairly quick. I have identified 3 ways to save power that REALLY work!
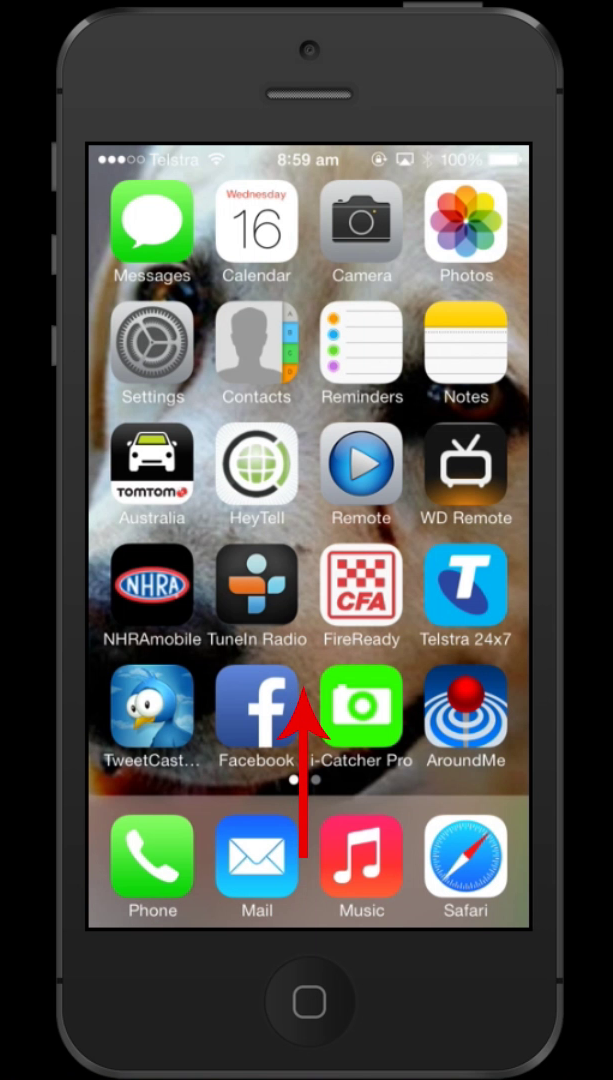 This will reveal the Control Center.
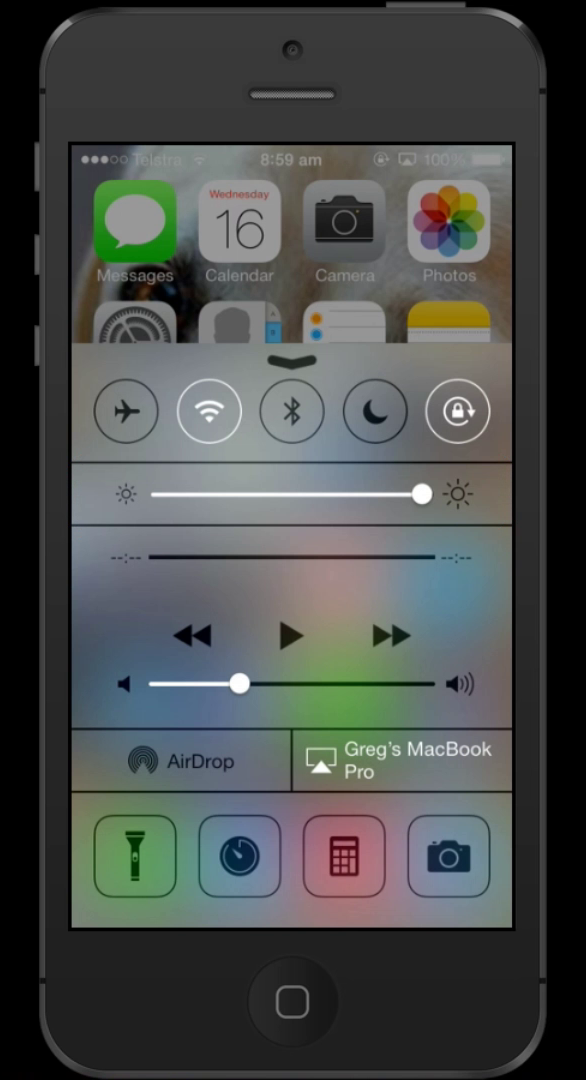 In control center, the first trick to saving power is to turn off any transmitters you are not using. For example, BlueTooth or Wifi. If you use Wifi at work, but not at home, turn Wifi off at home to save power.
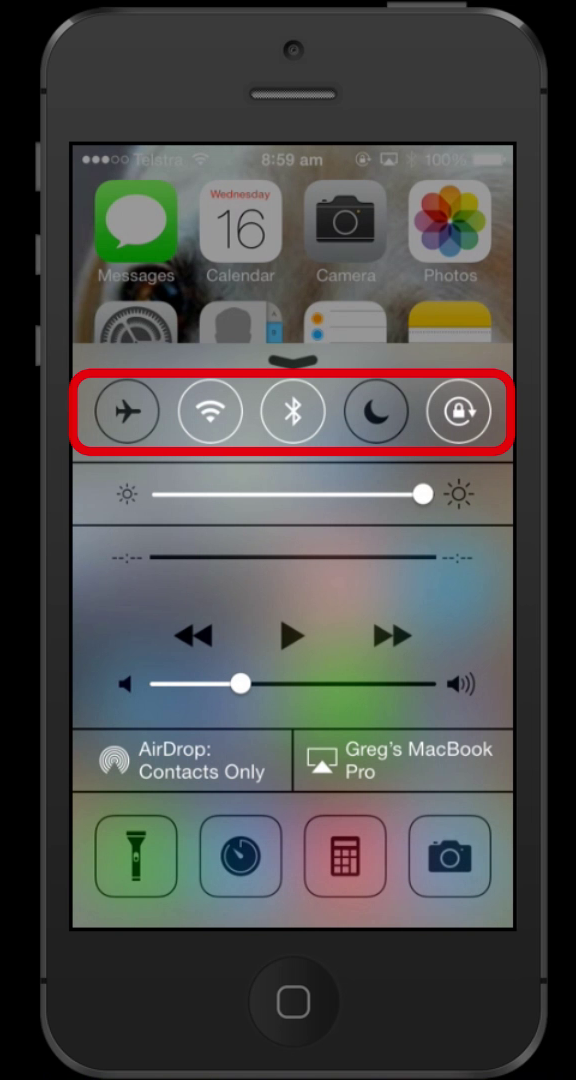 The next power saving tip is to turn down your screen brightness. The lower the better for battery life.
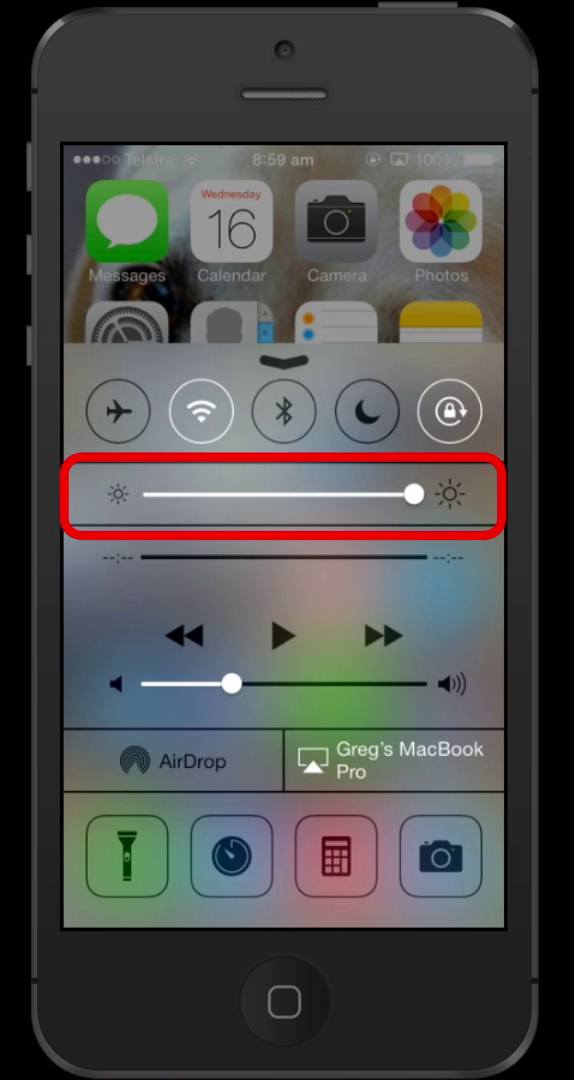 The BIGGEST drain on your iphones battery in my opinion is apps that are running in the background, that you are not using. When most of us finish using an app we press the home button to close out of it, but it is still actually running in the background. You need to “Terminate” the app out of your iphones memory for it to be completely closed. To do this, double click your home button, and see everything that is still open, running and in memory on your phone…..be prepared, there’s probably going to be a lot.
 To terminate apps out of your phones memory, slide/push their preview windows to the top of your screen.
 Once you have closed all of the apps your are not using right now, it’s time to get into the habit of closing all of your open apps using this method a few times a day. Before using this method, I would be looking for my charger by 3-4pm. Now that I terminate running apps through the day, I still have around 50% power left in my phone when I get home around 5-6pm.