Super Detailing 1/200 Nichimo Yamato by Tsukurimaseu

Disclaimer – This article is reproduced and translated here from the original page by Tsukurimaseu (We think). This article appears in Japanese HERE and was translated (Poorly) with Google Language Tools. Even though the words might not always make sense, this is an extremely detailed build, and the pictures tell the story.


Super Detail Nichimo Yamato


— Introduction —
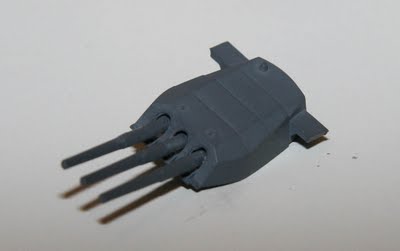
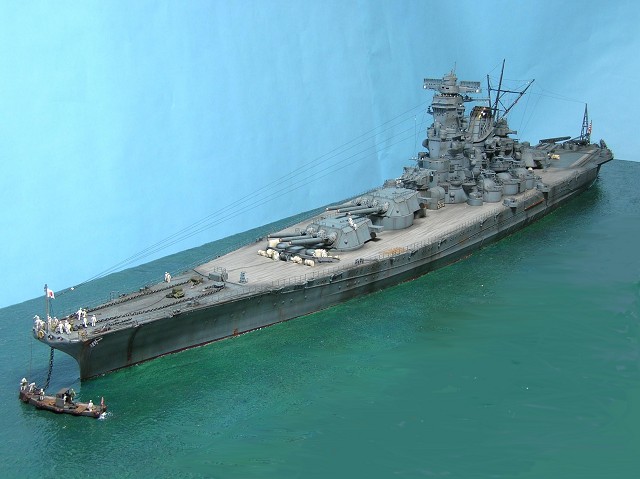
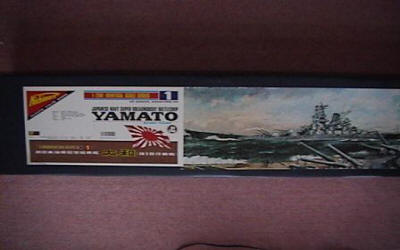
1 / 200 Yamato model Nichimo Corporation.
1m30cm greater length is about looking at the boxes in.
Once the stuff I want to make.
This model is the assignment of the size, perhaps because the old design to the fine details,
Representation is not much.
1944 to make six small offices around the image to be anchored off my Wu Mon,
I want to see.
Year 1997, I thought Heisei make this model one day to buy a 11 to 16 years from July at a time and rest for a little assembly.
This time, I had to put in the memorial and creating websites, I also have an expert, I think into the group.

Continue reading “Super Detailing 1/200 Nichimo Yamato by Tsukurimaseu”

How to paint Realistic Wood Scale Ship Model Decks by Loren Perry

**NOTE** – This article was written by Loren Perry many years ago, for another web site which unfortunately is no longer available. I was very glad to have found the article on an old floppy disc recently, and post it here now for the benefit of all.

Please visit Loren Perry and buy the best Ship Model Photo Etch parts at – Gold Medal Models


arizonaWooden deck on the fantail of Loren Perry’s 1934 Arizona, built from the Revell 1/429 kit

One of the three colors is a paint, the other two are from Floquil’s range of model “stains”. They are: 1. “Mud” (a model railroad weathering paint), 2. “Driftwood” (a light gray stain), and 3. “Walnut” (a brown stain.) The entire process can be boiled down to four simple steps:* 1. Airbrush the deck with Mud.
* 2. Streak the deck with Driftwood.
* 3. Streak the deck with Walnut.
* 4. Repeat steps 2 and 3 as necessary.

This method is, fortunately, very simple and very forgiving. First one must airbrush the deck with Mud and allow it to dry at least 24 hours. In fact, this will be the very first color painted on the entire model – the grays, blacks, and other colors come after the deck has been prepared first. Once the Mud paint has dried, select your smallest tipped brush and open the bottle of Driftwood. You then dip the brush into the stain and then wipe the tip of the brush lightly over a paper towel until only a small amount of wet stain remains in the bristles. Now use the brush to streak the stain in narrow strips lengthwise along the deck (or parallel to the planking). Use random strokes until the deck is evenly streaked over is entire surface. When finished (the stain dries very quickly), open the Walnut stain and repeat this step. If the deck appears too dark, repeat the streaking process with the Driftwood until the deck starts to lighten up. If you want the deck to return more to the shade of the Mud paint, streak the deck with Mud in the same manner as the stain. By alternating back and forth between these three colors, you’ll find you have great control over the final appearance of the model’s wooden decks. And so long as you keep the stains and paint nicely thinned, there will be no visible buildup of pigment to obscure detail. And remember to keep the brush strokes about the width of a plank, or no more than two planks.

Some advantages of this technique: A. no great artisitic skill is necessary, only the ability to apply random paint streaks in parallel lines; B. a damaged area can easily be blended into the rest of the deck by applying more strokes in alternating colors as above; C. the process goes quickly – one Arizona model had its deck fully painted and streaked in about an hour (after the original Mud application had dried, of course.) A tip: purchase an inexpensive kit to use as your “guinea pig”. Use this kit’s parts to test your technique and refine it before you move onto your main project. You’ll find, as I did, that the final appearance of your model’s planked deck looks exceptionally convincing, both in photographs and to the viewer seeing it on display.

arizona_003arizona_002

How to make Quick Easy Blast Bags for Scale Ship Models

The revised 1/700 Tamiya Yamato has many corrections on the original release (Which I am building). One is that they have added blast bags to the 18″ guns. But for those of us with old stock, or building some other model without blast bags, there is a solution. It requires some Blu-Tack, skill, and believe me, much better results can be achieved than what I will show here (Instead of skill, I got Fat Fingers:-)

Here’ the two pieces that combined will form the gun.

t2Assembled, you can see the gapping holes around the barrels

t1Roll some Blu-Tack between your fingers and flatten it out into a tube-shape so its about 1 1/2 inches long, and wrap it around the base of the barrels.

t3Then pull the barrels through the turret. The Blu-Tack will hold the barrels in place, and a small amount will protrude through the turret. This can then be shaped with a toothpick to make a convincing enough looking blast bag. Blu-Tack can also be painted.

t4Blu-Tack is very forgiving, if you botch it, just pull it out and start over.

t5And here is the finished blast bag painted.