Split large audio files into individual tracks with Audacity This tutorial shows you how easy it is to split large audio files into single individual tracks using the free program called Audacity on Mac, Windows and Linux
You can download Audacity FREE for Mac, Windows and Linux/Unix HERE.
I was lucky enough to go and see Aerosmith at Melbourne’s Rod Laver Arena – It was a KICK ASS show!
After the show, we really wanted to have a souvenir, and thanks to Youtube, we got one. Some other folks at the show recorded it on their phones and uploaded it. Using Flash Video Downloader I was able to download their vids, and using the awesome and FREE MacX Video Converter, I was able to save the audio from their video files to MP3, then to iTunes, and then sync the songs to our iPhones, so we have a playlist of the show. How cool huh!
The problem was, that the songs played in alphabetical order instead of the order they played the songs on the night (Track number order).
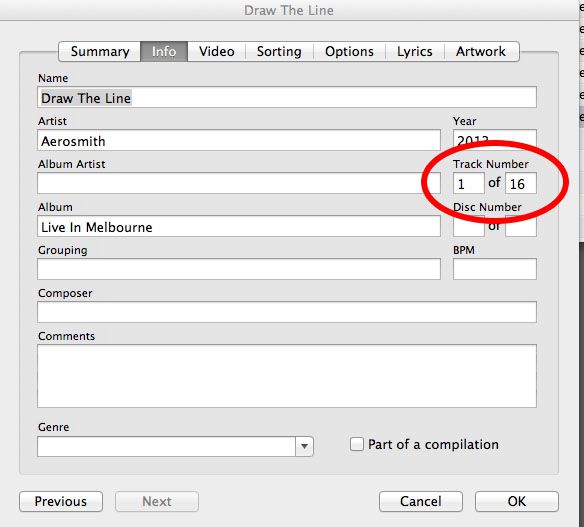
I did the whole Get Info thing in iTunes and set the track numbers….which didn’t work….
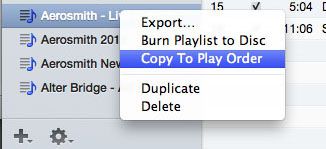
I sync’d and sync’d to no avail. And then out of the blue, I right clicked the playlist, and there it was….PLAY ORDER!
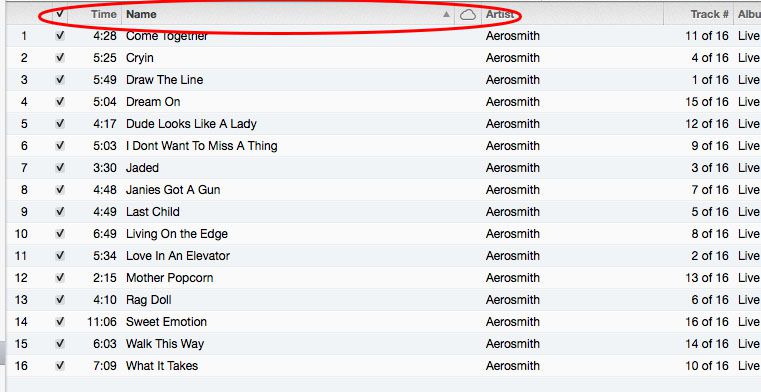
This is SO hidden! I learned that if your songs are listed in alphabetical order in the album view in iTunes, with the highlight in the song name column, and you right click (command click) the playlist and select “Copy To Play Order”, and then sync your device your songs will play in alphabetical order.
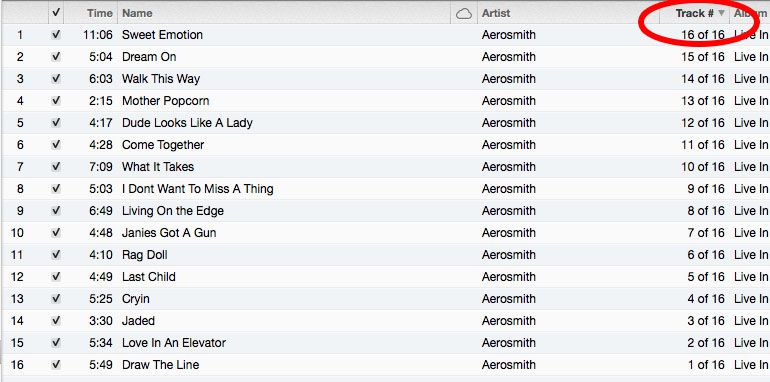
If you want your songs in your playlist to play in track number order on your device, click and highlight the track number column in iTunes,
Then right click (command click) the play list and select “Copy To Play Order”
There’s nothing I hate more than dropping new music into my iTunes library only to learn once it has finished importing that it doesn’t have meta-tags (No Song Name, Artist, Album Title etc etc). So now, before I add new music, I run it through MusicBrainz Picard. Here’s the programs description from their site:
“MusicBrainz Picard is a cross-platform (Linux/Mac OS X/Windows) application written in Python and is the official MusicBrainz tagger.
Picard supports the majority of audio file formats, is capable of using audio fingerprints (PUIDs, AcoustIDs), performing CD lookups and disc ID submissions, and it has excellent Unicode support. Additionally, there are several plugins available that extend Picard’s features.
When tagging files, Picard uses an album-oriented approach. This approach allows it to utilize the MusicBrainz data as effectively as possible and correctly tag your music. For more information, see the illustrated quick start guide to tagging.
Picard is named after Captain Jean-Luc Picard from the TV series Star Trek: The Next Generation.”
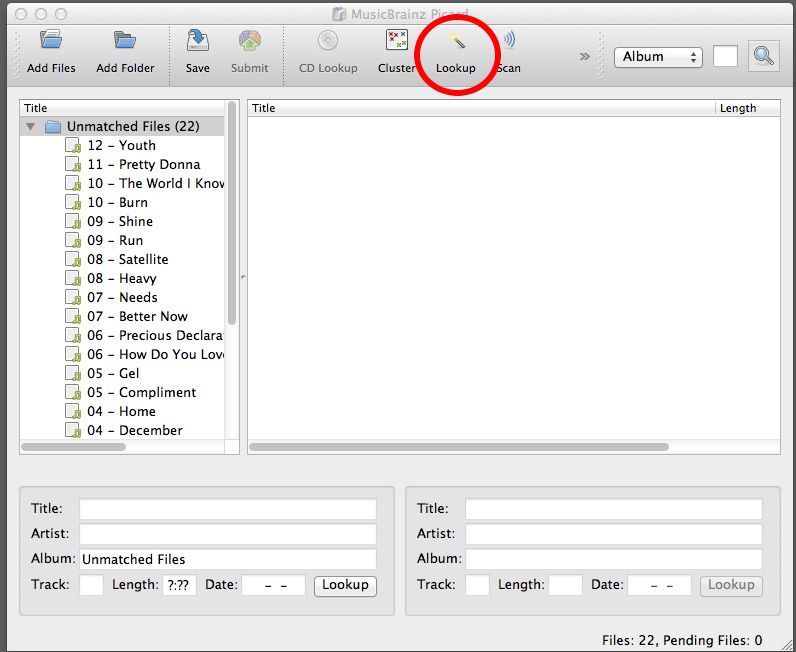
To get started, download and install MusicBrainz Picard HERE. Once you are up and running, drop the music files you want to tag anywhere in the window. They will then populate the list on the left called unmatched files.
When you have finished adding files, click the line of text with the folder icon next to it that says “Unmatched Files” to make it active. When it is active it will become highlighted. Now, go ahead and press the “Lookup” button, and MusicBrainz Picard will start scanning your music and comparing it to their database for identification.
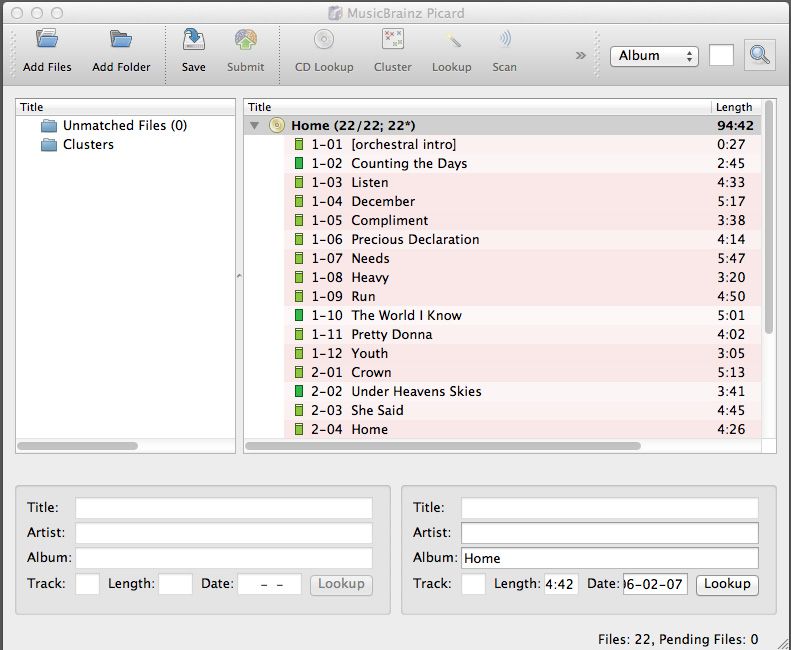
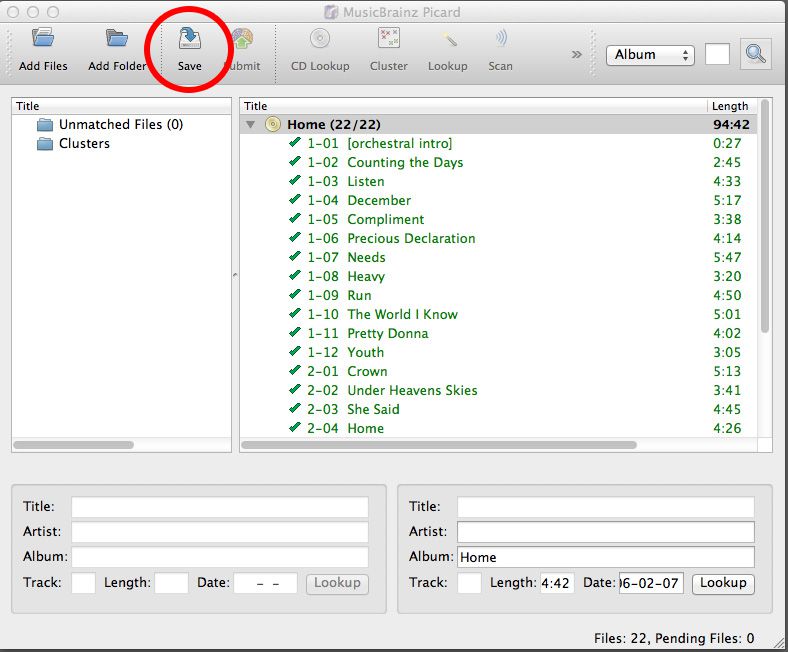
Once MusicBrainz Picard has identified the album and added all of the songs to it, the CD icon next to the album name will turn gold in color. If you don’t have all of the songs from the album, it doesn’t matter, you can still proceed, but the CD icon stays silver. The next step is to click Album Name next to the CD icon to make it active, and highlighted. You can now click “Save”.
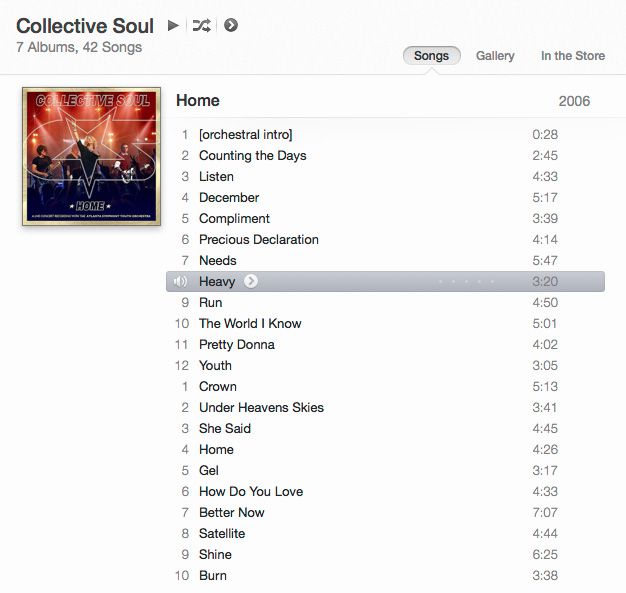
MusicBrainz Picard will now write the Meta Tag Data directly into your music files. Once it has completed, you can close out of the program, and then drop your music files into iTunes, and everything will be correctly categorised and ready to play.
We use cookies on our website to give you the most relevant experience by remembering your preferences and repeat visits. By clicking “Accept”, you consent to the use of ALL the cookies.
This website uses cookies to improve your experience while you navigate through the website. Out of these, the cookies that are categorized as necessary are stored on your browser as they are essential for the working of basic functionalities of the website. We also use third-party cookies that help us analyze and understand how you use this website. These cookies will be stored in your browser only with your consent. You also have the option to opt-out of these cookies. But opting out of some of these cookies may affect your browsing experience.
Necessary cookies are absolutely essential for the website to function properly. This category only includes cookies that ensures basic functionalities and security features of the website. These cookies do not store any personal information.
Any cookies that may not be particularly necessary for the website to function and is used specifically to collect user personal data via analytics, ads, other embedded contents are termed as non-necessary cookies. It is mandatory to procure user consent prior to running these cookies on your website.

 This tutorial shows you how easy it is to split large audio files into single individual tracks using the free program called Audacity on Mac, Windows and Linux