Another way to recover data from a dead hard drive

Hard Drive Icon

There are plenty of articles on the internet that provide you with many ways you can attempt to reclaim data from a dead or dying hard drive. Everything from putting the platters in a new drive casing to bagging the drive up and placing it in the freezer for 20 minutes. These all seem to be fairly extreme measures to me, so here’s a quick tip I have discovered recently by accident which may help.

I have a number of old drives I have been using as storage, and I recently needed to access a file on one, and when I plugged the drive into my USB dock it spun up but would not mount. I re-tried several times and it refused to load. Needless to say I was pretty unhappy. I kept coming back to it over the next few days, trying again and again, hoping it would mount so I could “just get that one file”. A few weeks later, whilst having a clean up, I decided to give it one more try and if it didn’t work, I was going to throw it away.

I plugged the drive in, it spun up, and again it refused to mount. At this point I was called away quiet urgently, and I left with the drive plugged in and turn on. After about 4-5 hrs I returned, and found the drive had some heat in it. Wondering if this might yield a result I switched off the drive, then switched it on again, and it mounted, and I was able to get the file!

 Woohoo

I seized the opportunity to copy off all the other data on the drive, and then I started to wonder…

I had two other drives that I had deemed dead in the past, so I plugged those in and left them to warm for a few hours. After restarting them, both of them mounted as well. One mounted and appeared to work well, but the other mounted just long enough for me to drag a few files off, and then it ejected itself again. In the week or so since, I have been able to reconnect and use two of the three drives normally.

I’m wondering if tarnish might have built up on the read/write head over the period when it was not in use, and a little bit of heat might have been all it took to break it down enough for it to be able to read again? Either way, if your drive spins up but wont initialize, this method might be well worth trying before you take extreme action.


3 ways to save battery power in iOS7 on your iPhone that REALLY work!

iphone-battery-iconiOS 7 on the iPhone is really great, but it can drain your battery fairly quick. I have identified 3 ways to save power that REALLY work!

httpvh://youtu.be/wMu79khieC8

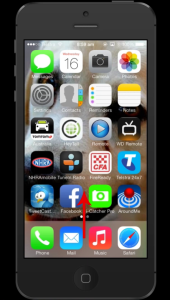
To get started, drag from the bottom of your iphone screen upwards.

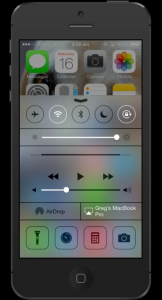
ios7-iphone-power-save-tip-001This will reveal the Control Center.

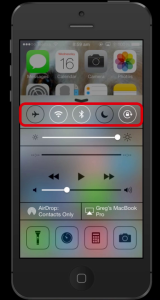
ios7-iphone-power-save-tip-000In control center, the first trick to saving power is to turn off any transmitters you are not using. For example, BlueTooth or Wifi. If you use Wifi at work, but not at home, turn Wifi off at home to save power.

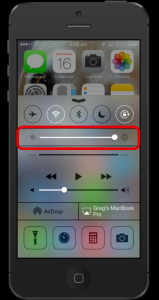
ios7-iphone-power-save-tip-002The next power saving tip is to turn down your screen brightness. The lower the better for battery life.

ios7-iphone-power-save-tip-003The BIGGEST drain on your iphones battery in my opinion is apps that are running in the background, that you are not using. When most of us finish using an app we press the home button to close out of it, but it is still actually running in the background. You need to “Terminate” the app out of your iphones memory for it to be completely closed. To do this, double click your home button, and see everything that is still open, running and in memory on your phone…..be prepared, there’s probably going to be a lot.

ios7-iphone-power-save-tip-005To terminate apps out of your phones memory, slide/push their preview windows to the top of your screen.

ios7-iphone-power-save-tip-006Once you have closed all of the apps your are not using right now, it’s time to get into the habit of closing all of your open apps using this method a few times a day. Before using this method, I would be looking for my charger by 3-4pm. Now that I terminate running apps through the day, I still have around 50% power left in my phone when I get home around 5-6pm.

TRY IT!

Easy Fix or Work Around for iMessage bug problem on iPhone running IOS7

iMessage iconSince updating to iOS 7, a lot of iPhone users are finding that iMessage does not send their messages. It looks like it is sending, but stops or freezes at last minute. I have discovered a work around, I am not sure if it is a “Fix” but I have had good results using this method, and have tried on on some friends phones with success as well. I hope it works for you!

httpvh://youtu.be/Y0JZ0R51e9I

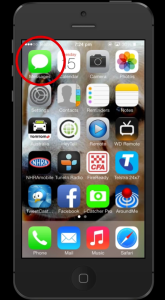
Firstly, go into iMessage on your iPhone.

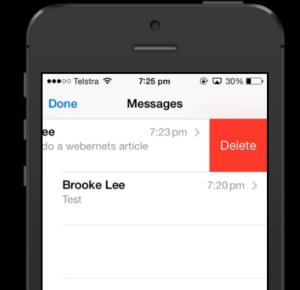
imessage-fix-001Clear off ALL messages and threads by swiping to the left on each conversation to make the “delete” option appear.

imessage-fix-002and then press delete.

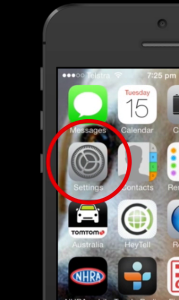
imessage-fix-003Now go into settings.

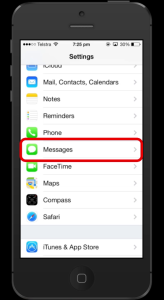
imessage-fix-004Then select “Messages”

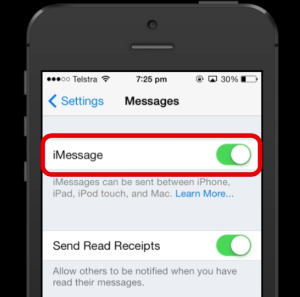
imessage-fix-005Turn “iMessage” option OFF

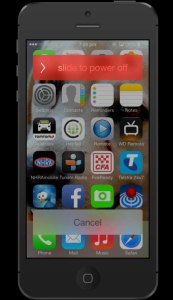
imessage-fix-006Now turn your phone off by pressing and holding the power button on the top right edge, and then swipe across the red “Slide To Power Off” message on your screen.

imessage-fix-007Once your phone has completely powered off, you can press the power button again to restart it. Once your phone has booted up again, select “Settings”

imessage-fix-004Go back into Messages

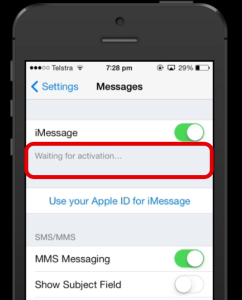
imessage-fix-005Turn on the “iMessage” option and you will see your phone re-activating and syncing with the iMessage server.

imessage-fix-009When it has finished, it you should see confirmation that you can now use iMessage.

imessage-fix-010Now, Hopefully, you should be back in business.

Fix a dodgy home button on iPhone, iPod Touch and iPad

iphone-4-home-buttonI’ve noticed recently that the home button on my iPhone has become a bit dodgy. It doesn’t always work, especially when I double click it for multitasking/app switching.

I had resided myself to believing that the actual button mechanism had worn and was malfunctioning, when my wife told me how to recalibrate it. I was dubious at first, but this little “fix” has solved my problem, and my home button is back from the dead!

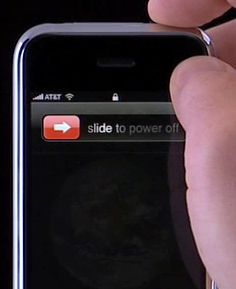
To start the recalibration process, press and hold the lock button on the top of your device, just like you are going to turn it off.

turn off iphoneInstead of sliding the red button with white arrow to the right, press and hold down the home button.

iphone-4-home-button-highlightedAfter about 5 or 6 six, your phone will go back to your home screen, and that is it! During that 5 seconds, your phone re-calibrated your home button, and with a bit of luck, everything will be like new again!

VMWare Fusion 4 Black Screen Workaround on OSX Lion

VMWare Fusion Black Screen in OSX LionIf your like me and run Windows on your Mac using VMWARE Fusion, you have probably been getting really frustrated lately at the blank black screen you see when you try to run your virtual machine. I haven’t found a permanent fix for this, and I hope the folks at VMWare are looking into it, but I have found a workaround, which has worked for me.

TRY THIS AT YOUR OWN RISK – I ACCEPT NO RESPONSIBILITY IF YOU BREAK SOMETHING – THIS IS MERELY A RECOUNT OF HOW I WAS ABLE TO RESOLVE THE ISSUE – YOUR RESULTS MAY BE VERY DIFFERENT!!!

I have performed this workaround not only on my Macbook Pro, but on my Mac Pro as well – it worked in both instances.

To begin, I went back to VMWare’s site HERE and re-downloaded VMWare Fusion 4 (I use the lite version without McAfee)

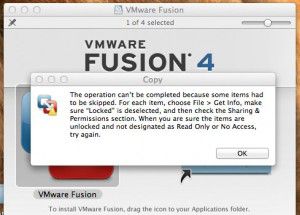
VMWare Download ScreenOnce the download was complete, I mounted the .dmg and tried to simply drop the app icon onto the Applications Folder……..FAIL!

VMWare Install Fail

I cant stress enough, I accept NO responsibility if you try this and it fails for you ok!

At this point I opened up my Applications folder and dragged the VMWare app to the trash – I had to type in my admin password before the system allowed this. Initially I was worried that my license would get deleted as well, but I had a hunch the license would be stored elsewhere deeper in the bowels of my Mac, so I pressed on.

Move To TrashAfter the app was successfully moved to the trash, I was able to drag the VMWare logo from the .dmg into the Applications folder. Again, I was asked to type in my Admin password.

Once it had completed copying, I unmounted the .dmg, and clicked the icon in my dock to boot my Windows XP Virtual Machine. An alert popped up telling me that VMWare had to update some resources, and again I had to type my Admin password……………..AND THEN…..

XP-Boot-Screen

LOOKIN GOOD……………….

Running AgainYES! Back in the game!

Since I discovered this workaround about 10 days ago, my Mac Pro hasn’t skipped a beat. I updated my Macbook Pro last night with new iCloud features, and my Virtual Machine Black Screened again this morning. So I re-tried the work around for the creation of this article and It worked again for the second time.

I know its a pain to perform, but it did work for me, and if I have to choose between not using my Virtual Machine at all, or spending three minutes performing the workaround to get going again, I know what I would prefer to do.

Lets hope the folks at VMWare sort this one out soon!