Want to Stop Transmission Opening Dialogue Box Window For Each New Torrent Added?
Transmission is a great piece of software, but in its default settings state it does have some quirks that can be a little annoying. To learn how to stop this you can watch the below video, or continue reading.
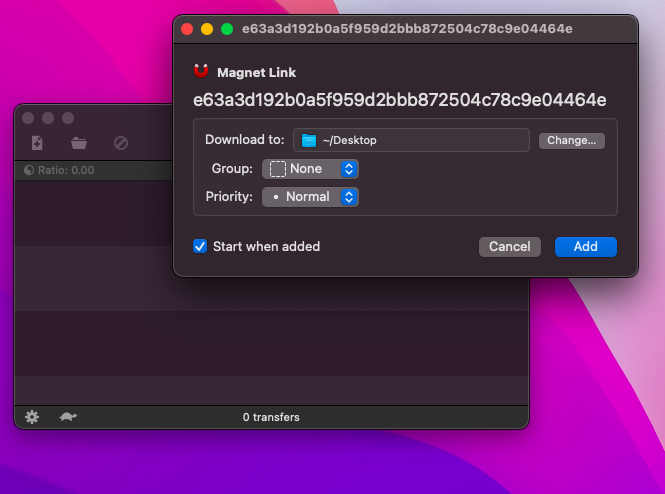
When adding a new torrent, a dialogue box ALWAYS opens, even after you have set your default download locations for both complete and incomplete files.
Wouldn’t it be great if you didn’t get that window, and downloads just added and started automatically without you having to click the “Add” button every time?
Here’s how to stop this annoying behaviour once and for all!
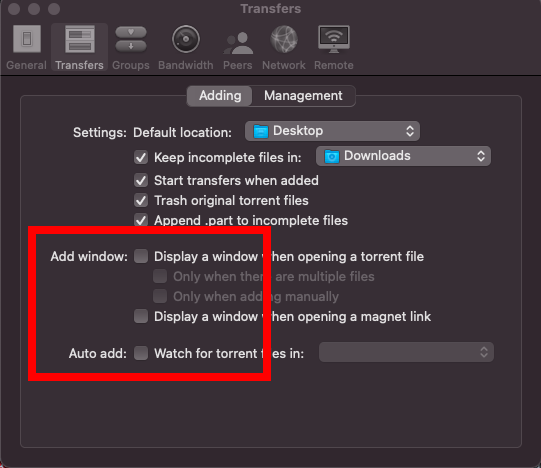
Open Preferences, and click on the “Transfers” tab. Make sure you are looking at “Adding” and not “Management”.
To stop it from opening that annoying window make sure ALL of these options are unchecked.
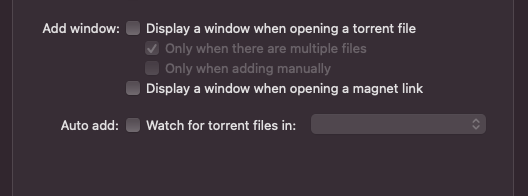
**NOTE** – Be sure that EVERY option is unchecked! I found in my testing that leaving one checked (as shown below), and un-checking the parent option still made the window appear, even though the check was greyed out
As always, make sure you are using the latest version of Transmission BT which can be downloaded HERE.
MP4Gain – Normalize Audio Volume Levels in your MP4 Videos
Mac users please see my Mac specific article HERE.
I have been saving episodes of the Discovery Channel show “How It’s Made” for years. Recently I compiled and organized them into an archive on my WDTV Live Hub, and I found that as I have used several different devices to record the episodes over the years, the audio volume levels range from barely audible to deafening. I needed a way to make the audio volume level of all of my mp4 video files the same. This process is called “Normalizing”.
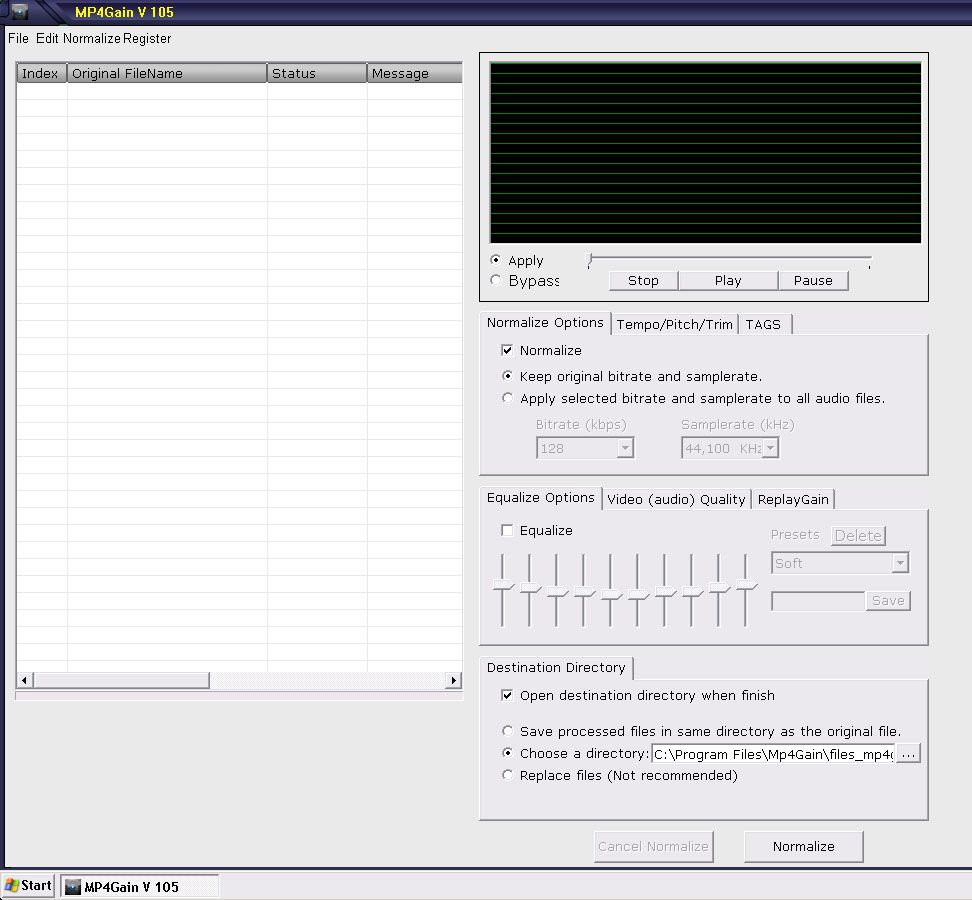
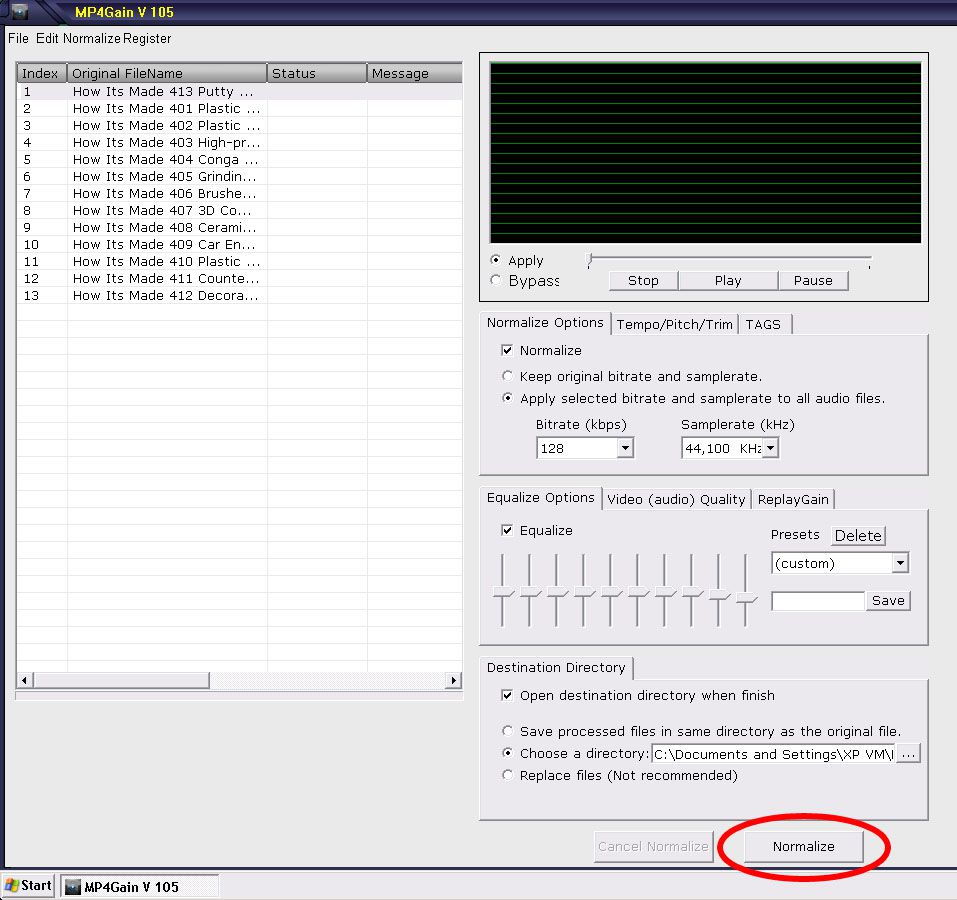
A Google search returned only one batch MP4 volume normalizer of note, MP4Gain. The author offers a trial version, which I downloaded and installed. This is what the main window looks like.
The program is VERY easy to use. For straight out “Normalizing” all you need to do is simply add your video files and press “Normalize”. In my case, I wanted to adjust the bit rates of the audio and do a little re-equalizing.
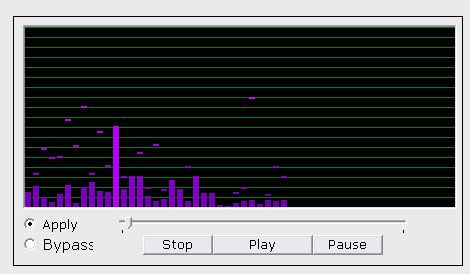
The program includes a level meter with fall-offs, so you can play your file and have a visual representation of the sound levels. The functionality is bit raw at the moment, but I’m sure in future versions this will be refined, and hopefully you will be able to adjust the fall-off times to make them stay at the peaks a little longer, as they seem to drop off a little to quickly.
Once I set my EQ levels and bit rates, I pressed “Normalize” and away it went!
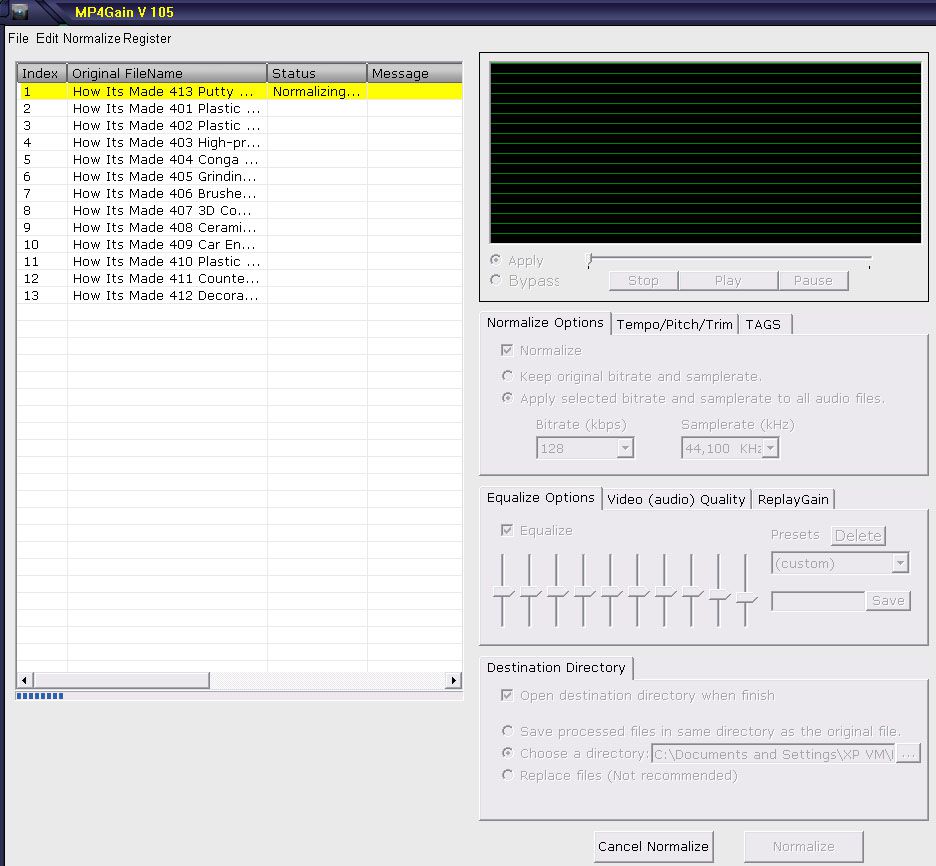
MP4Gain processes the files very quickly, and once it is complete, all your video files are the same volume! Its VERY cool!
You can download the trial version of MP4Gain HERE. The trial is fully functional and allows you to process about 15-20 files before asking you to buy a license.
In summary, this program is great, and I’m hoping that future versions polish up a few minor issues, like a missing vertical scroll bar (program is difficult to use on a small screen as the Normalize button is right down the bottom, and off the screen), and the jerky level meter. The major killer of this program is the price. At $40, it is pretty expensive (In My Humble Opinion). If it was somewhere in the $15 – $20 range it would definitely be hard to pass up.
It is able to normalize volume levels in the following video file types:
mp4, flv, avi
mpeg, mpg
3gp, wmv
MP4Gain can also normalize your audio music files. It can also normalize MP3, MP2, AAC, AC3, FLAC, OGG, WAV and M4A files to!
We use cookies on our website to give you the most relevant experience by remembering your preferences and repeat visits. By clicking “Accept”, you consent to the use of ALL the cookies.
This website uses cookies to improve your experience while you navigate through the website. Out of these, the cookies that are categorized as necessary are stored on your browser as they are essential for the working of basic functionalities of the website. We also use third-party cookies that help us analyze and understand how you use this website. These cookies will be stored in your browser only with your consent. You also have the option to opt-out of these cookies. But opting out of some of these cookies may affect your browsing experience.
Necessary cookies are absolutely essential for the website to function properly. This category only includes cookies that ensures basic functionalities and security features of the website. These cookies do not store any personal information.
Any cookies that may not be particularly necessary for the website to function and is used specifically to collect user personal data via analytics, ads, other embedded contents are termed as non-necessary cookies. It is mandatory to procure user consent prior to running these cookies on your website.