
Bluray Subtitles Demystified – What settings to use in Handbrake

Bluray Subtitles behave differently to what we are used to in DVD’s. DVD subtitles are basically a text file with timings noted, and the specific text is displayed at the correct time. Bluray’s however use graphics that are pretty similar to PNG files. Each line of text is actually a little picture overlayed on top of the movie. Therefore, including subtitles in your Bluray encodes with Handbrake seems a bit tricky! However, in reality it’s actually easier than you think, let me show you how!
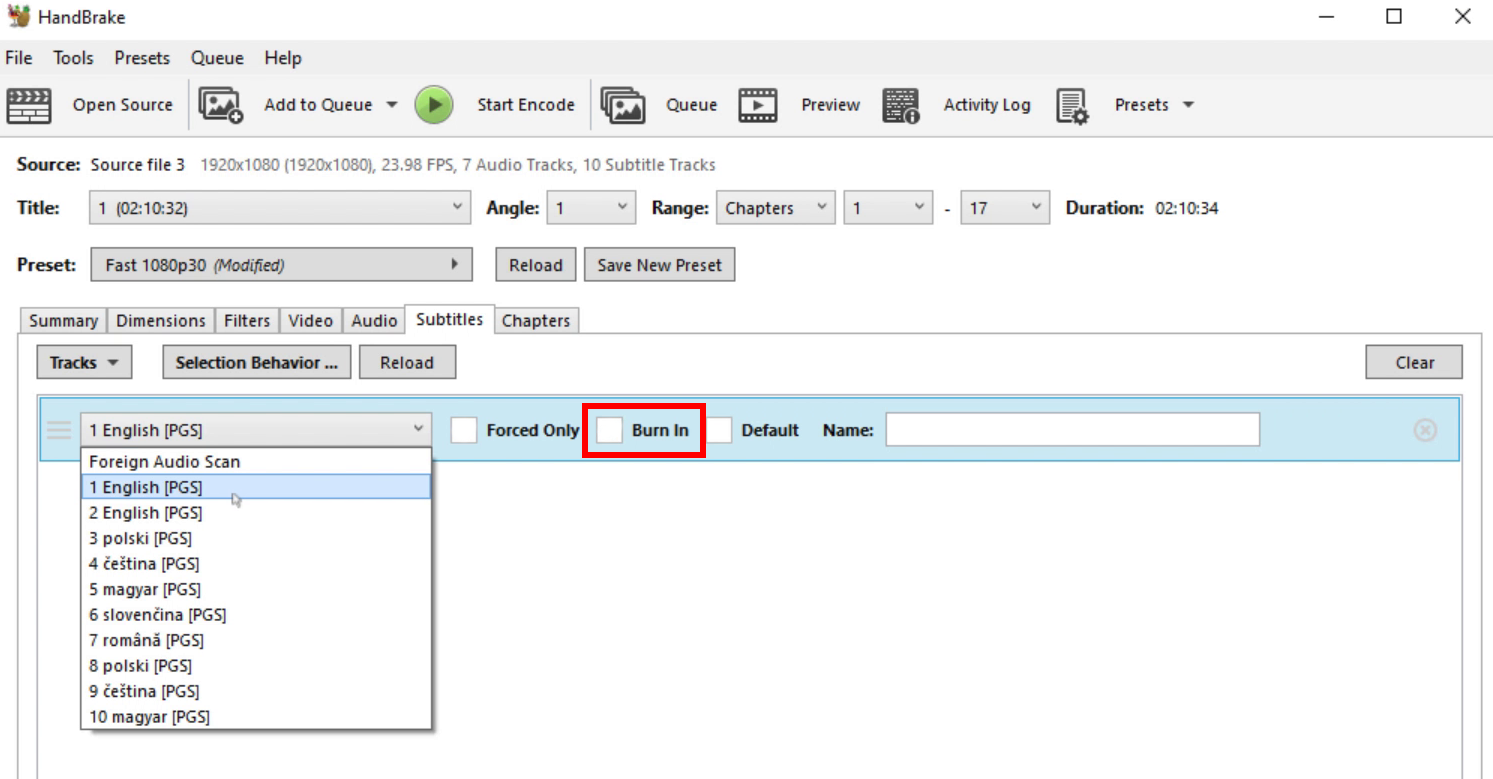
Once you have “Make” a MKV file from your source disk, there are two ways to go. We can either use the PGS subtitles from the disk in Handbrake directly, or we can convert the PGS subtitles to SRT text based subtitles. You are probably thinking “But won’t Handbrake burn the PGS subtitles in” and “I want to be able to turn them on and off”. And there is a very simple solution:

That’s right, if you use MKV in Handbrake you will be able to deselect “Burn In”, and turn the subtitles on and off in your encoded video as required! MIND BLOWN!
However, if you have an older media player that requires a separate SRT subtitle file, or if you just want to use MP4 format, all is not lost! It is definitely do-able!
Go to niske.dk and download Subtitle Edit. It’s completely free and open source. Once you have it installed open it up and drop your source MKV file in. It will ask you which subtitle track you want to work with.
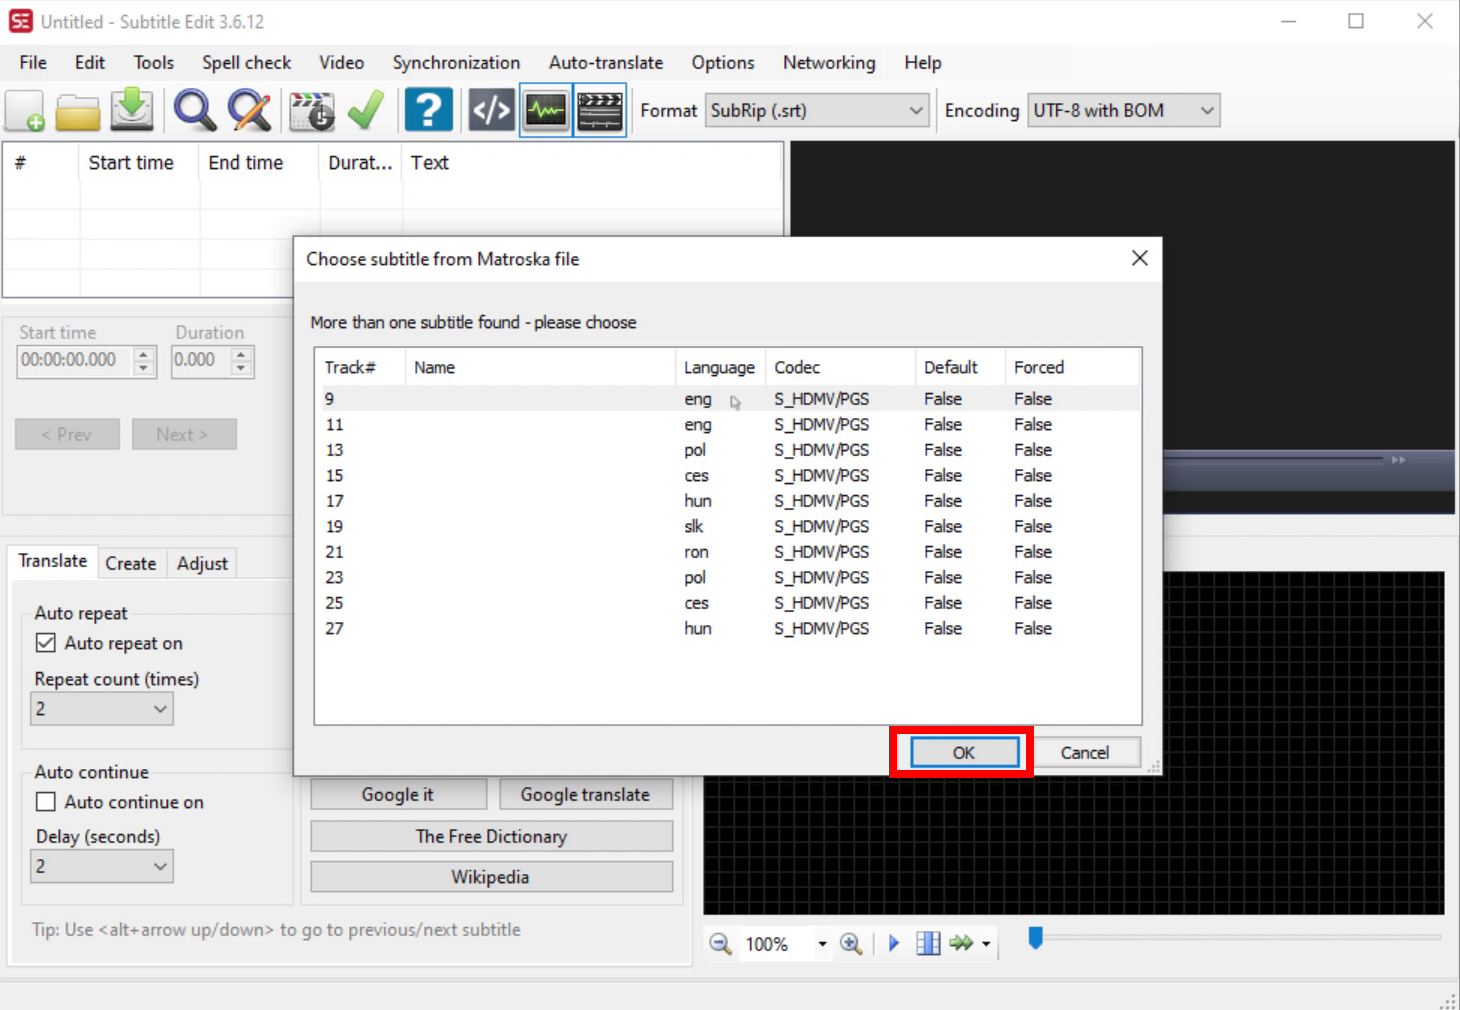
Select your desired track and click OK. It will start importing the subtitles. It might look like the program has crashed, but look closely in the bottom left and you will see it is making progress.

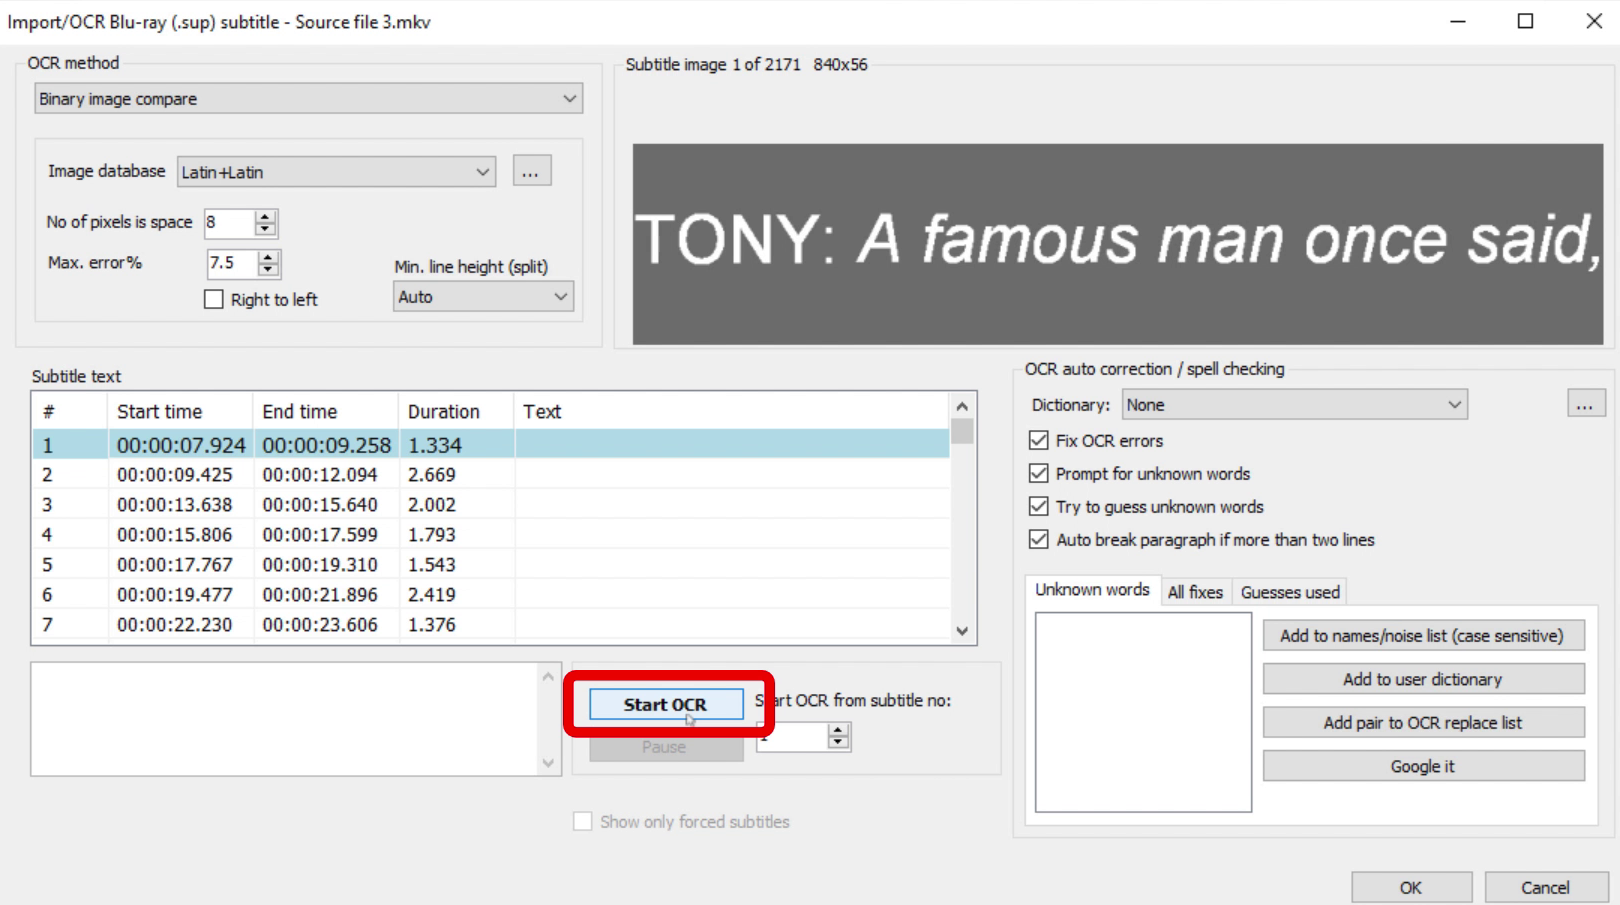
Once Subtitle Edit has finished importing, it’s time to unleash its full power! Press the “Start OCR” button and sit back as the program unleashes a barrage of Optical Character Recognition on your PGS subtitles! It’s so much fun watching this step!
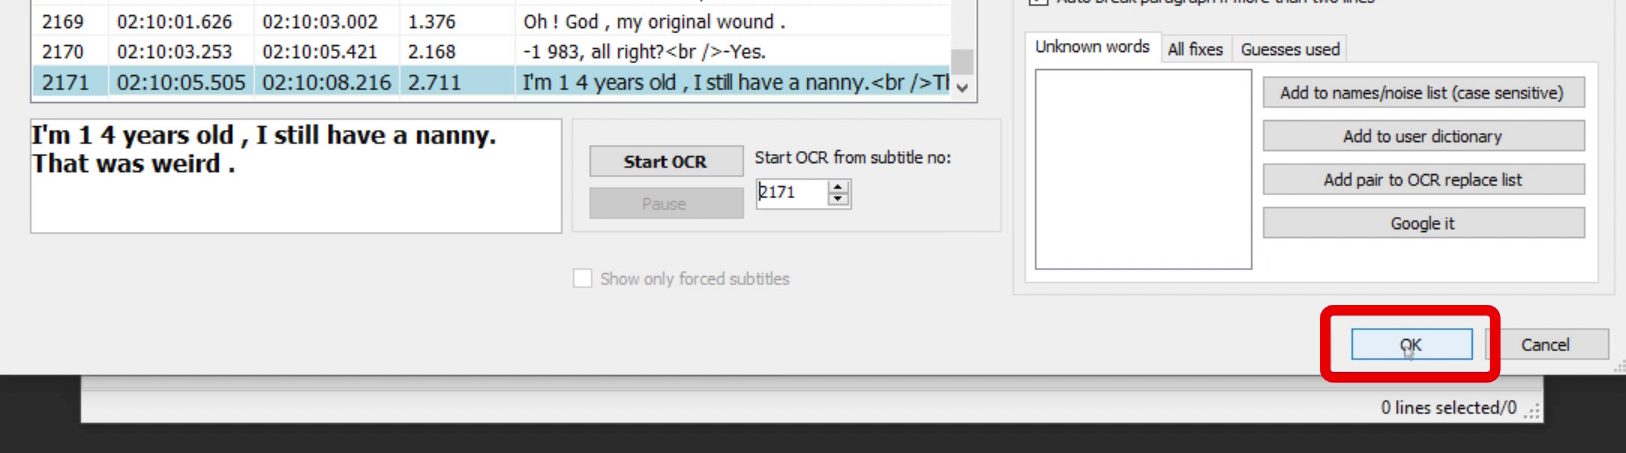
Once it finishes, you will need to press the “OK” button in the bottom right corner to move to the next step.
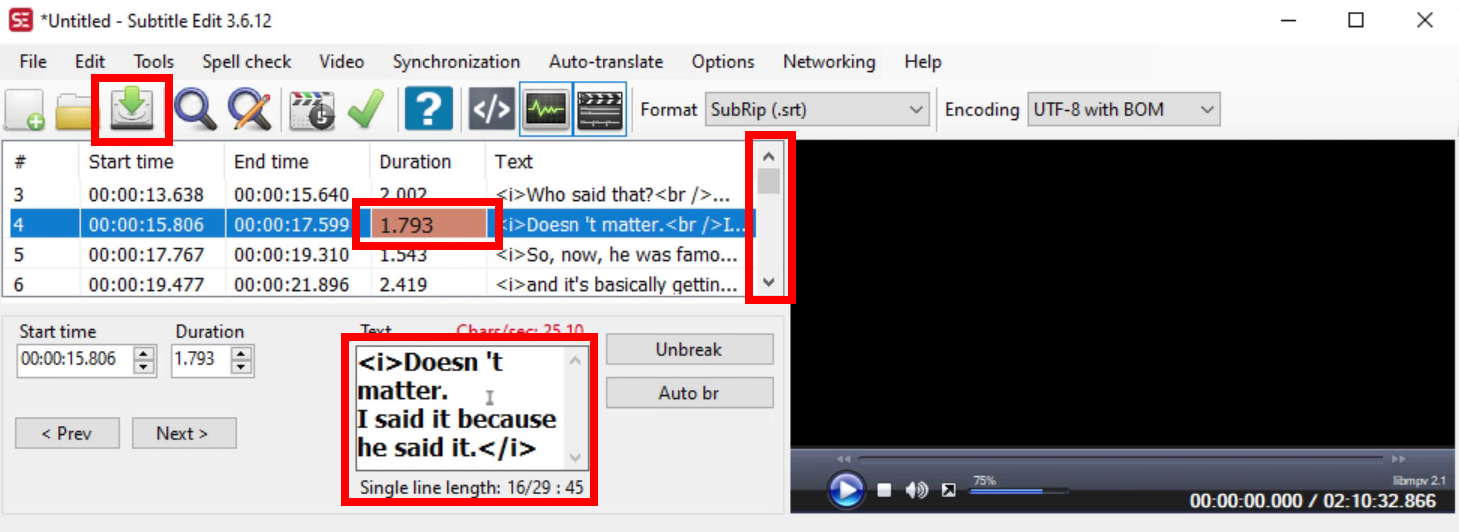
You will then find yourself at the editor. Now it’s a matter of scrolling down through each subtitle keeping an eye out for the ones with the reddish highlight. This means that the subtitle may contain an error. If you need to make an adjustment just click on the highlighted line and correct the error by inserting your cursor into the text box below. Once you have finished correcting all the errors click the save button up the top to export the subtitles to a SRT file. Make sure that “SubRip” is selected as the file type.
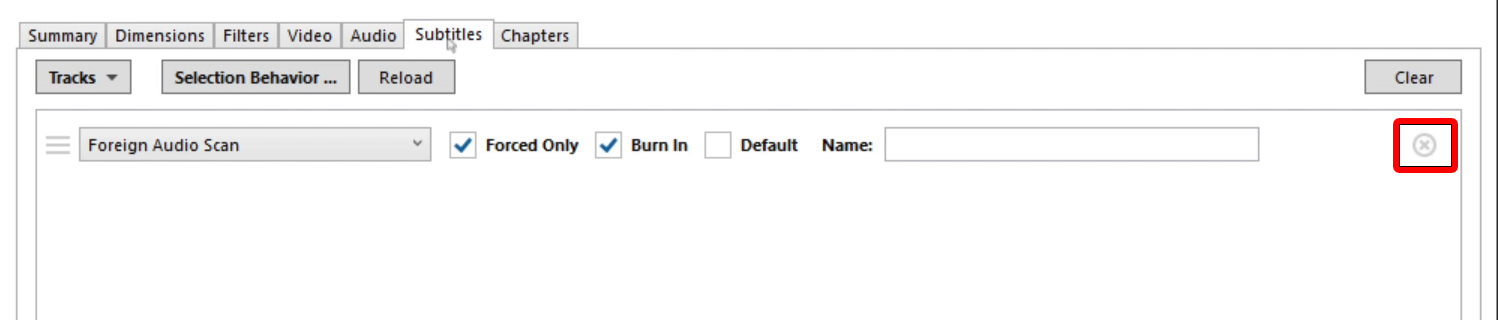
At this point, if you have an older media player and need separate SRT and MP4 files, you can encode your Bluray rip MKV as normal. Be sure to remove ALL subtitles on the subtitle screen in Handbrake by clicking the small grey “X” in a circle at the right side.
Once your encode is finished, make sure it’s file name is exactly the same as your SRT file (obviously they will have different file extensions). Put them both in the same folder, and you should now be able to turn subtitles on and off as you require.
If you want include/mux the SRT subtitles into a MP4 file (or even a MKV for that matter), open Handbrake and drop your source MKV file in. Adjust all of the settings to your likings. If you are not sure of the optimal Handbrake settings follow these guides:
For Bluray to H.264 check out my tutorial HERE
For Bluray to H.265 HEVC check out my tutorial HERE
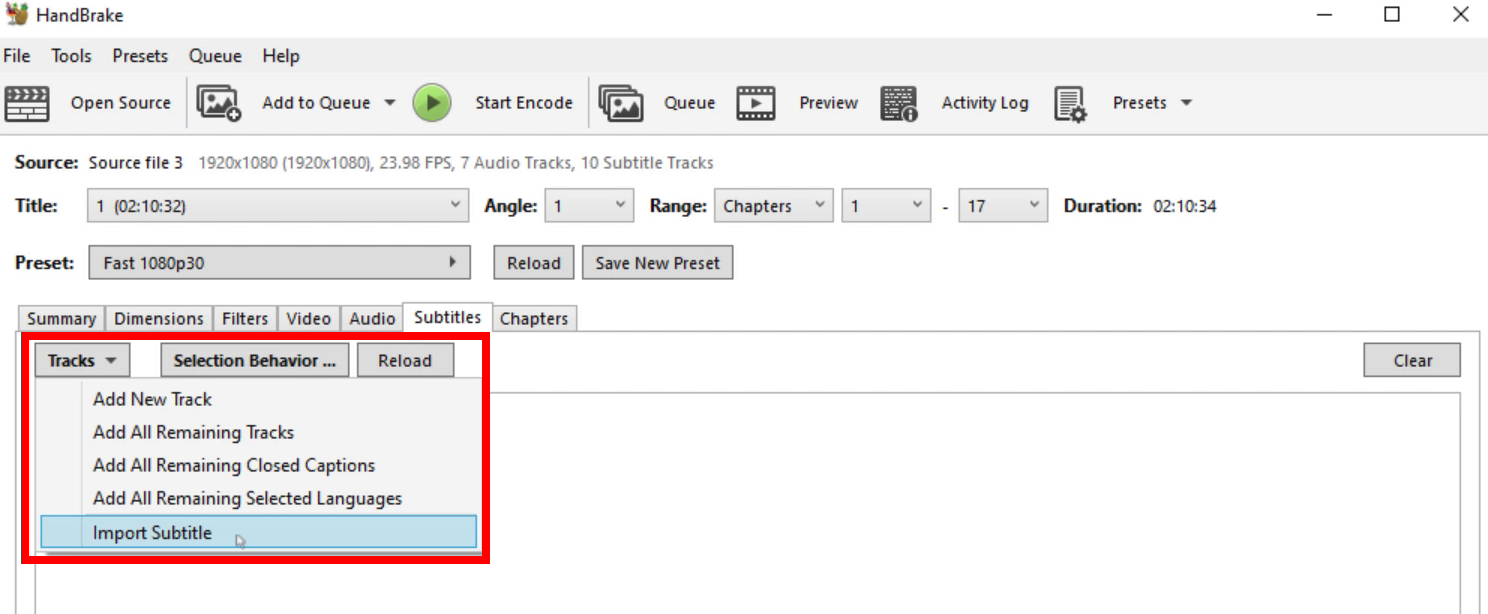
Once you have all of the others settings set, set forth by subtly setting the settings to the “Subtitles” settings tab. Just a little Easter Egg for those of you still reading. If you are still reading, THANKS! I put a lot of effort into this stuff, and I appreciate you for sticking with it to this point. Ok, Once you have set about subtly setting your settings to subtitles, click that little grey “X” in the circle on the right to clear away all subtitle tracks from your encode. Then, click the “Tracks” box, and select “Import Subtitles”
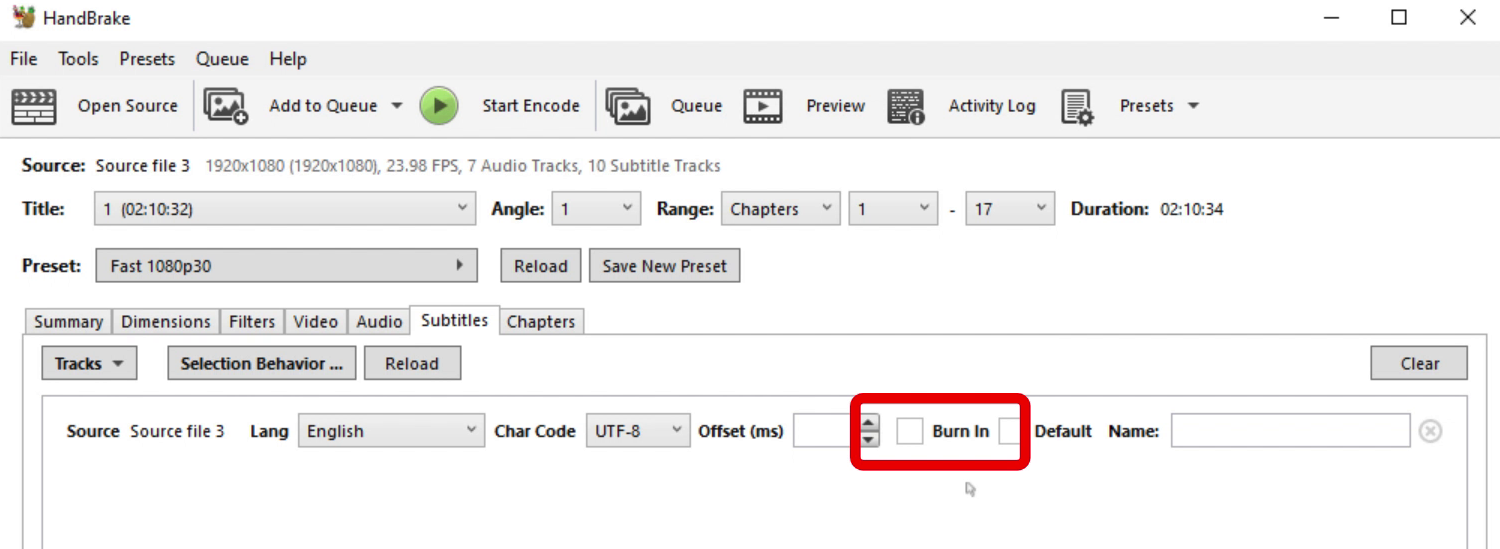
Select the SRT file you exported from Subtitle Edit, and make sure “Burn In” is deselected
Now, click “Start Encode” and Handbrake will begin encoding your file and you will soon save a MP4 (Or MKV) that you can subtly set the subtitles ON and OFF whenever you want…and nobody can stop you!
And if anybody sets a setting that sets off a situation, you can subtly reset their already set settings, and set them straight! Subtly savour these settings, and set subtle subtitles in your settings when you save these settings….subtly……
I see your easter egg! Thank me? Bro, Thank YOU for this! It’s all very helpful and informative to someone who’s just getting started with digitizing my collection.
Hi, I’ve recently discovered your website and YouTube videos after having gotten back into backing up my physical DVDs (and now blu-rays and 4Ks) using my new UHD reader/writer.
One thing I’d recommend, since it wasn’t apparent when I first found your tutorials, bookmarked them and was using them on the first few discs… it would be very helpful to edit your original posts on the best settings for DVD/blu-rays to include the info in this article about how to include the subtitles with the on/off functionality or at least link to this article at that point in both the “Short Version” and “Long Versions” of your walk-throughs.
Also, do you go into anything about saving multiple audio tracks when saving as .MKVs? I had recently tried to save an old DVD I had of the movie “Kung Fu Hustle” which has an English dub audio track but would also like the option of saving the original Chinese audio track that I could watch with the English subtitles. I know it’s kind of a rare use case, but I think others may find that to be informative too.
Wanted to say “thanks again” for making these easy to follow and informative tutorials. Very much appreciated.