Part 4 – Mixing Audio, Mics, and Avoiding Looping in Software
Mixing Audio into your Vidcast can be as easy as you want it to be, or as difficult as you want it to be. You will find the more you want to incorporate into your set up, that audio is always going to be the pebble in your shoe, especially if you are using multiple audio sources.
As a result, I will divide this tutorial into two parts, a Basic Beginners section for those just getting started, and an Advanced section for those using external mixers and audio sources.
Note to Pros – These articles are aimed at beginners, who wish to spend little or no money until they have a grasp on the topic, and are hoping to learn how to get started quickly and easily, using equipment they most likely already have.
Beginners Tutorial
httpvh://youtu.be/cEfJWcLq7xI
Voicemeeter can be downloaded FREE HERE at vb-audio.com. Don’t forget to make a donation – the programmer deserves a little something for a program this good!
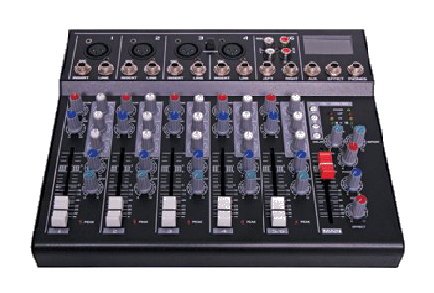
Advanced Tutorials
In this tutorial I show you how you can use a USB Mic and an external mixer together in Vidblaster. See the full article HERE.
httpvh://youtu.be/rtWqR_AWV4M
This tutorial shows you how you can run your USB mic through your external mixing desk. View the full article HERE.
httpvh://youtu.be/K9vqNj0_CuU
MORE AUDIO TUTORIALS COMING SOON!
You can download a free unrestricted trial copy of Vidblaster from vidblaster.com
Part 1 – Selecting Video Switcher Production Software – The Heart of Vidcasting – VIEW HERE Part 2 – Installing Vidblaster, Connecting Your Webcam, Switching and Interface Basics – VIEW HERE Part 3 – Adding Additional Cameras – VIEW HERE Part 4 – Mixing Audio, Mics, and Avoiding Looping in Software – VIEW HERE Part 5 – Desktop and Browser Capture – VIEW HERE Part 6 – Connecting Guests Via Skype – VIEW HERE Part 7 – How To Make A Lower Third Overlay – VIEW HERE Part 8 – Adding flair with Effects, Soundboards and Chat Streams – COMING SOON! Part 9 – Green Screen/Chroma Keying and Virtual Sets with iClone – COMING SOON! Part 10 – Recording and Streaming – COMING SOON!
Recently I learned about Vision 3’s QuickS3D plug-in, which provides the ability to edit 3D Multiple Streams (Stereo Pairs) and Side By Side (Multiplexed) video natively in Adobe Premiere Pro and After Effects.
After Watching several demonstration videos about the plug-in, and reading Vision 3’s site, I just had to have it. There are two different versions of the plug-in, A Lite version aimed at home users for $49, and a Pro version for $299. Most users will get the functionality they need in the Lite version.
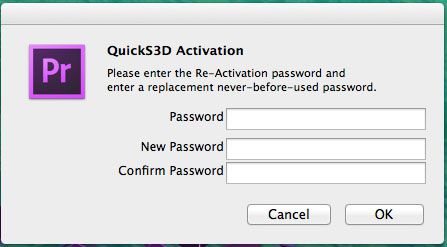
There is no trial version of the software available, so I decided to jump in and purchase the Lite version for $49. Within minutes, I had a link to download the plug-in, as well as my activation key. I downloaded the software, and it installed easily. Upon opening Premiere Pro I was asked to supply my activation key, and upon submitting, I was presented with another window asking me for a password?
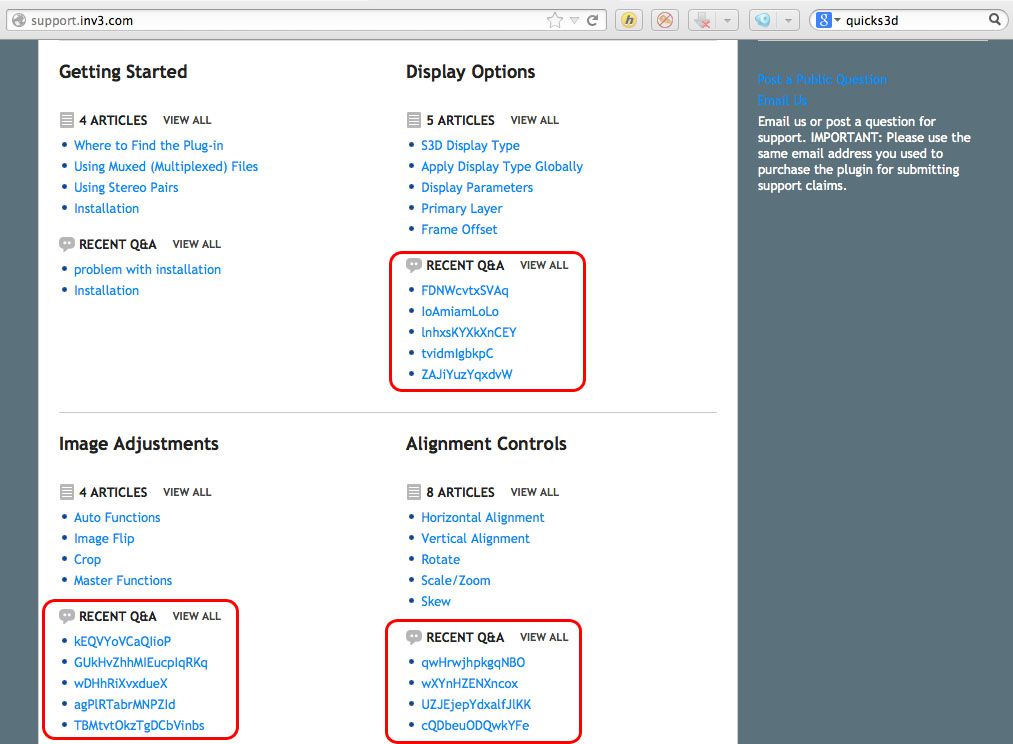
At first I was confused as to the purpose of this secondary password request window, so I began to search through the documentation supplied with the plug-in, read the EULA, and found no reference to it. I searched the Vision 3 website, and the support forums, and again, no information was found. I did notice the forum had been spammed though.
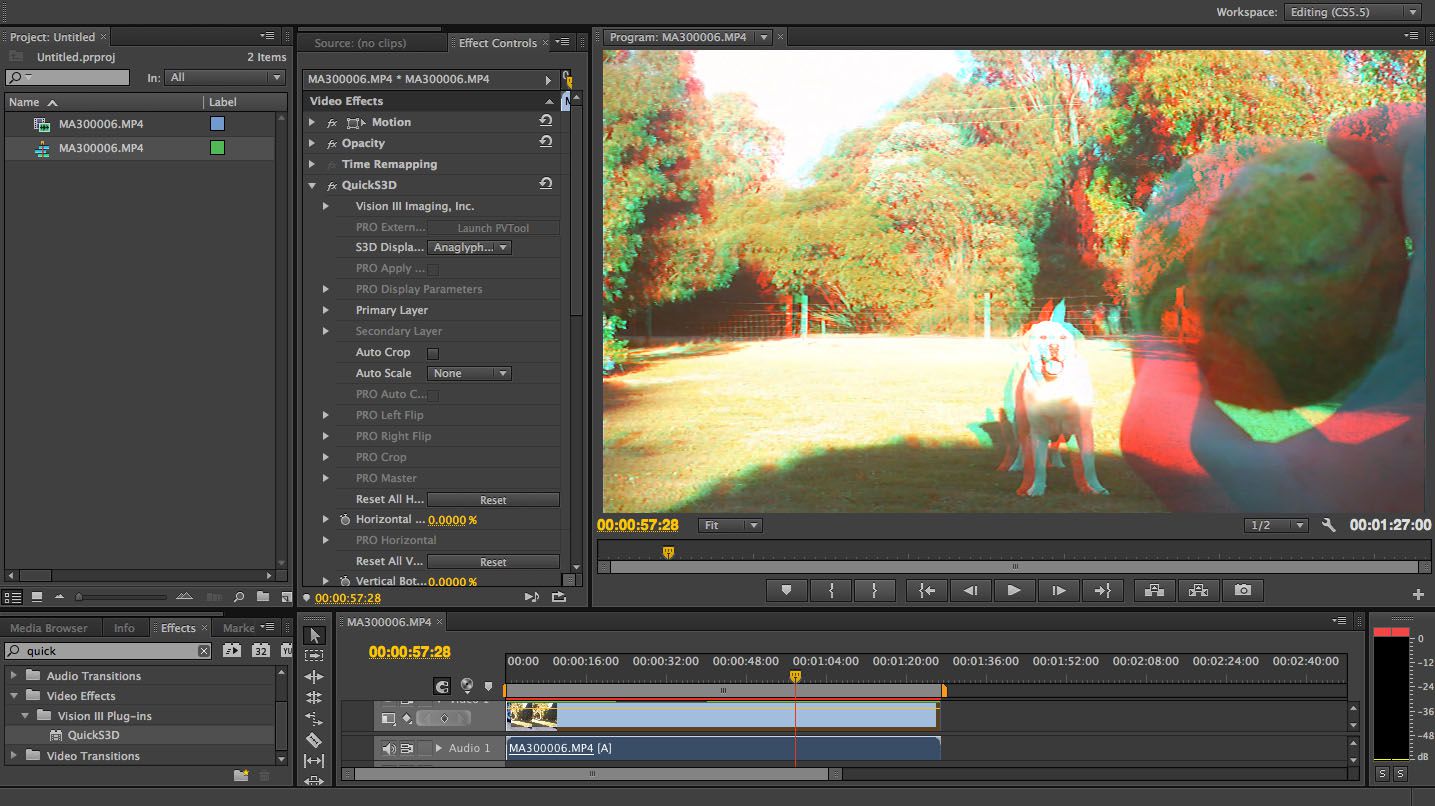
After spending some time contemplating the situation, I entered some passwords and it activated, and Premiere Pro opened up. I imported some Side By Side 3D video and started playing with it. As claimed, the QuickS3D does indeed provide the ability to edit 3D video natively. I especially liked the way I was able to add titles to my video, apply the plug-in, and create a really nice 3D effect between the text and the background video. It felt like the text was jumping out of the screen at me.
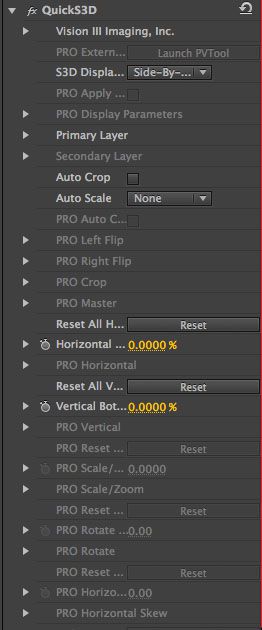
What I didn’t like on first glance, which became incredibly annoying after applying the plug-in a few times was seeing all of the “PRO” version options greyed out. Screen real estate is at a premium in Premiere Pro anyway, but seeing so much space taken up by information which is irrelevant to me became infuriating quickly, and started to feel like a “In App Advertisement” designed to frustrate me into spending another $250 upgrading to the “PRO” version.
The basic functionality of the plug-in felt a bit buggy to me at first, as quite a few times my video seemed to automatically revert back to Side By Side, not long after switching to Anaglyph mode. Having said that, this behavior did settle down after a while. I guess I might have been dragging across the “Display” option drop down somehow and once I got used to the plug-in a little more I stopped doing it? Maybe…But probably not…
Of the few options available in the Lite version, the basic tasks most of us will want to use are available. Features as listed from the Vision 3 Website:
Display Features
Top/Bottom
Side – by – Side
Frame Offset to Sync
Work with Stereo Pairs or Multiplexed file
Onion Skin (50-50)
Anaglyph (Red/Cyan)
v3 Parallax
Image Adjustments
Auto Crop
Scale to Fit
Scale to Fill
Stretch to Fit
Alignment Tools
Percent Only
Horizontal/Vertical Only
A feature I really liked is the auto crop option. This comes in very handy when adjusting the horizontal and vertical placements of the left and right channels. Using “Scale To Fit” the plug-in will scale your video so both channels fit correctly in the frame.
At this point, I was quite happy with my purchase, and decided to grab my Macbook Pro to write a review. After pondering the implications of the “Passwords” dialogue box, I came to the conclusion that the developer must have been taking a sensible approach to licensing, by allowing us the opportunity to transfer our single machine license to another machine, giving us the option to “Choose” which single machine we use our license on, as Adobe does… WRONG!
After installing the plug-in on my second machine, I tried to input my passwords from my first machine to no avail, I tried to create new passwords to no avail, and after 3 attempts, the plug-in no longer worked on EITHER machine!
Quite concerned, I re-read the documentation that came with the software, double checked the website and forum, Googled my problem, and found nothing. Under the “Support” option on Vision 3’s website I selected “Email Us”, and sent in a request for support/clarification regarding the purpose of the “Passwords” dialogue box. A few minutes later I received an automated reply with a Ticket number saying I would receive support soon…..
After a few days I still had not heard back, and sent of another request for support. 3 WEEKS LATER I have still yet to hear back from Vision 3 regarding this issue! And not surprisingly, the spam has not been cleaned/removed from the support forum.
The Bottom Line – In My Humble Opinion: Vision 3’s buggy QuickS3D Plug-In, whilst bursting with potential, is yet another piece of potentially excellent software crippled with anti-piracy measures to the point where those that have purchased it are “Guilty until deemed Innocent”. Vision 3 has no interest in supporting it’s paying customers or keeping a secure spam free support forum, they are interested only in getting your money. VERY DISAPPOINTING!
So now you have created your 3D video file, its time to watch it back and see how it looks. If you try to open it using Quicktime or Windows Media Player, you will see your two camera feeds simultaneously in “Side by Side” format.
In order to see the 3D effect, and watch your video in 3D you will need to use a player that is capable of handling Stereoscopic Video files. There are quiet a few out there, but my Favorite is called BINO. I like it because it is really easy to use, can play your side by side video file back in lots of different flavors of 3D (like red/cyan, amber/blue, green magenta), there are versions for Windows, Mac and Linux/Unix, and the best part, its completely free!
You can download BINO from the bino3d.org web site HERE.
Once you have downloaded, extracted and installed BINO you can launch it, and from the file menu select your Side By Side video file, and the player will appear. You now need to set only two parameters, you need to tell BINO what kind of file it is you want to play, and how you want it played back.
In the “Input” drop down menu, select “Left/Right Half Width”, and in the “Output” drop down menu, select the display method that corresponds to the 3D Glasses you will be using to watch the video. I have the ones with the Red and Blue lenses, so I use Red/Cyan High Quality mode. Now, just push play and see how you did.
You can make your video go full screen by double clicking the playing video. Double clicking on it again takes you back to window mode.
We use cookies on our website to give you the most relevant experience by remembering your preferences and repeat visits. By clicking “Accept”, you consent to the use of ALL the cookies.
This website uses cookies to improve your experience while you navigate through the website. Out of these, the cookies that are categorized as necessary are stored on your browser as they are essential for the working of basic functionalities of the website. We also use third-party cookies that help us analyze and understand how you use this website. These cookies will be stored in your browser only with your consent. You also have the option to opt-out of these cookies. But opting out of some of these cookies may affect your browsing experience.
Necessary cookies are absolutely essential for the website to function properly. This category only includes cookies that ensures basic functionalities and security features of the website. These cookies do not store any personal information.
Any cookies that may not be particularly necessary for the website to function and is used specifically to collect user personal data via analytics, ads, other embedded contents are termed as non-necessary cookies. It is mandatory to procure user consent prior to running these cookies on your website.

 Part 4 – Mixing Audio, Mics, and Avoiding Looping in Software