Fix Connectivity Problems by Power Cycling your Home Network and Computers

Unplugged

Power Cycling sounds like riding a bike really fast up a hill, but in the technology field it refers to a way to get everything back online when things aren’t working right, or you have to recover from a failure or freeze.

A Power Cycle is achieved by turning everything off safely, disconnecting the power sources, and leaving everything to sit for a in-determined amount of time (some say 30 seconds, some say 30 minutes).

I find Power Cycling makes all my devices talk to each other quicker. As I have a somewhat sophisticated home network, yanking the cord on everything from time to time allows new routing tables to be created, and old machines that are no longer connected to the network (That may have been a Master Browser (Machine that tells other machines where everything is located)) to be removed from the environment.

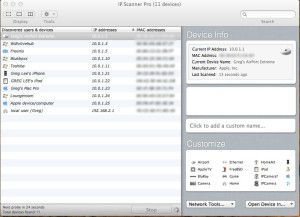
We’ll use my network as an example to go through the procedure, as things do need to be done in a specific order. Using a IP Scanner (There’s lots of free ones available – just Google IP Scanner) I generated this view of my home network.

IP-Scanner

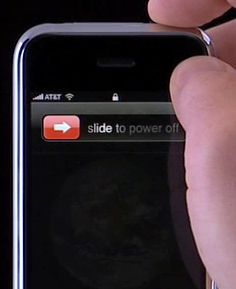
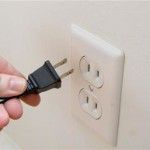
To begin a Power Cycle, I turn all off the Computers and my Server off. Once they are safely and completely shut down I yank the power cords from the sockets (This is important, if it is still plugged in, there is still power going in, keeping things in memory – So YANK IT!). With my Laptops, I take the batteries out. Next, I shut down and unplug my WD TV media machines and the “Elements” hard drives attached to them. My iPhone and iPad are now shut down by Pressing and holding the Sleep/Wake button (Power Button on top right side of device) for a few seconds until the red “slide to power off” slider appears, and then slide the slider. Lastly, My Airport Extreme Router, D-Link Switch, and ADSL Modem are all disconnected from the outlets.

Now I go throw a tennis ball with my Dog Benson for about 10 minutes. This allows plenty of time for any power left in the devices to drain away, and all caches and memory to clear.

Benson

After playtime I get ready to restart everything. First, I plug the modem back in and let it initialize and connect to the internet. Then I turn on my Switch, and my Airport Extreme Router is next. When they are all operational and happy, I turn my computers on one at a time, beginning with the one I use most, first (So it can become the Master Browser). Once it is up and connected to the internet, I turn the next one in my usage order on, and let it connect, then the next, etc, etc. Then, I boot up my WD TV Live Hub and reconnect the “Elements” storage drives, and lastly, I power on my iPhone and iPad by holding down the Sleep/Wake (Power Button on top right side) for a few seconds until I see the silver Apple logo appear.

Everything should be back up, running, and happy!

Some people will tell you there is no advantage to power cycling. I personally, do believe it helps, and if you are undecided, Try it for Yourself and make up your own mind! What have you got to loose?

 

Fix a dodgy home button on iPhone, iPod Touch and iPad

iphone-4-home-buttonI’ve noticed recently that the home button on my iPhone has become a bit dodgy. It doesn’t always work, especially when I double click it for multitasking/app switching.

I had resided myself to believing that the actual button mechanism had worn and was malfunctioning, when my wife told me how to recalibrate it. I was dubious at first, but this little “fix” has solved my problem, and my home button is back from the dead!

To start the recalibration process, press and hold the lock button on the top of your device, just like you are going to turn it off.

turn off iphoneInstead of sliding the red button with white arrow to the right, press and hold down the home button.

iphone-4-home-button-highlightedAfter about 5 or 6 six, your phone will go back to your home screen, and that is it! During that 5 seconds, your phone re-calibrated your home button, and with a bit of luck, everything will be like new again!

Easily Watch or Fix Aspect Ratio Problems in MPEG Video with MPEG Streamclip on Windows and Mac

Earlier this week one of my favorite movies “The Scorpion King” was on TV, and as I recently bought a new digital set top box with USB recording capabilities, I thought I would give it a try. I remember when I saw The Scorpion King at the movies it was in a very widescreen aspect ratio, and it looked great! But, as soon as it started on Sunday night, I could tell something was not right. Rock Johnson looked more like a character from Avatar than the WWF! He seemed over 10 feet tall and as skinny as a broom handle, which as we all know, isn’t the case!

My suspicion is that someone at the TV station got lazy, or maybe a setting in my set top box was wrong, but the bottom line is I have a 2+ gigabit video file of one of my favorite movies, and it is virtually unwatchable because the aspect ratio is way off.

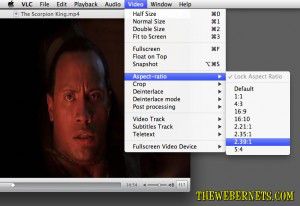
Thankfully, there is a nice easy way to straighten things out. Now, If I intended to watch the video file on my computer, I would use VideoLAN’s VLC Player, because it’s free, it plays practically everything, and it has nice built in feature’s that amongst dozens of other tricks, will adjust your movies aspect ratio on the fly, so no re-encoding is required.

VLC Player falls into my “I can’t Believe it’s free” category. No matter what OS your running, they have a player for you that will knock your socks off. But if you want to watch that distorted video file on something like a WDTV, or plug a USB key into your flat screen TV, your gonna have to re-encode it and repair the problems.

Luckily, my set top box records in MP4 format, so my tall and skinny video file will drop straight into a really cool, and again FREE program, called MPEG Streamclip, which is what I am going to use to fix my aspect ratio problem in my video file.

Thankfully, MPEG Stream not only fixes tall and skinny video’s, but short fat ones too 🙂

To get started, if you don’t have it already, get your free copy of MPEG Stream clip right HERE! You can do a bunch of cool stuff with it, it’s free, so there is no reason not to have it in your video tool kit! Once your installed, FIRE IT UP!

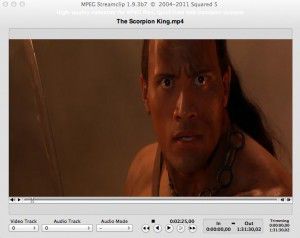
MPEG Streamclip Screen CaptureOnce the main window is open, drag your wonky video clip into it, and you will see a preview window.

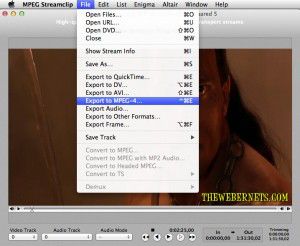
MPEG Streamclip Screen CaptureTo begin reshaping, open the file menu and select “Export to MPEG-4”, or if you want to cross encode to another format, you can choose it here instead.

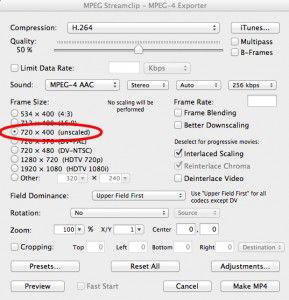
MPEG Streamclip Screen CaptureOnce you have selected your preferred export format, a new window will pop up where you can adjust your settings, and de-distort your movie.

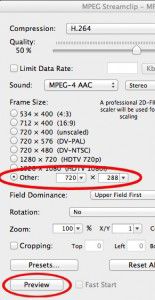
MPEG Streamclip Screen CaptureAs you can see from the above capture, my video was recorded in 720px wide by 400px high, so I am now thinking I really do need to go and take a look at the default settings on my set top box. To start repairing the problem, I clicked “Other”, left the width at 720px, and started to play with the vertical height. After I changed the setting, I clicked “Preview” to see if my changes made the aspect ratio better.

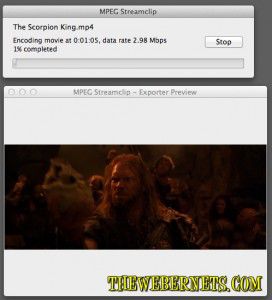
MPEG Streamclip Screen CaptureA new window popped up and the movie started to preview, and I noticed a secondary window which looked like it had already begun encoding, but this doesn’t appear to be the case. It seems to me that it is just encoding your preview while you are watching it, but its not the final pass.

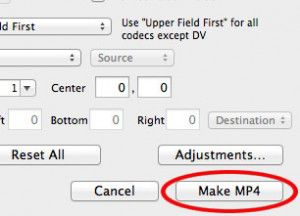
MPEG Streamclip Screen CaptureIf the preview looks good, or even if it doesn’t, click the stop button after you have assessed your changes. If you want to re-adjust your settings, you can go back and do so, or if you are happy with your changes, go ahead and click “Make MP4” in the bottom right hand corner, and give your FIXED video a new unique name.

MPEG Streamclip Screen CaptureLike most video encoding, it will take some time to process the file and apply your changes. But when it’s done, everything will look like it should again.

Hacking Low Flow Shower Heads

Kramer Low Flow Shower HeadAsk anybody about their favorite episodes of Seinfeld, and the “Low Flow Shower Heads” episode is sure to be mentioned. As funny as this episode is, low flow shower heads are a reality, and I found this out first hand this week upon moving into our new house. My first shower was a dreadful, dreadful experience. On second thoughts, it can not actually be classified as a “Shower”. It was more an inadequate “Trickle”.

Now, I know we all need to conserve water, and respect the environment, and Low Flow Shower Heads help us sustain precious resources………but I am quiet sure my discharge of hot air after an inadequate shower does more damage to the ozone, so with that in mind, this is how I hacked my low flow shower heads.

**DISCLAIMER** – As stated, this is how “I” hacked “MY” shower – your system may be VERY different, and I take no responsibility should you fail catastrophically in your attempt to hack YOUR low flow shower head. This is simply an account of MY experience.

It’s not actually the “Shower Head” that is the problem. This is a DECOY phrase those “They” people use to mislead you. It’s the plastic “restricter” installed in the angled mounting piece of the arm that limits the flow of water.

DecoyWhere my shower arm mounts to the wall, I found a Hexagonal shaped coupling that screws to the hot water pipes. When I screwed it off, I found the water flow through the pipe was restricted by a plastic restricter. This restricter reduces the waters ability to flow through the pipe considerably by simply “blocking” it, hence the flow of water is low.

Shower Flow RestricterI learned that I could easily remove the plastic restricter from the waters path by “picking” it out with a small flat blade screw driver.

Restricter Removed

RestricterOnce I picked out the restricter, I remounted the arm back to the wall, and voila! I was now able to wash ALL of the shampoo out of my hair!