 Earlier this week one of my favorite movies “The Scorpion King” was on TV, and as I recently bought a new digital set top box with USB recording capabilities, I thought I would give it a try. I remember when I saw The Scorpion King at the movies it was in a very widescreen aspect ratio, and it looked great! But, as soon as it started on Sunday night, I could tell something was not right. Rock Johnson looked more like a character from Avatar than the WWF! He seemed over 10 feet tall and as skinny as a broom handle, which as we all know, isn’t the case!
My suspicion is that someone at the TV station got lazy, or maybe a setting in my set top box was wrong, but the bottom line is I have a 2+ gigabit video file of one of my favorite movies, and it is virtually unwatchable because the aspect ratio is way off.
Thankfully, there is a nice easy way to straighten things out. Now, If I intended to watch the video file on my computer, I would use VideoLAN’s VLC Player, because it’s free, it plays practically everything, and it has nice built in feature’s that amongst dozens of other tricks, will adjust your movies aspect ratio on the fly, so no re-encoding is required.
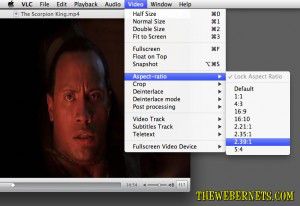 VLC Player falls into my “I can’t Believe it’s free” category. No matter what OS your running, they have a player for you that will knock your socks off. But if you want to watch that distorted video file on something like a WDTV, or plug a USB key into your flat screen TV, your gonna have to re-encode it and repair the problems.
Luckily, my set top box records in MP4 format, so my tall and skinny video file will drop straight into a really cool, and again FREE program, called MPEG Streamclip, which is what I am going to use to fix my aspect ratio problem in my video file.
Thankfully, MPEG Stream not only fixes tall and skinny video’s, but short fat ones too 🙂
To get started, if you don’t have it already, get your free copy of MPEG Stream clip right HERE! You can do a bunch of cool stuff with it, it’s free, so there is no reason not to have it in your video tool kit! Once your installed, FIRE IT UP!
 Once the main window is open, drag your wonky video clip into it, and you will see a preview window.
 To begin reshaping, open the file menu and select “Export to MPEG-4”, or if you want to cross encode to another format, you can choose it here instead.
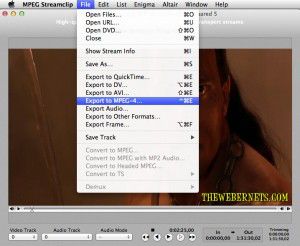 Once you have selected your preferred export format, a new window will pop up where you can adjust your settings, and de-distort your movie.
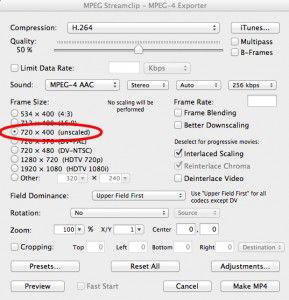 As you can see from the above capture, my video was recorded in 720px wide by 400px high, so I am now thinking I really do need to go and take a look at the default settings on my set top box. To start repairing the problem, I clicked “Other”, left the width at 720px, and started to play with the vertical height. After I changed the setting, I clicked “Preview” to see if my changes made the aspect ratio better.
 A new window popped up and the movie started to preview, and I noticed a secondary window which looked like it had already begun encoding, but this doesn’t appear to be the case. It seems to me that it is just encoding your preview while you are watching it, but its not the final pass.
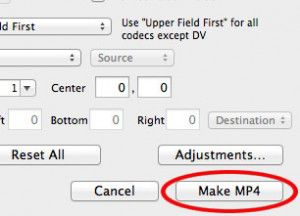
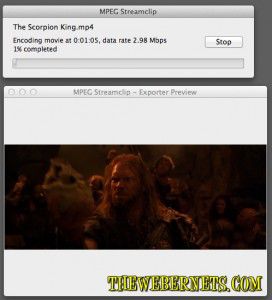 If the preview looks good, or even if it doesn’t, click the stop button after you have assessed your changes. If you want to re-adjust your settings, you can go back and do so, or if you are happy with your changes, go ahead and click “Make MP4” in the bottom right hand corner, and give your FIXED video a new unique name.
 Like most video encoding, it will take some time to process the file and apply your changes. But when it’s done, everything will look like it should again.


