Power Cycling sounds like riding a bike really fast up a hill, but in the technology field it refers to a way to get everything back online when things aren’t working right, or you have to recover from a failure or freeze.
A Power Cycle is achieved by turning everything off safely, disconnecting the power sources, and leaving everything to sit for a in-determined amount of time (some say 30 seconds, some say 30 minutes).
I find Power Cycling makes all my devices talk to each other quicker. As I have a somewhat sophisticated home network, yanking the cord on everything from time to time allows new routing tables to be created, and old machines that are no longer connected to the network (That may have been a Master Browser (Machine that tells other machines where everything is located)) to be removed from the environment.
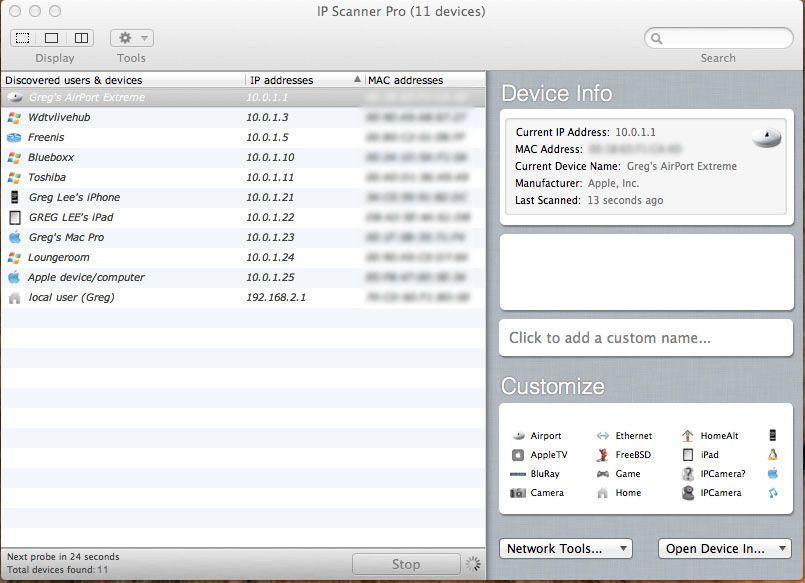
We’ll use my network as an example to go through the procedure, as things do need to be done in a specific order. Using a IP Scanner (There’s lots of free ones available – just Google IP Scanner) I generated this view of my home network.
To begin a Power Cycle, I turn all off the Computers and my Server off. Once they are safely and completely shut down I yank the power cords from the sockets (This is important, if it is still plugged in, there is still power going in, keeping things in memory – So YANK IT!). With my Laptops, I take the batteries out. Next, I shut down and unplug my WD TV media machines and the “Elements” hard drives attached to them. My iPhone and iPad are now shut down by Pressing and holding the Sleep/Wake button (Power Button on top right side of device) for a few seconds until the red “slide to power off” slider appears, and then slide the slider. Lastly, My Airport Extreme Router, D-Link Switch, and ADSL Modem are all disconnected from the outlets.
Now I go throw a tennis ball with my Dog Benson for about 10 minutes. This allows plenty of time for any power left in the devices to drain away, and all caches and memory to clear.
After playtime I get ready to restart everything. First, I plug the modem back in and let it initialize and connect to the internet. Then I turn on my Switch, and my Airport Extreme Router is next. When they are all operational and happy, I turn my computers on one at a time, beginning with the one I use most, first (So it can become the Master Browser). Once it is up and connected to the internet, I turn the next one in my usage order on, and let it connect, then the next, etc, etc. Then, I boot up my WD TV Live Hub and reconnect the “Elements” storage drives, and lastly, I power on my iPhone and iPad by holding down the Sleep/Wake (Power Button on top right side) for a few seconds until I see the silver Apple logo appear.
Everything should be back up, running, and happy!
Some people will tell you there is no advantage to power cycling. I personally, do believe it helps, and if you are undecided, Try it for Yourself and make up your own mind! What have you got to loose?

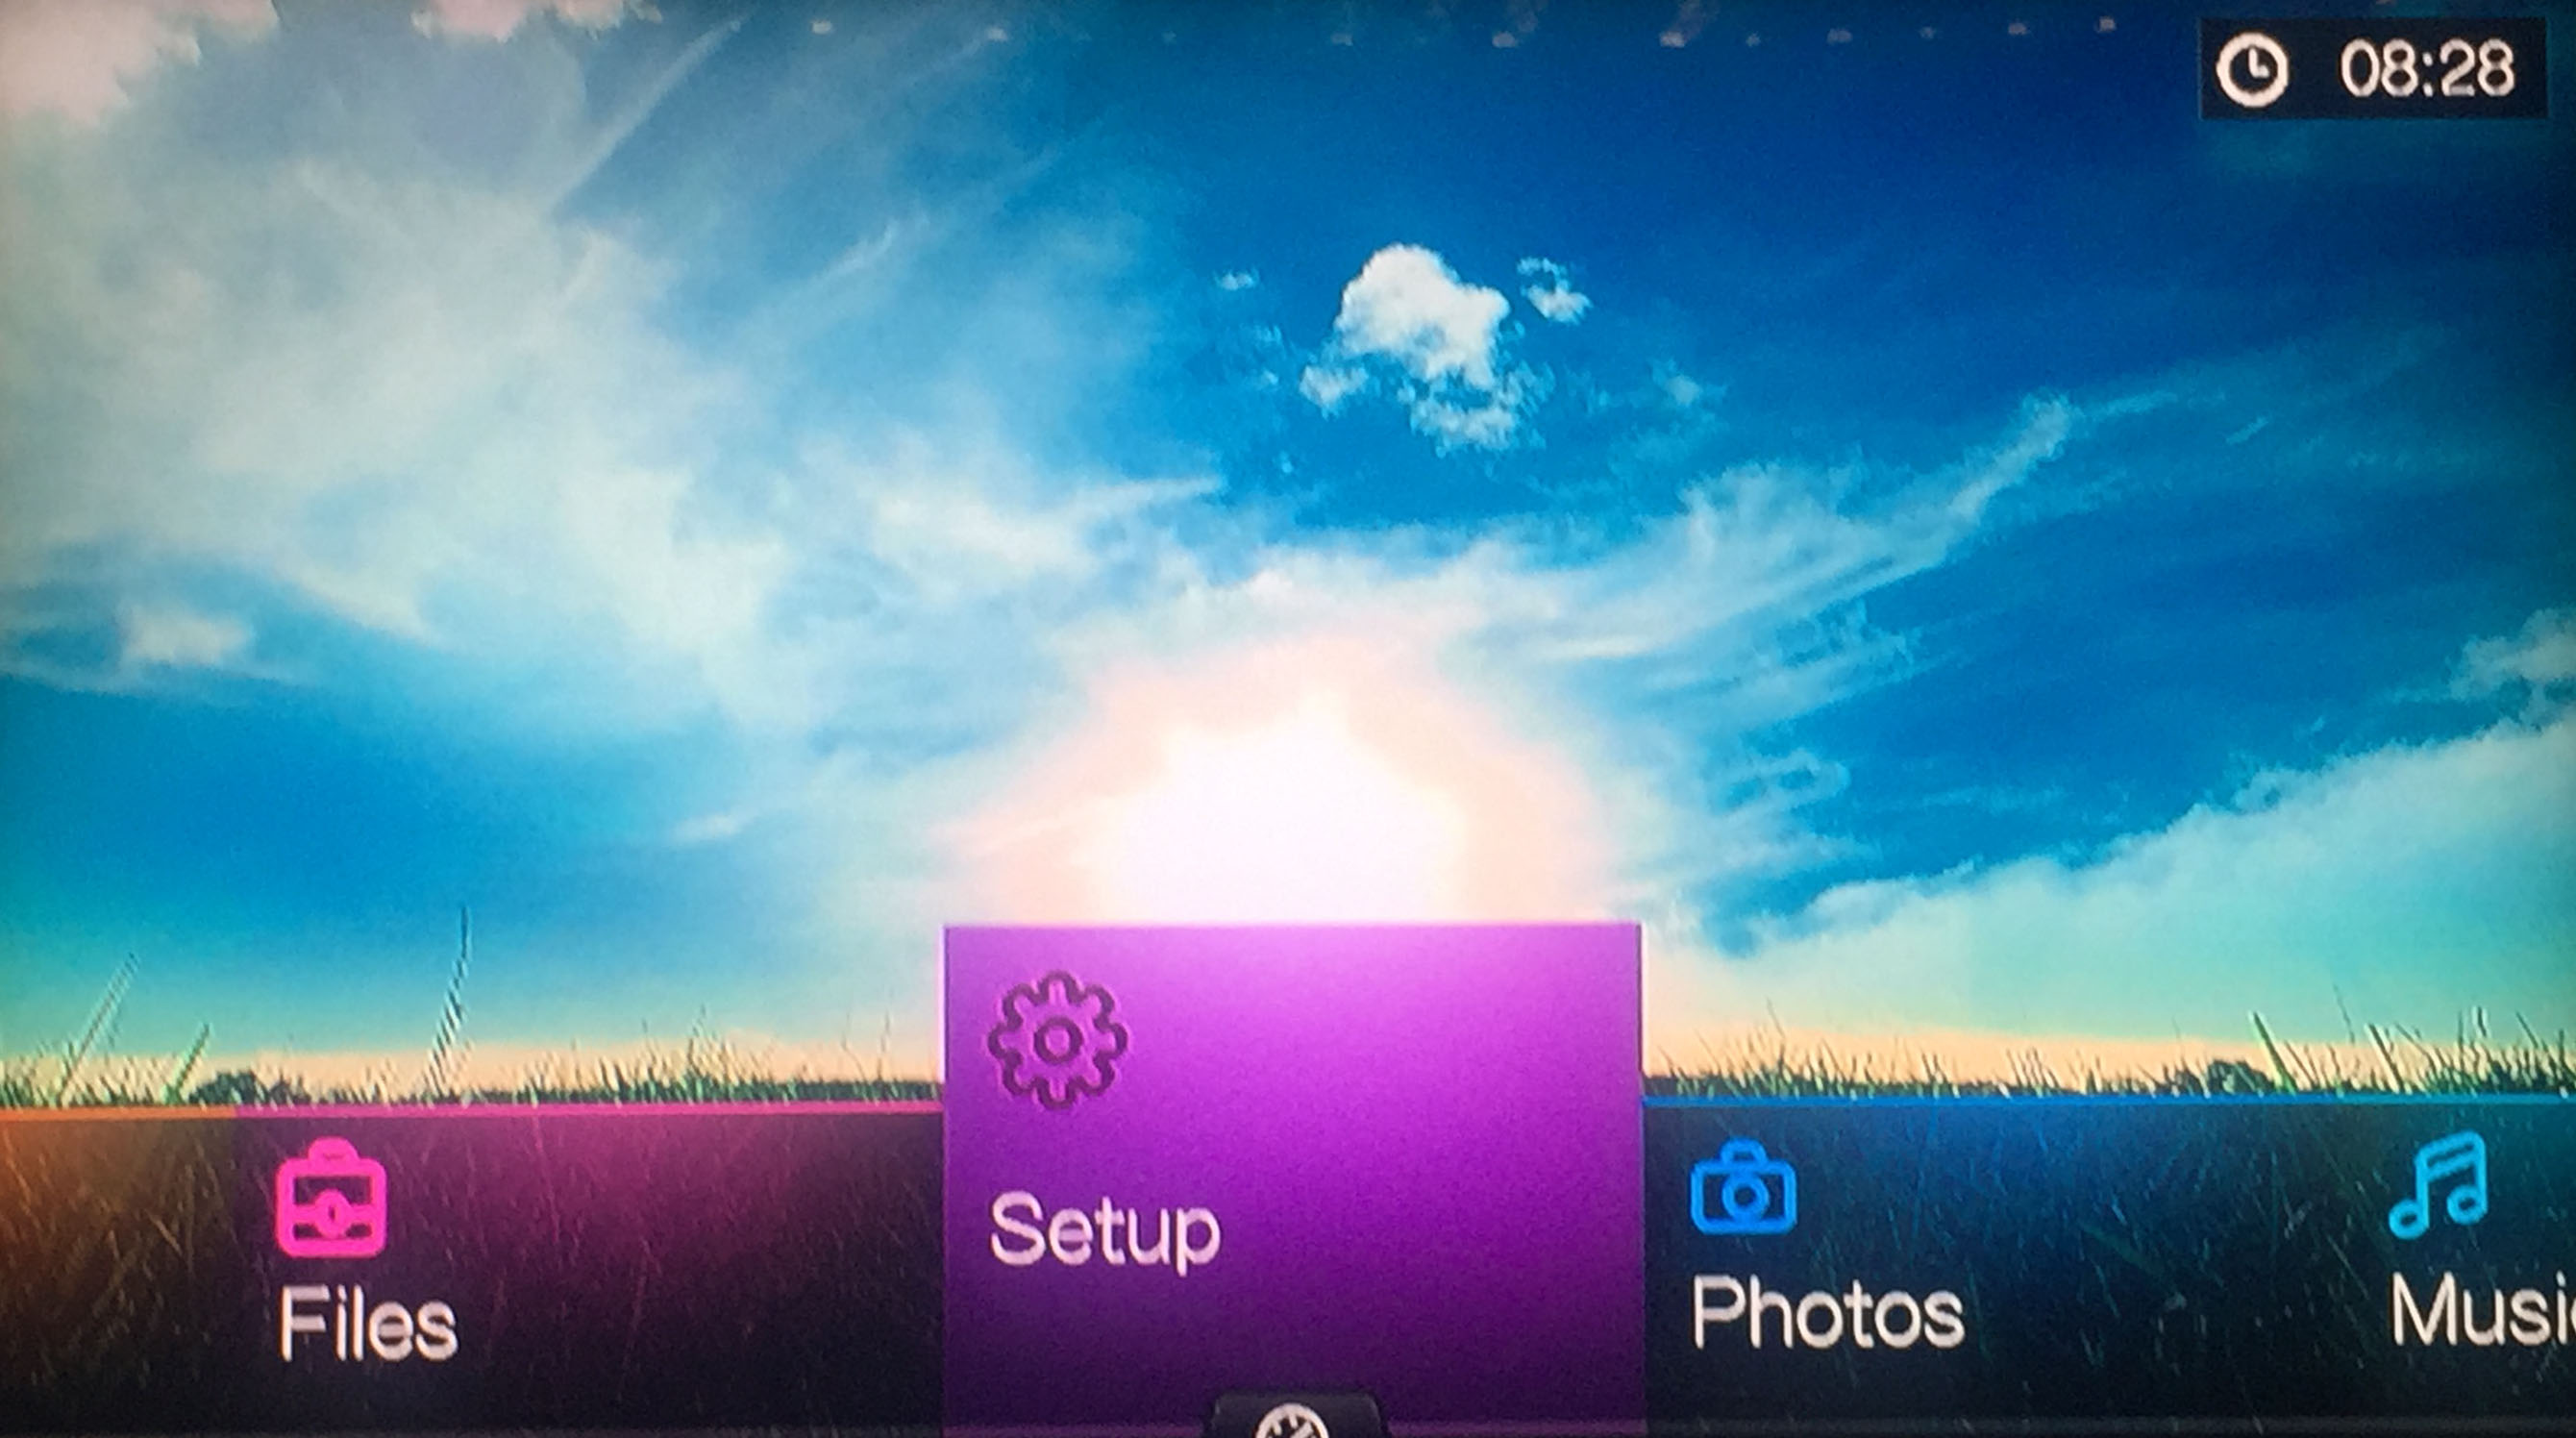
 If the power goes off, or I need to reboot my WDTV for any reason, when it comes back on my screen is always tainted with a pink hue, it seems to be called the “Pink Screen Issue”. From what I can gather, its caused by a mismatch in frame rate when using HDMI. Here’s how I fix it on my unit. I hope this works for you as well.
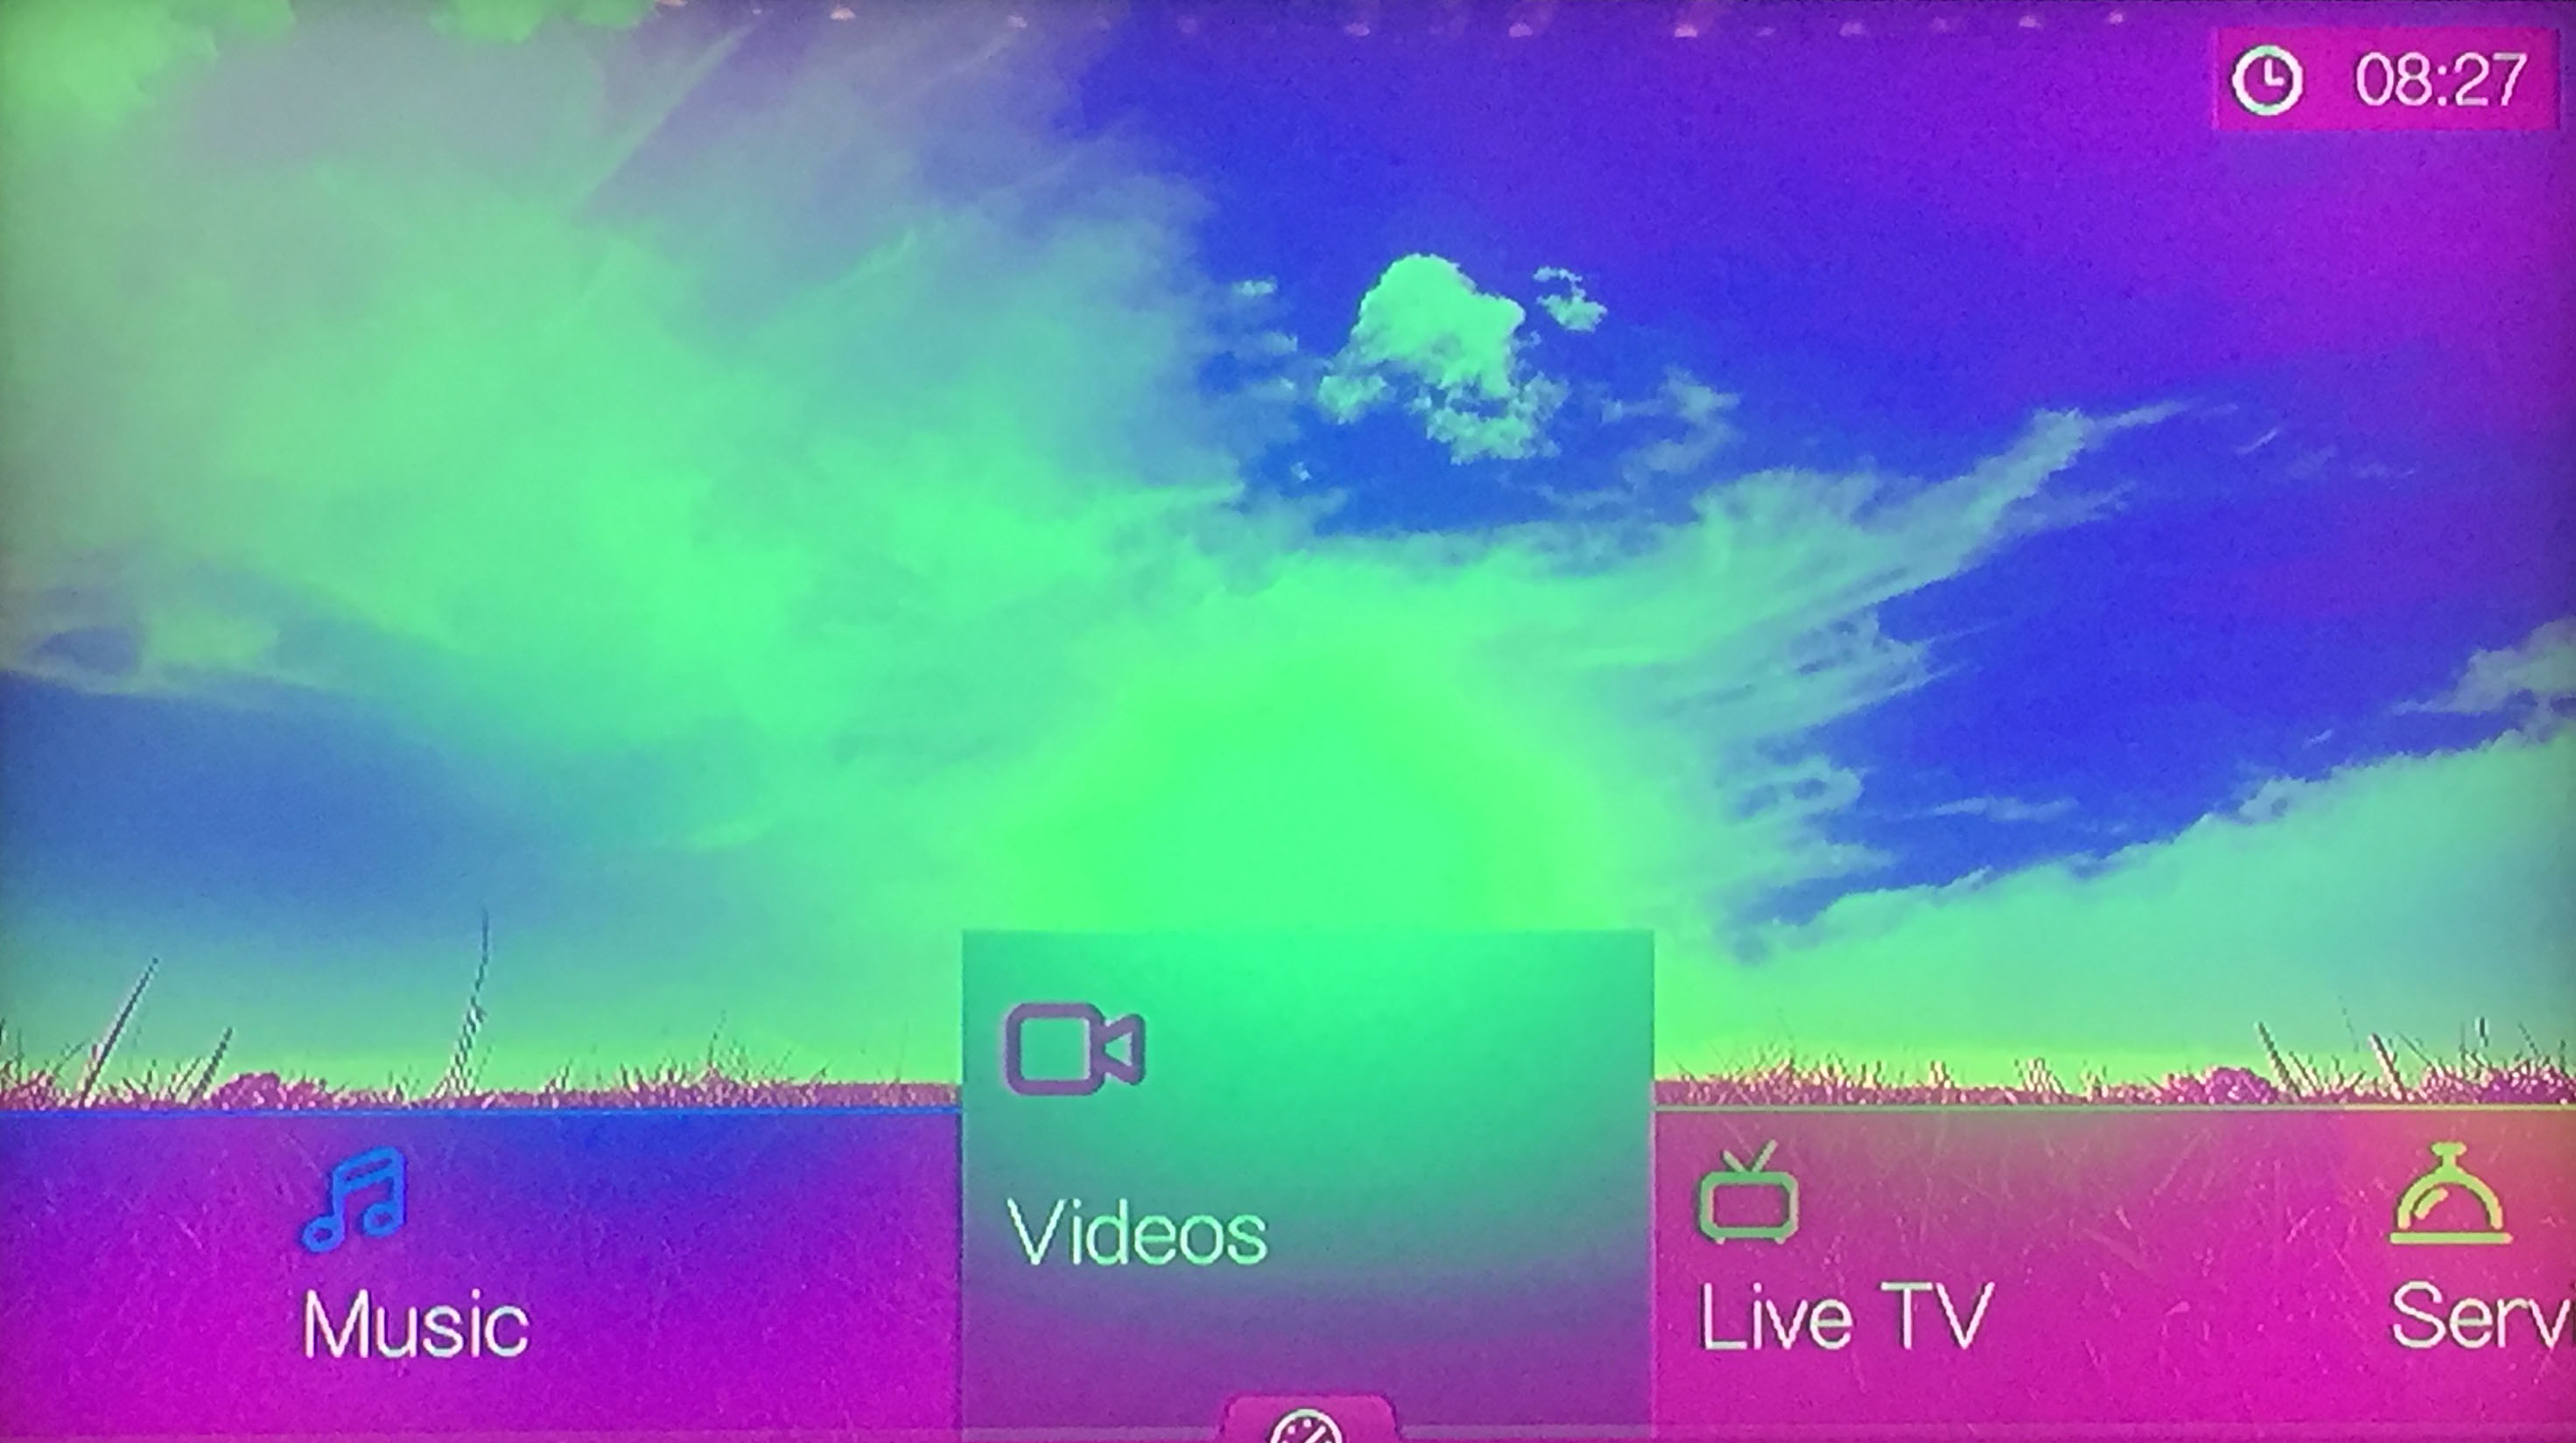 Scroll through and select the “Setup” option
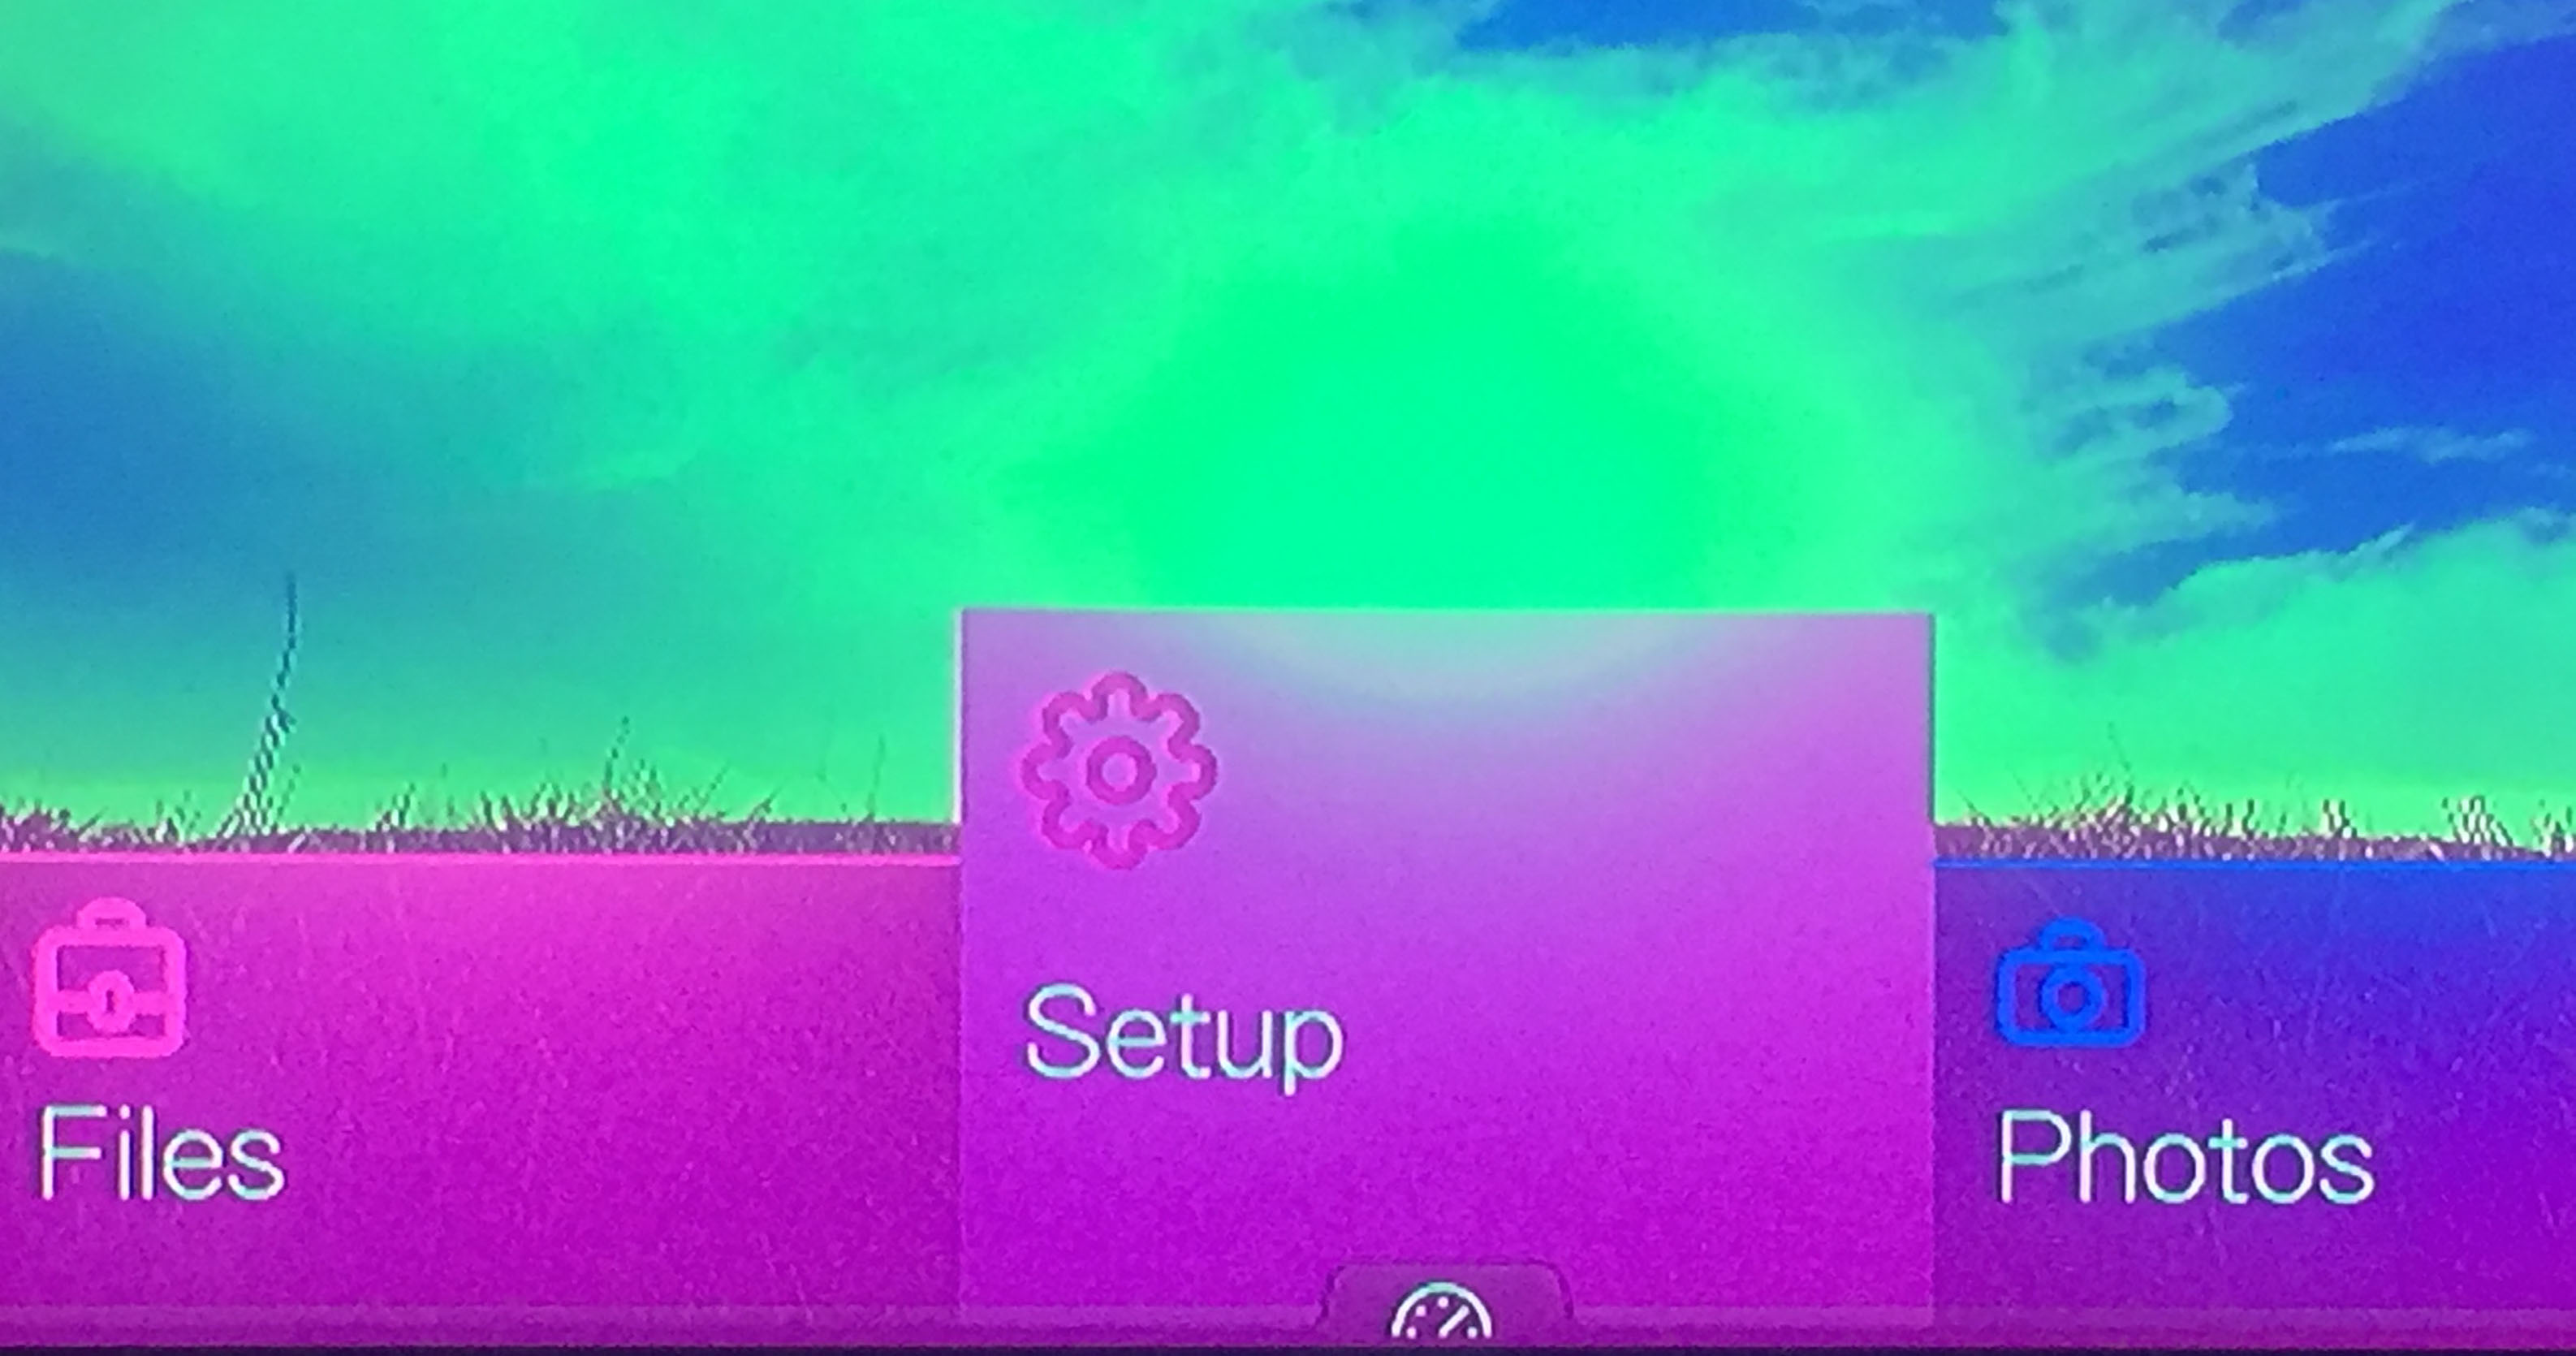 Then select Audio/Video Output
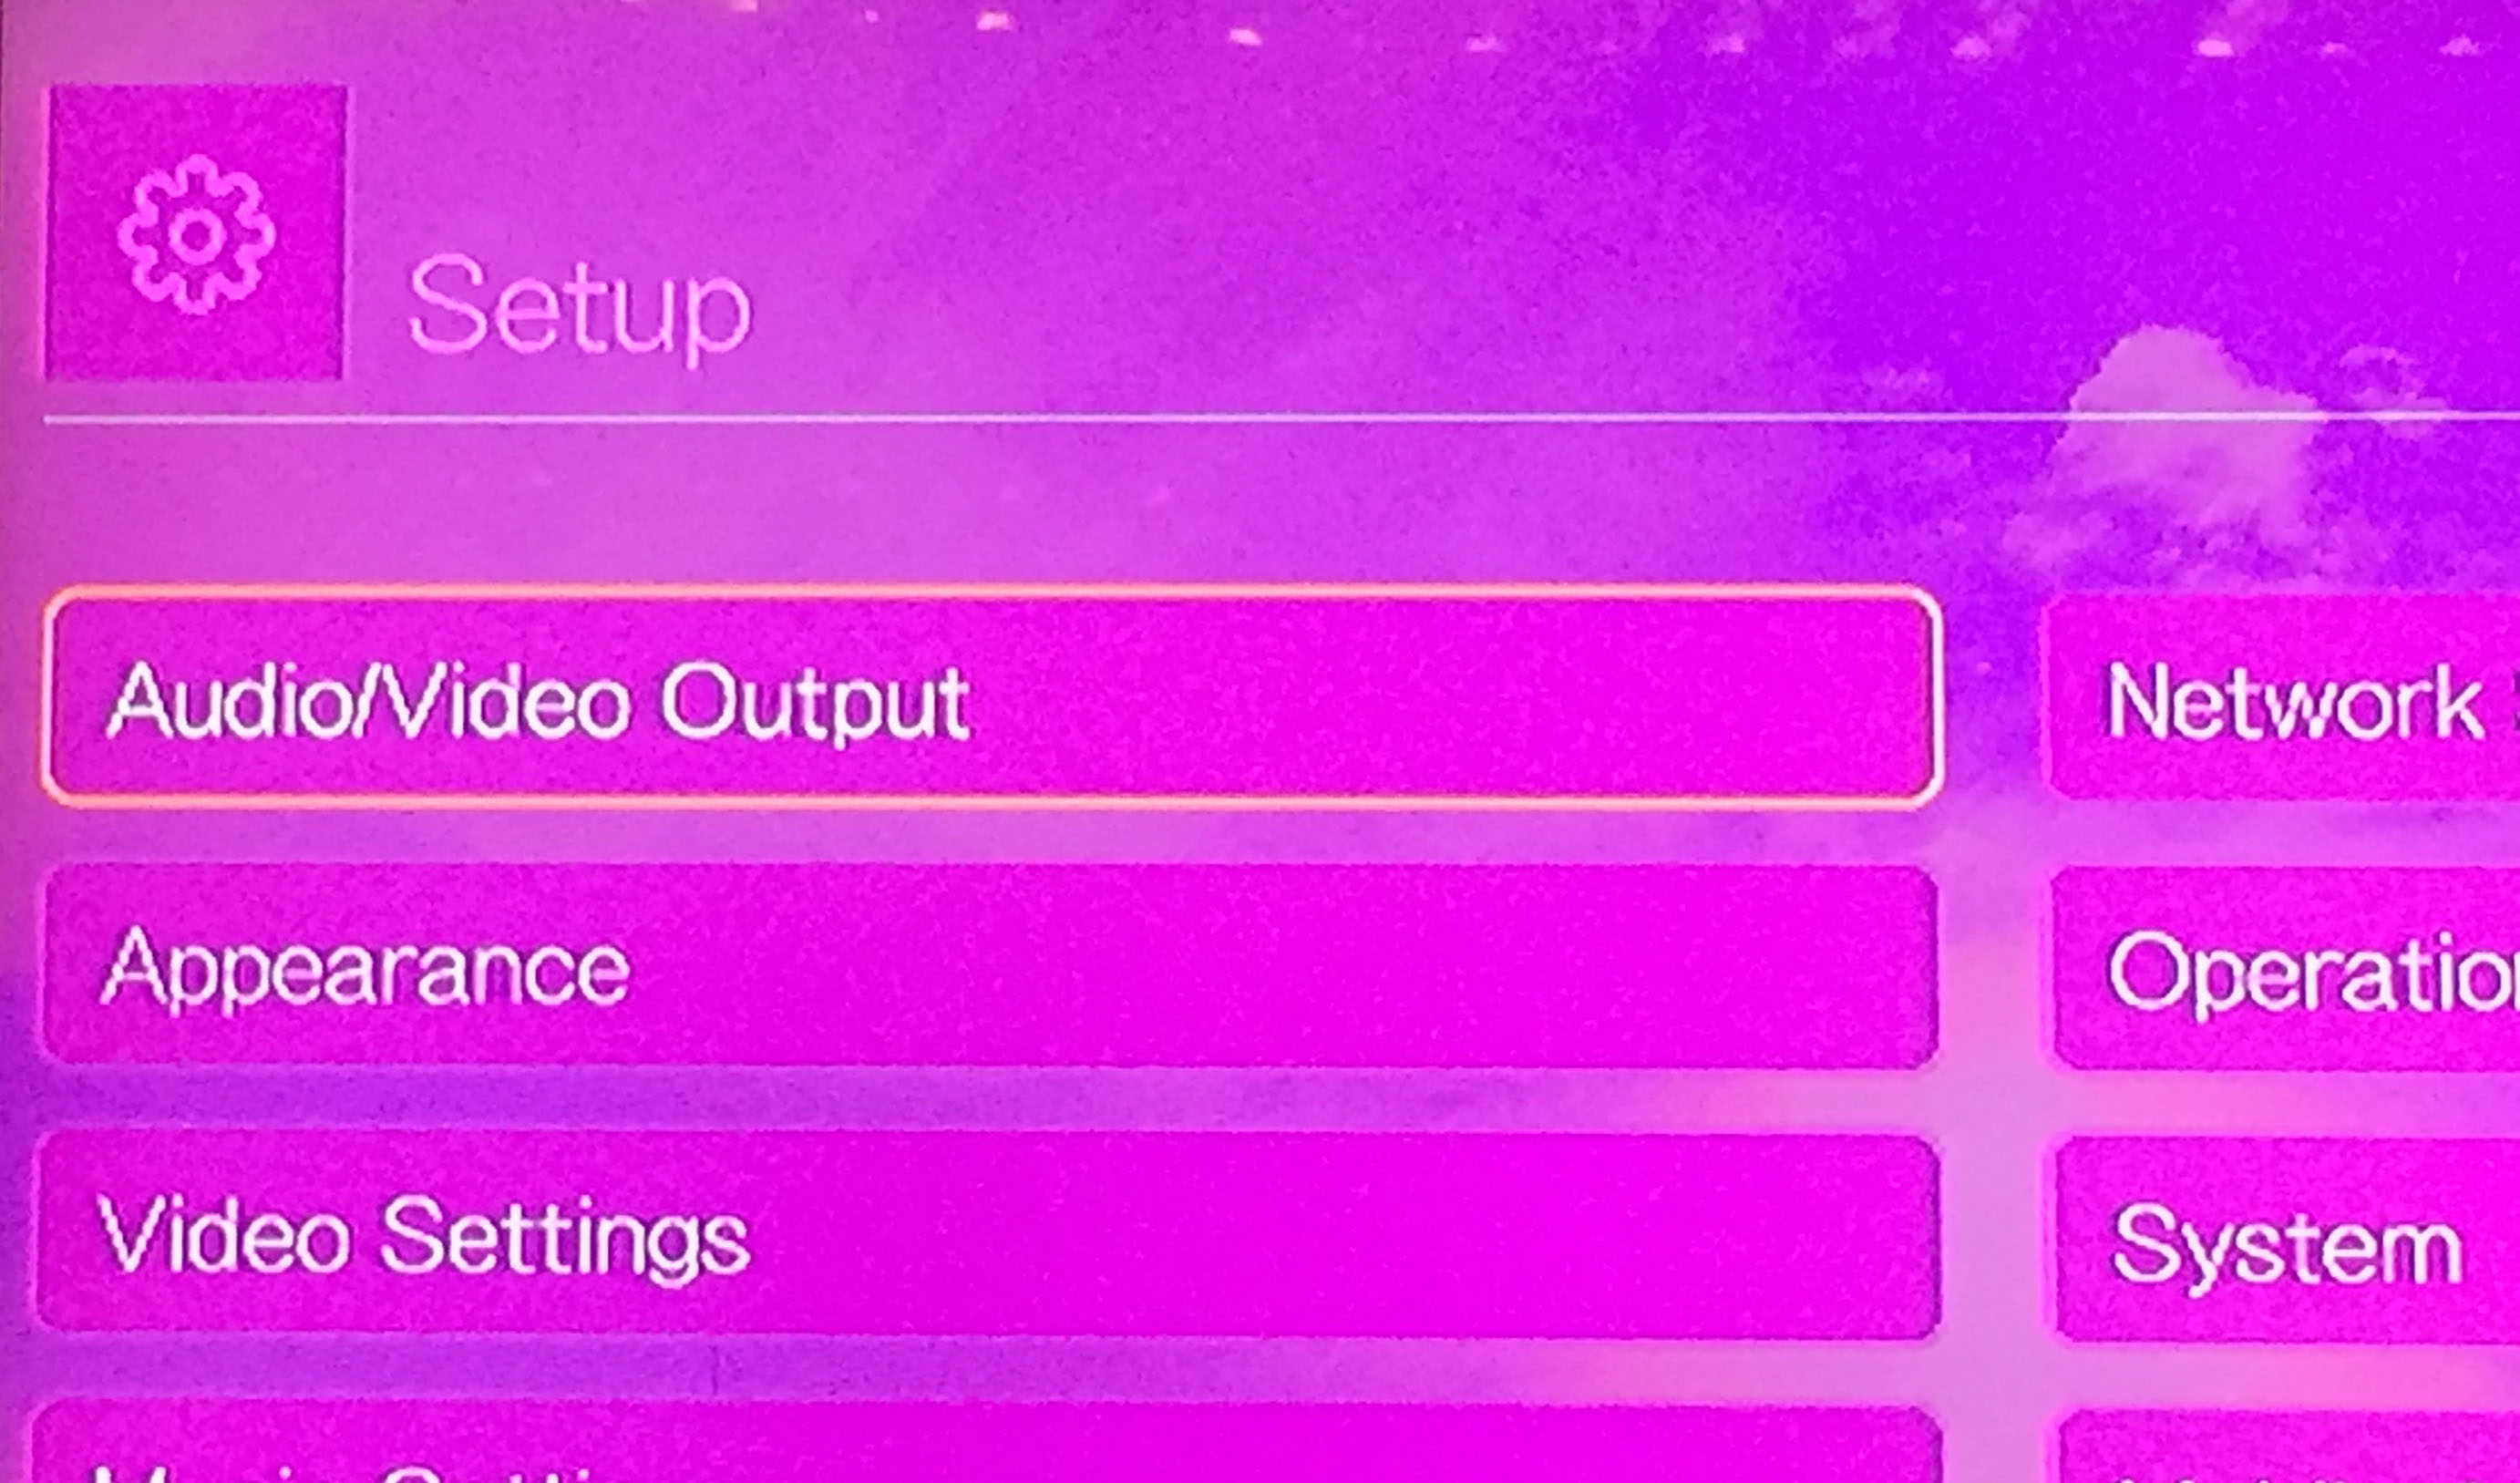 The next step is to select HDMI
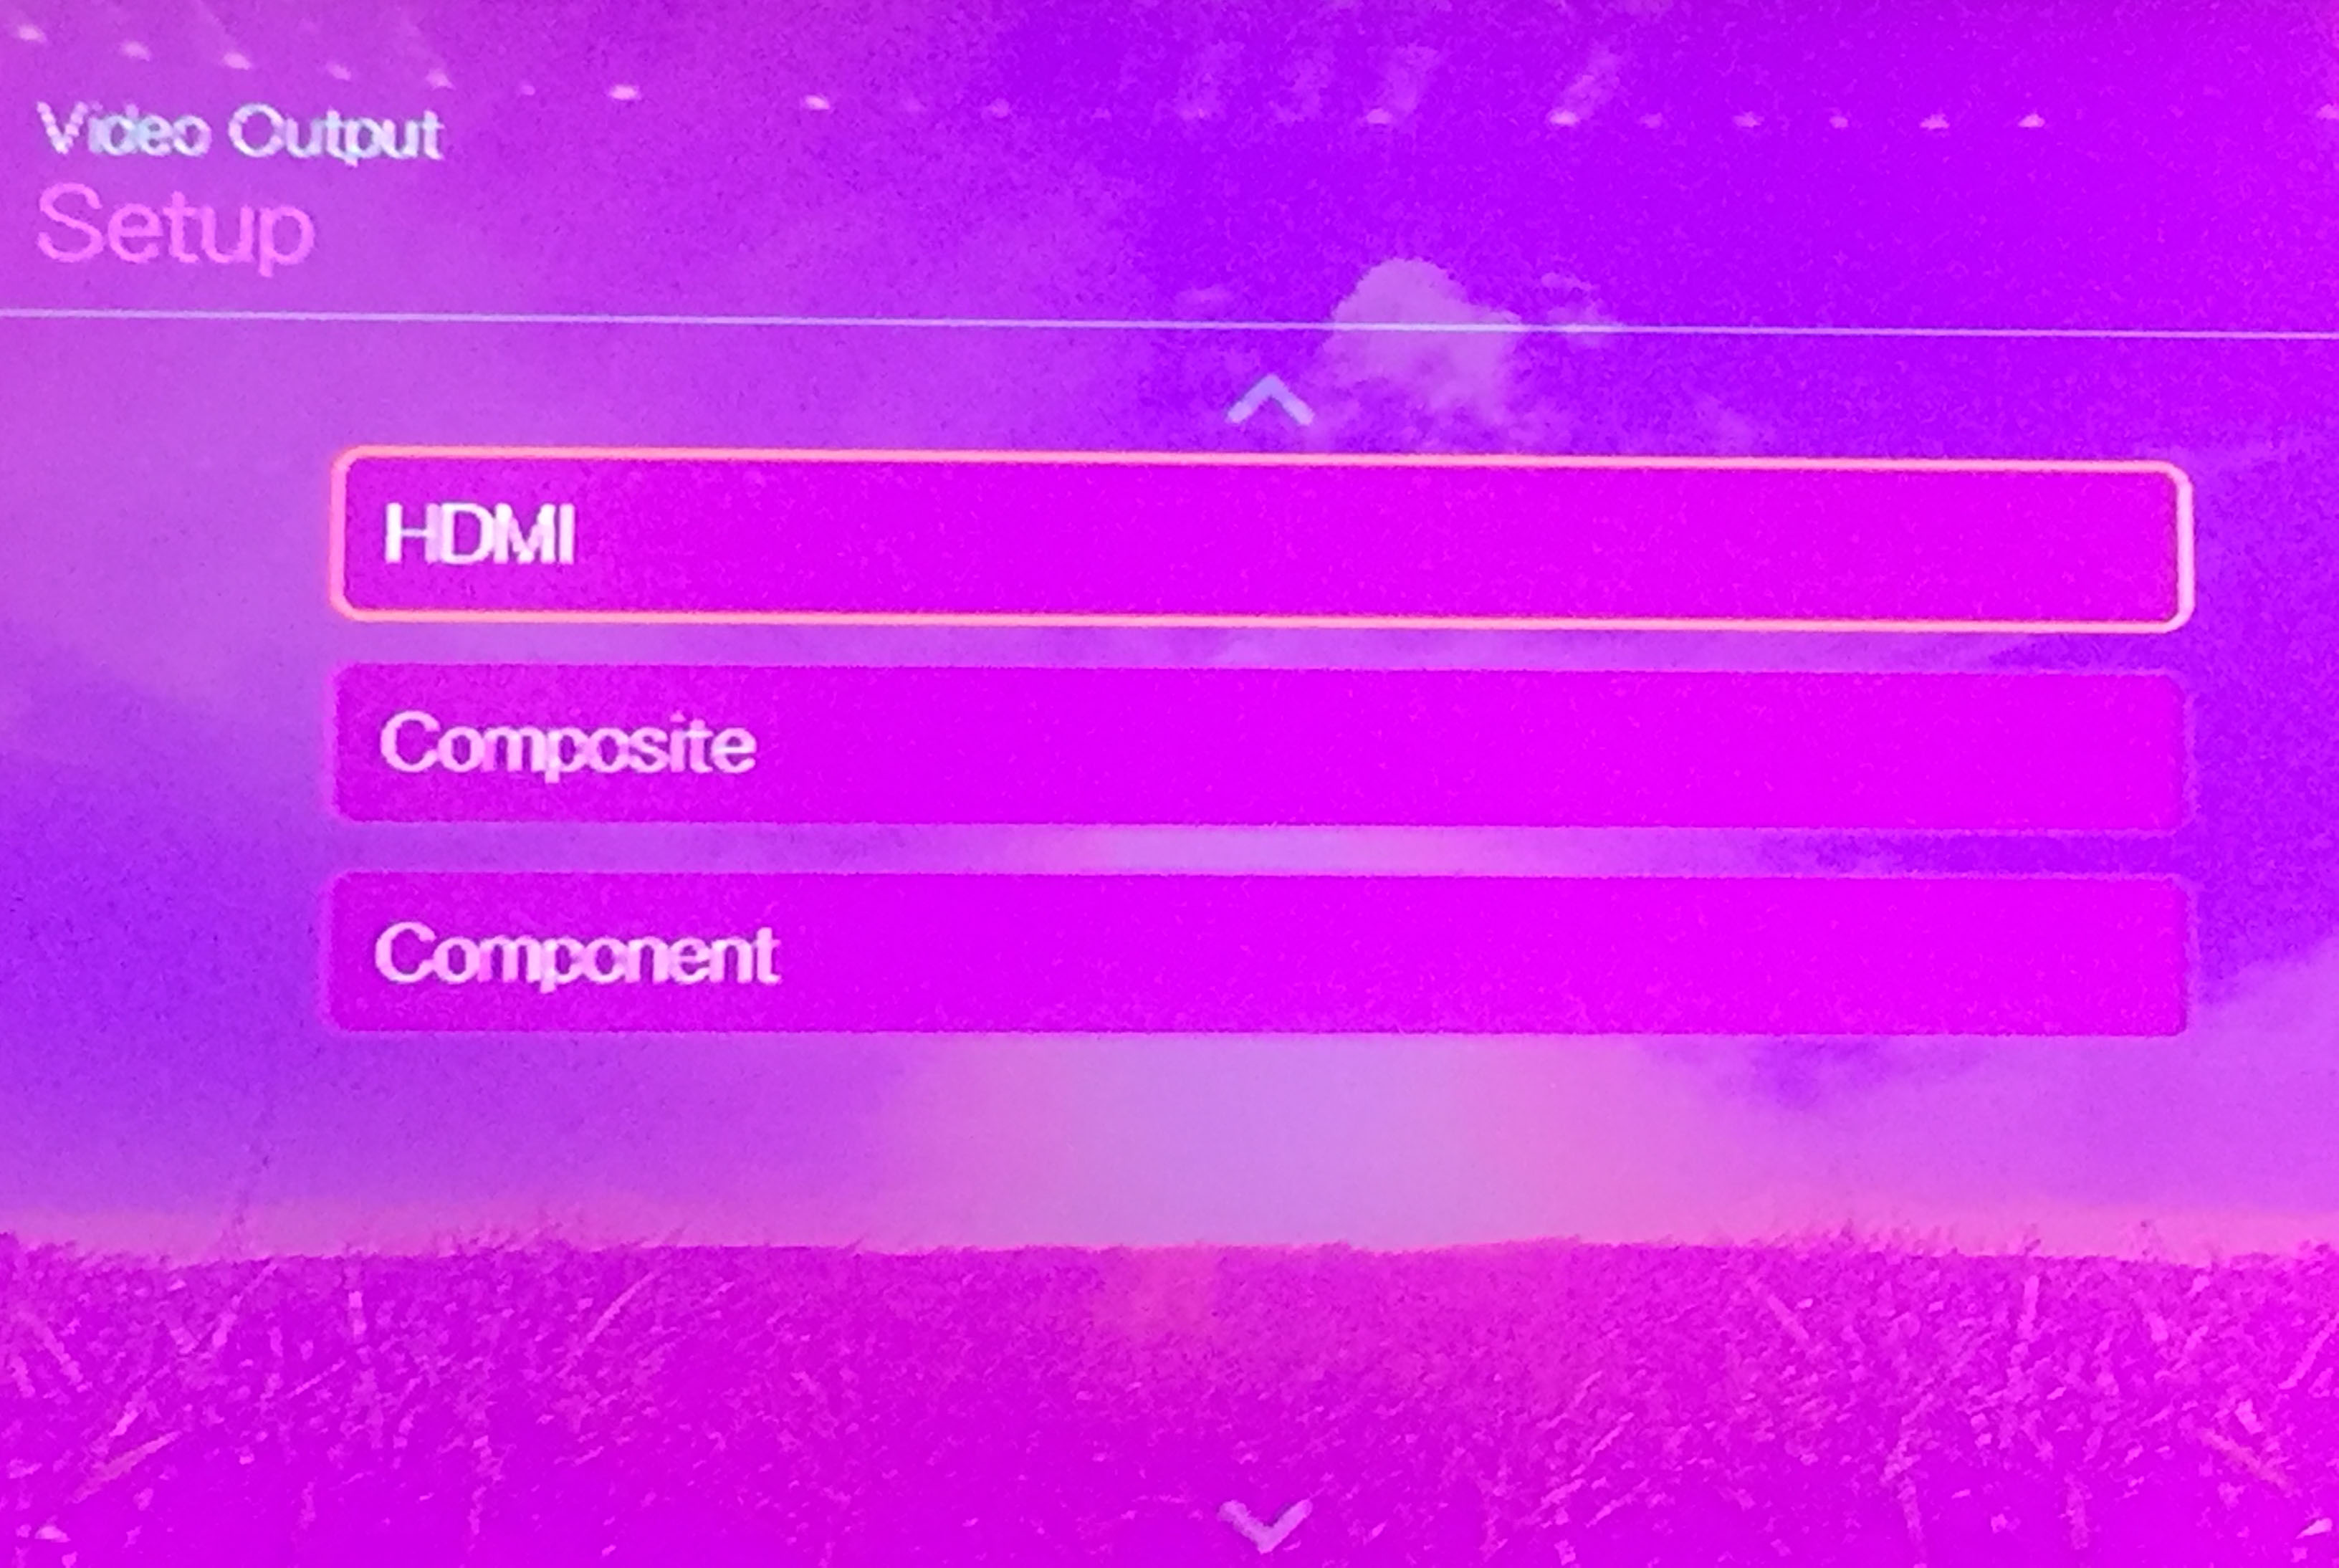 Now select AUTO
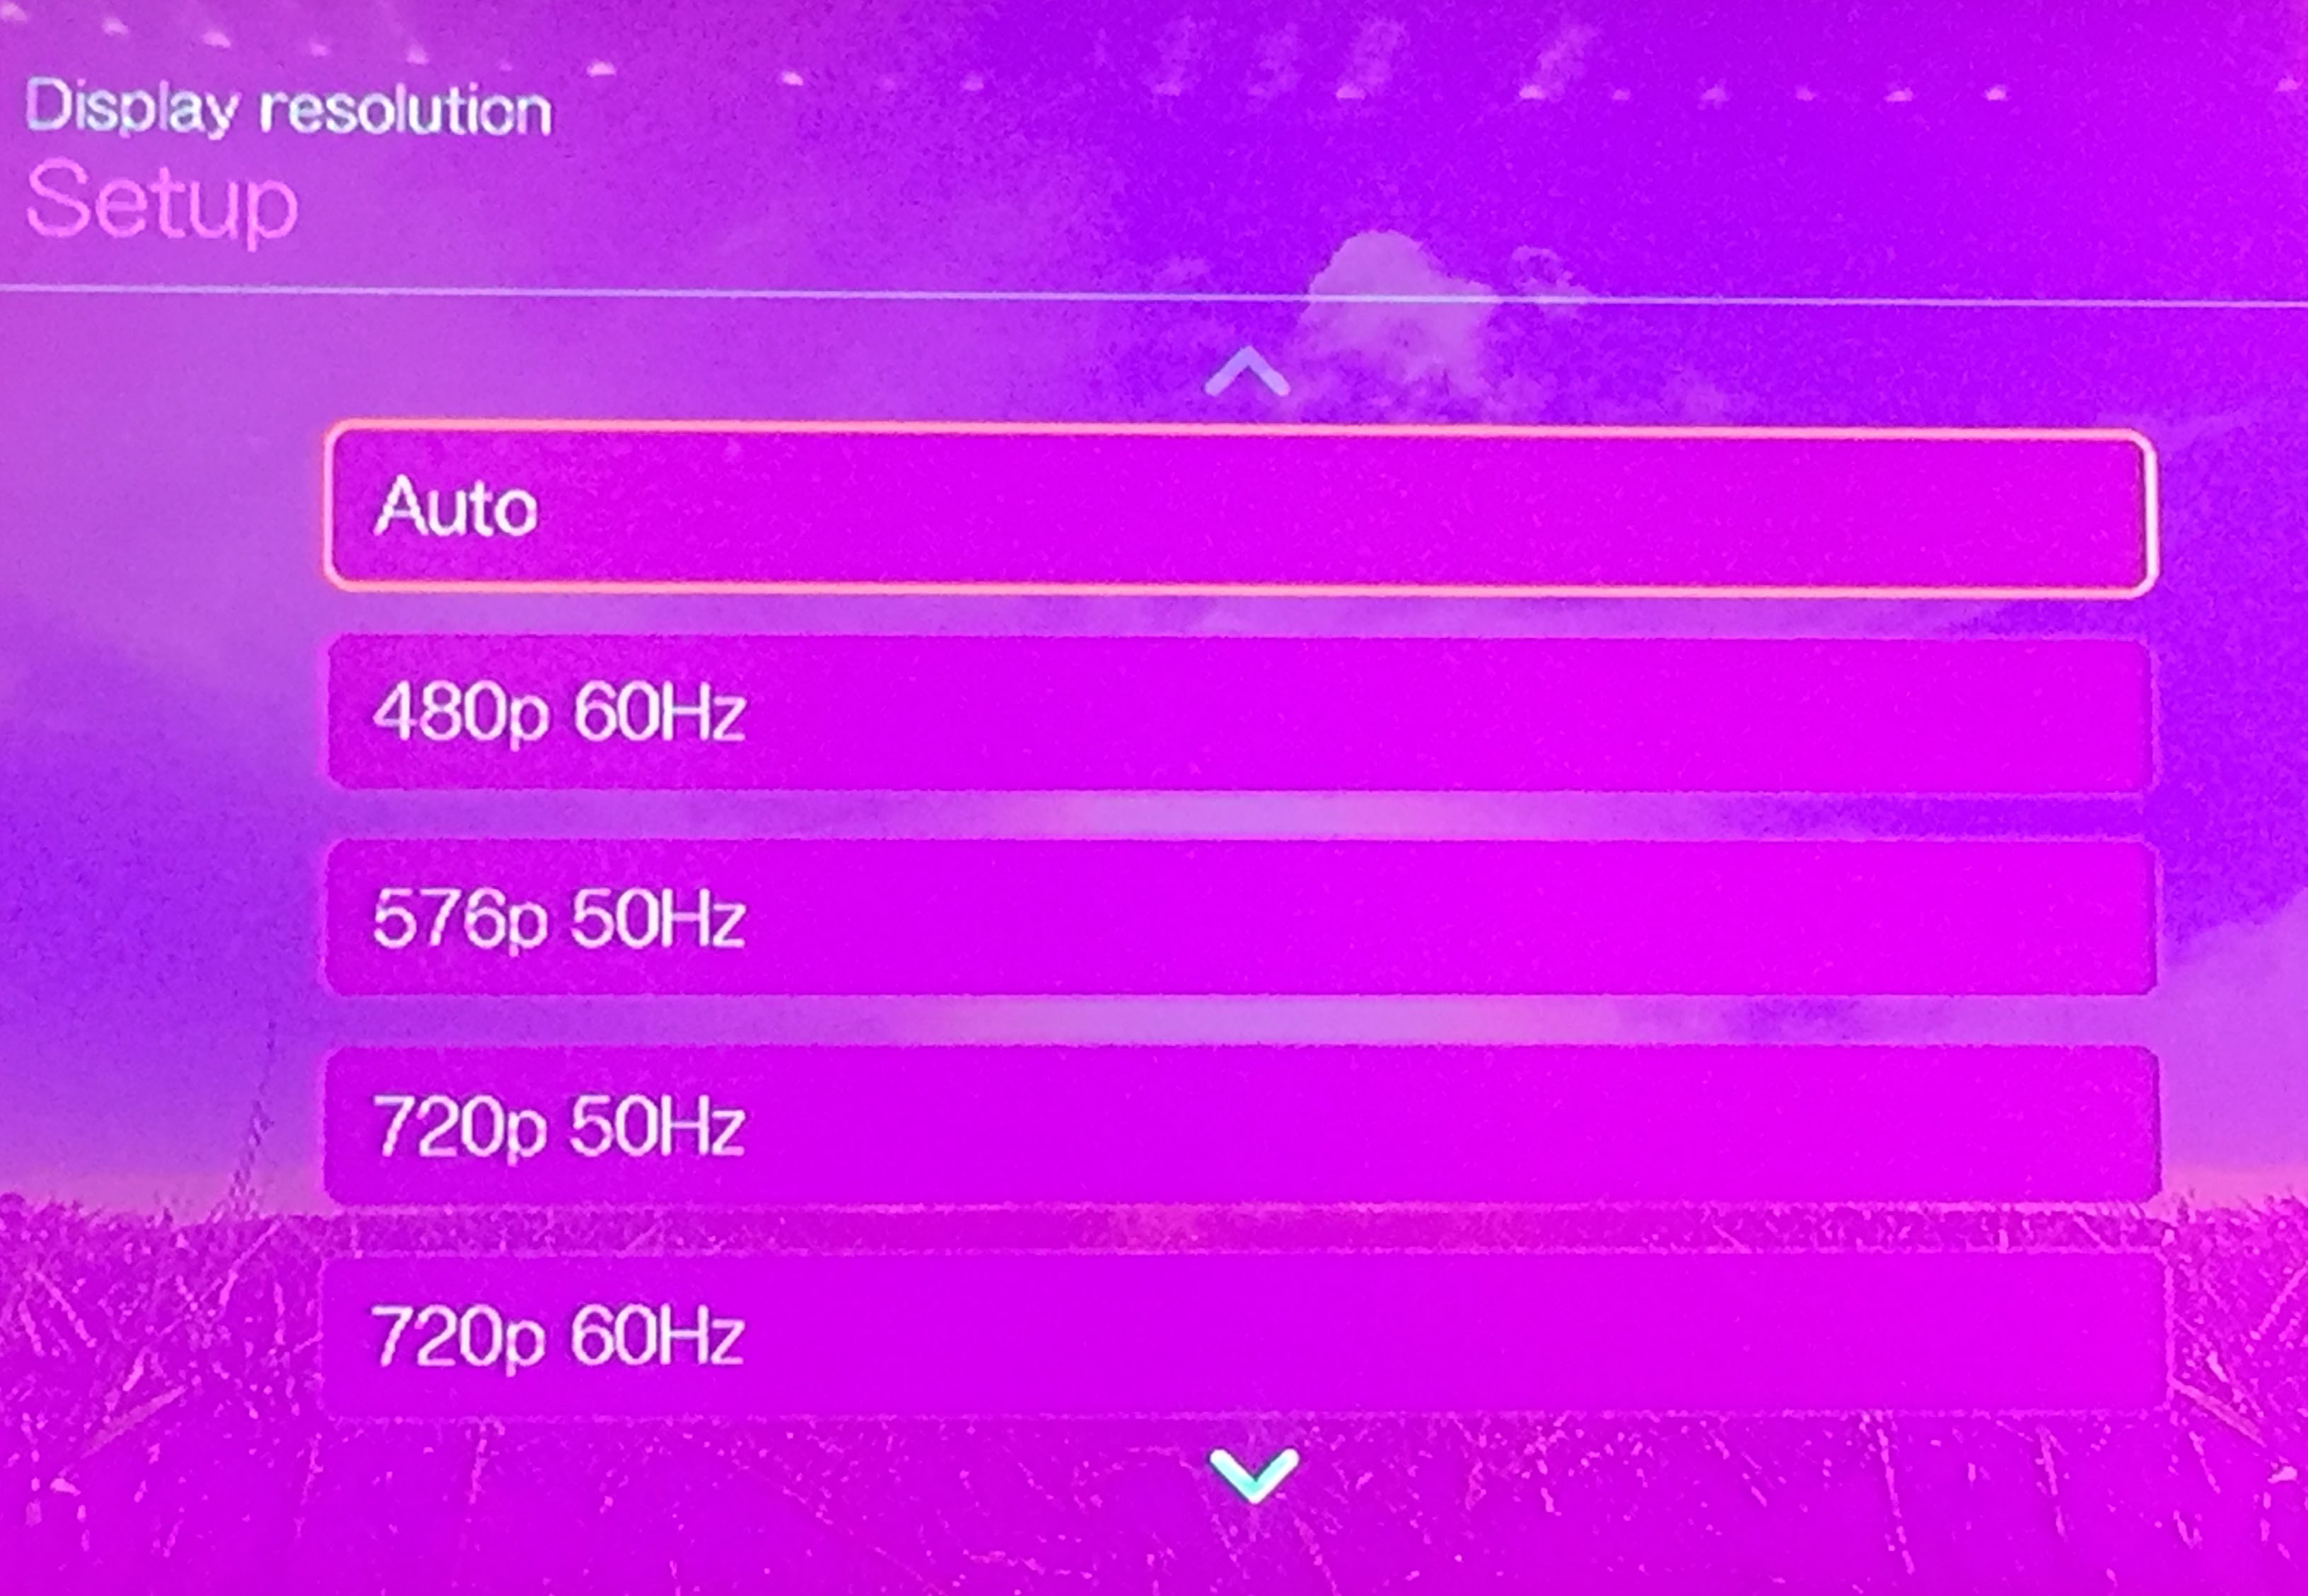 Next, choose OFF
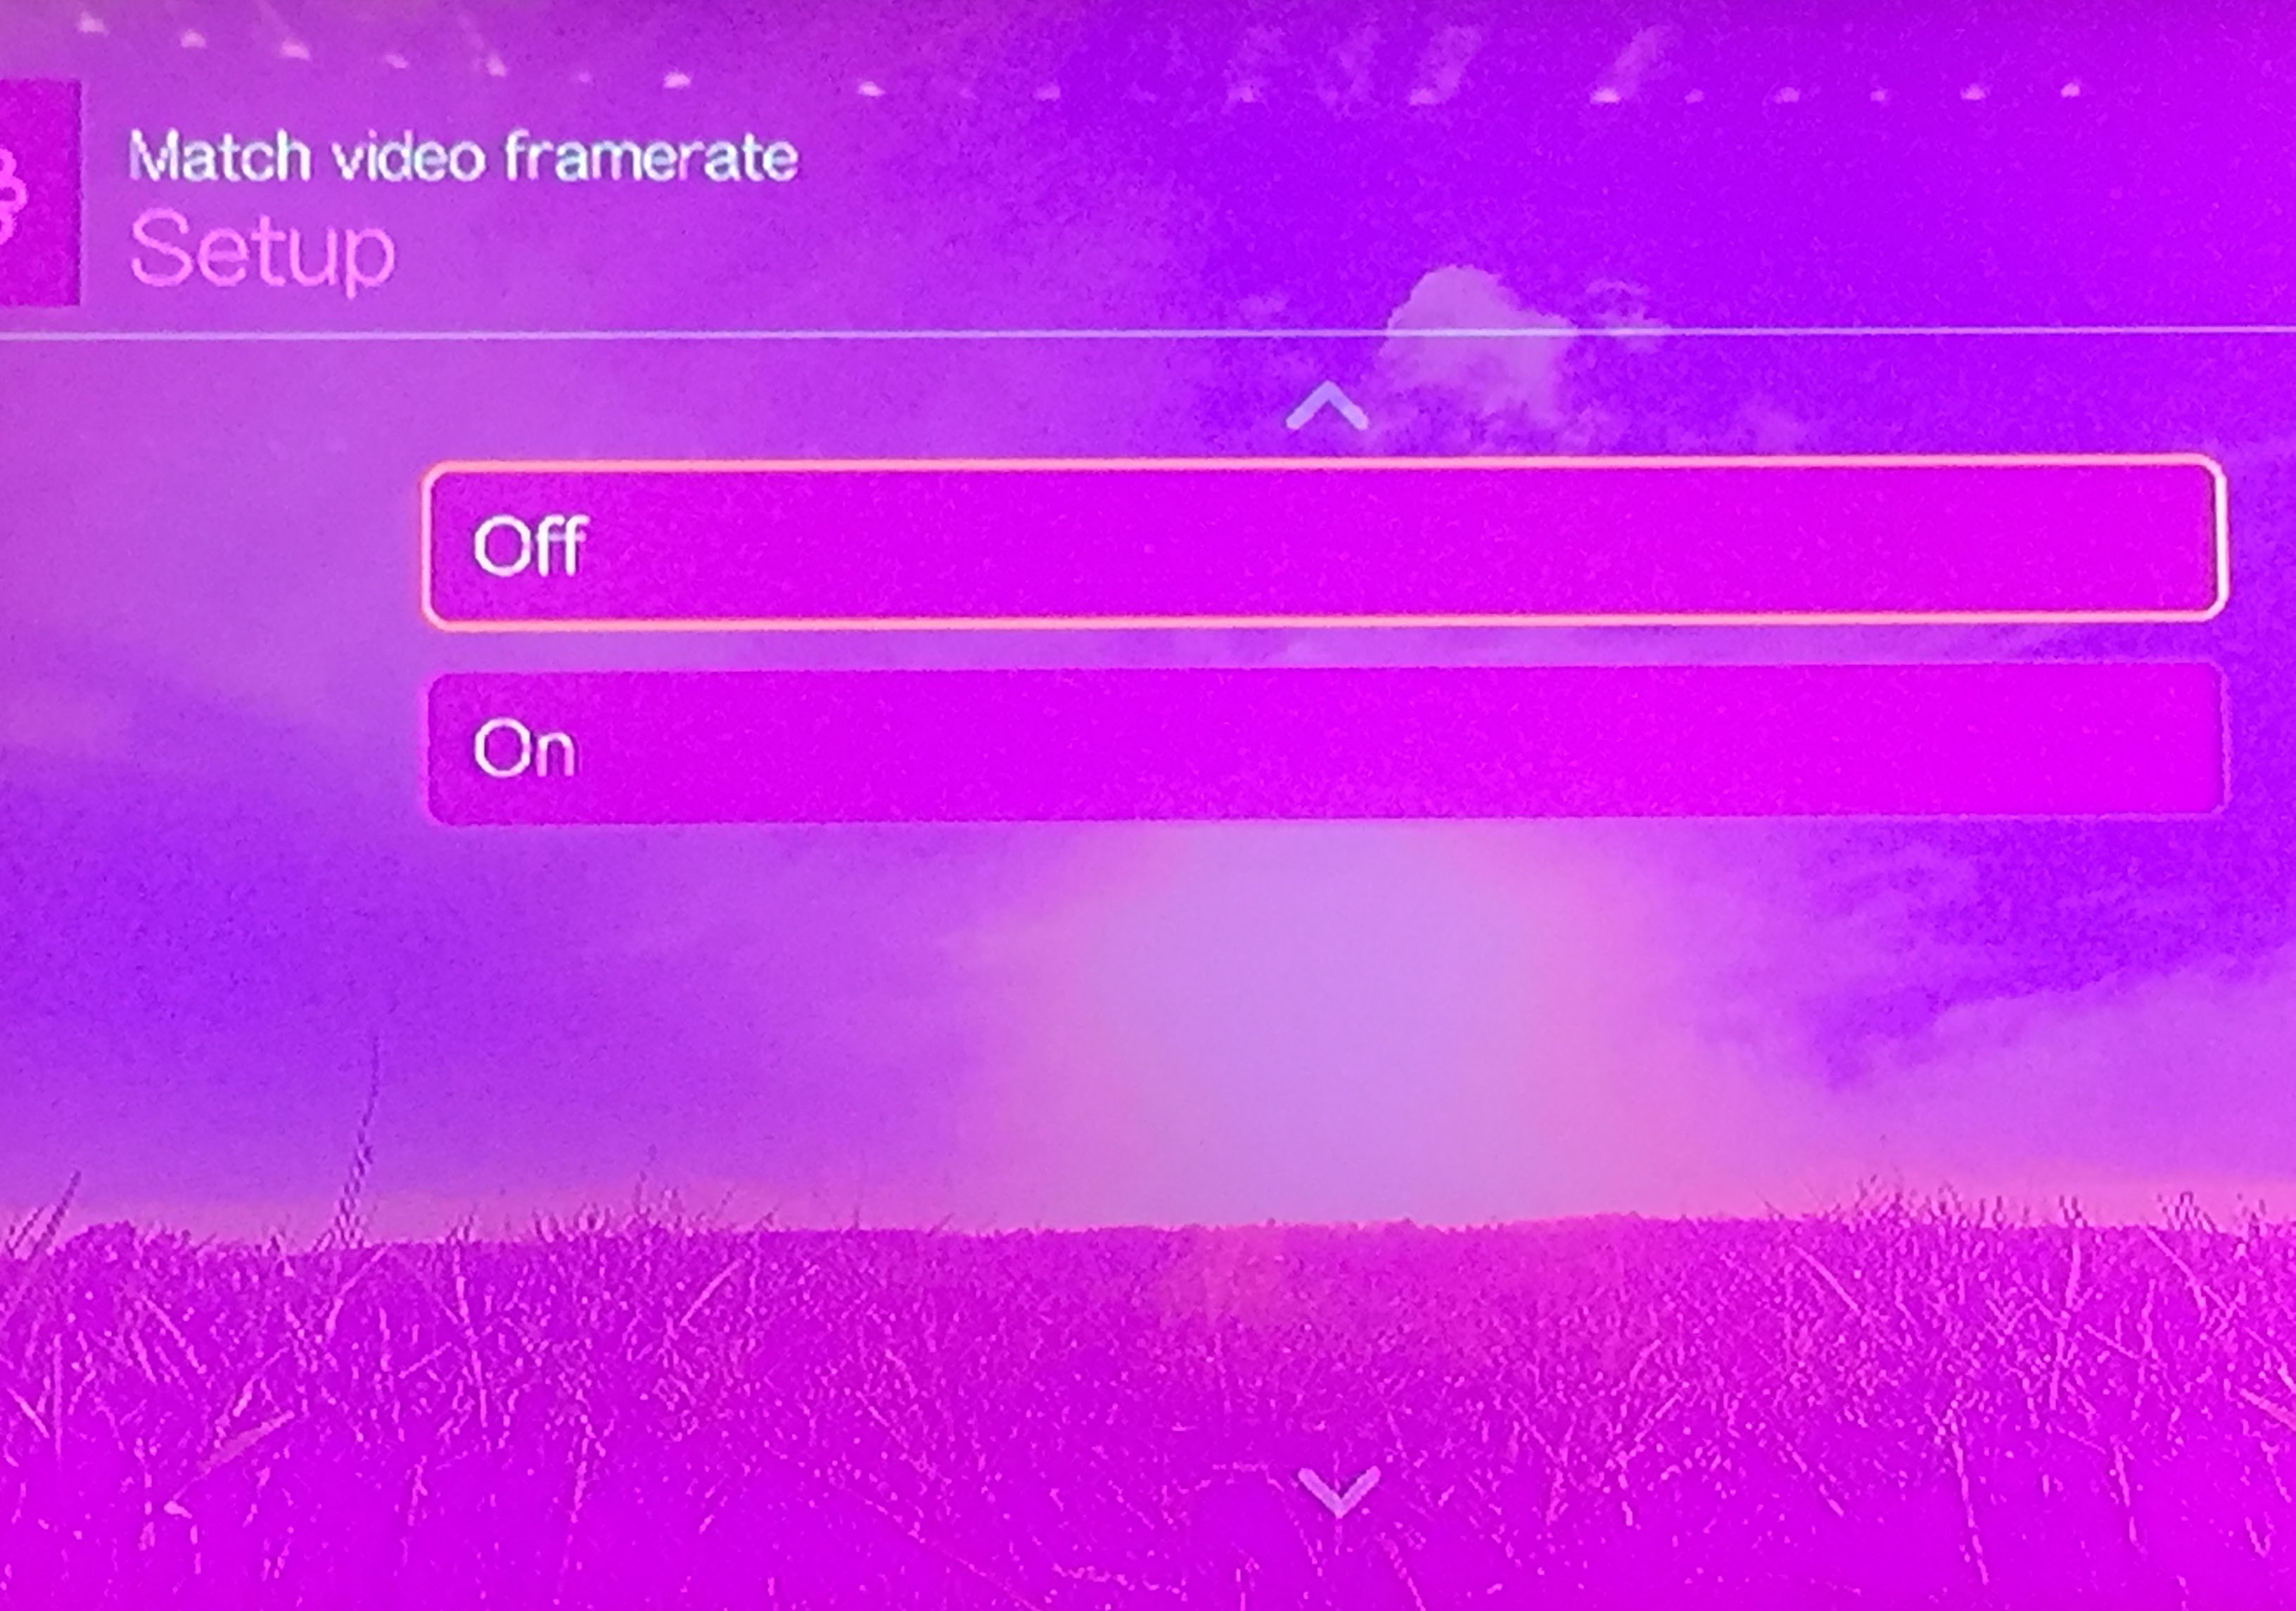 PINK BE GONE! Click OK to save the changes
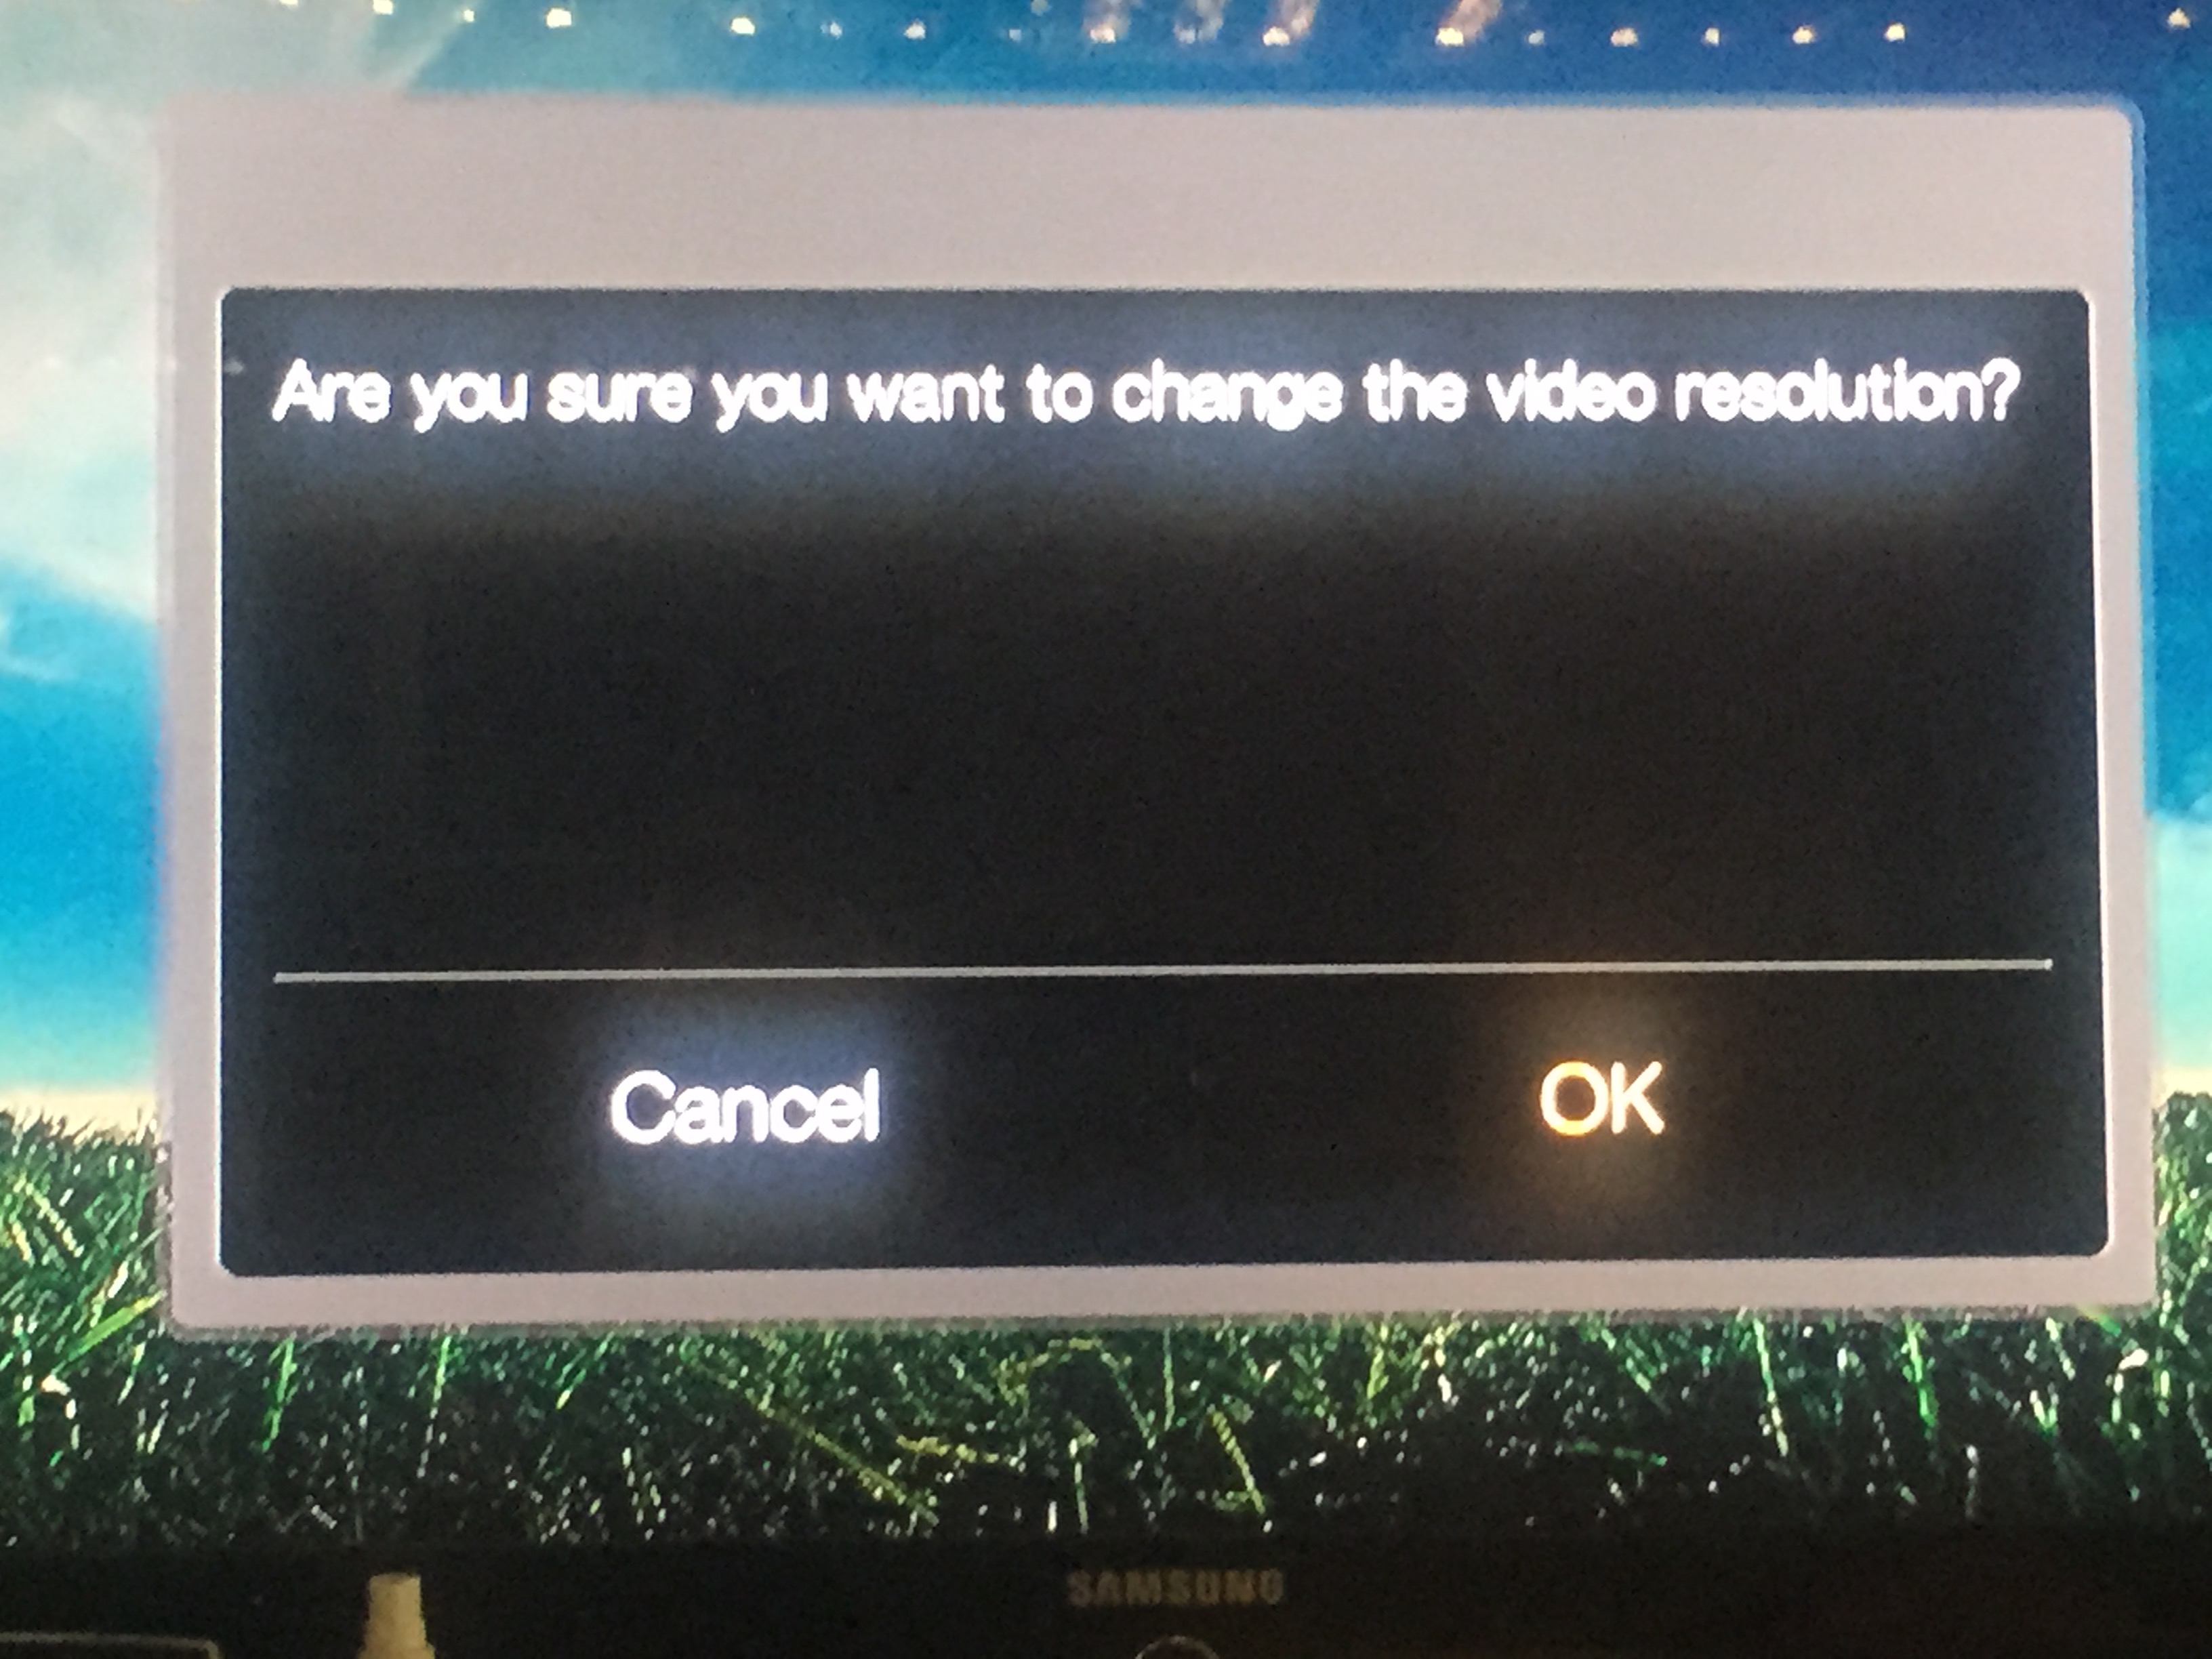 Close out of setup by pressing the Home button on your remote
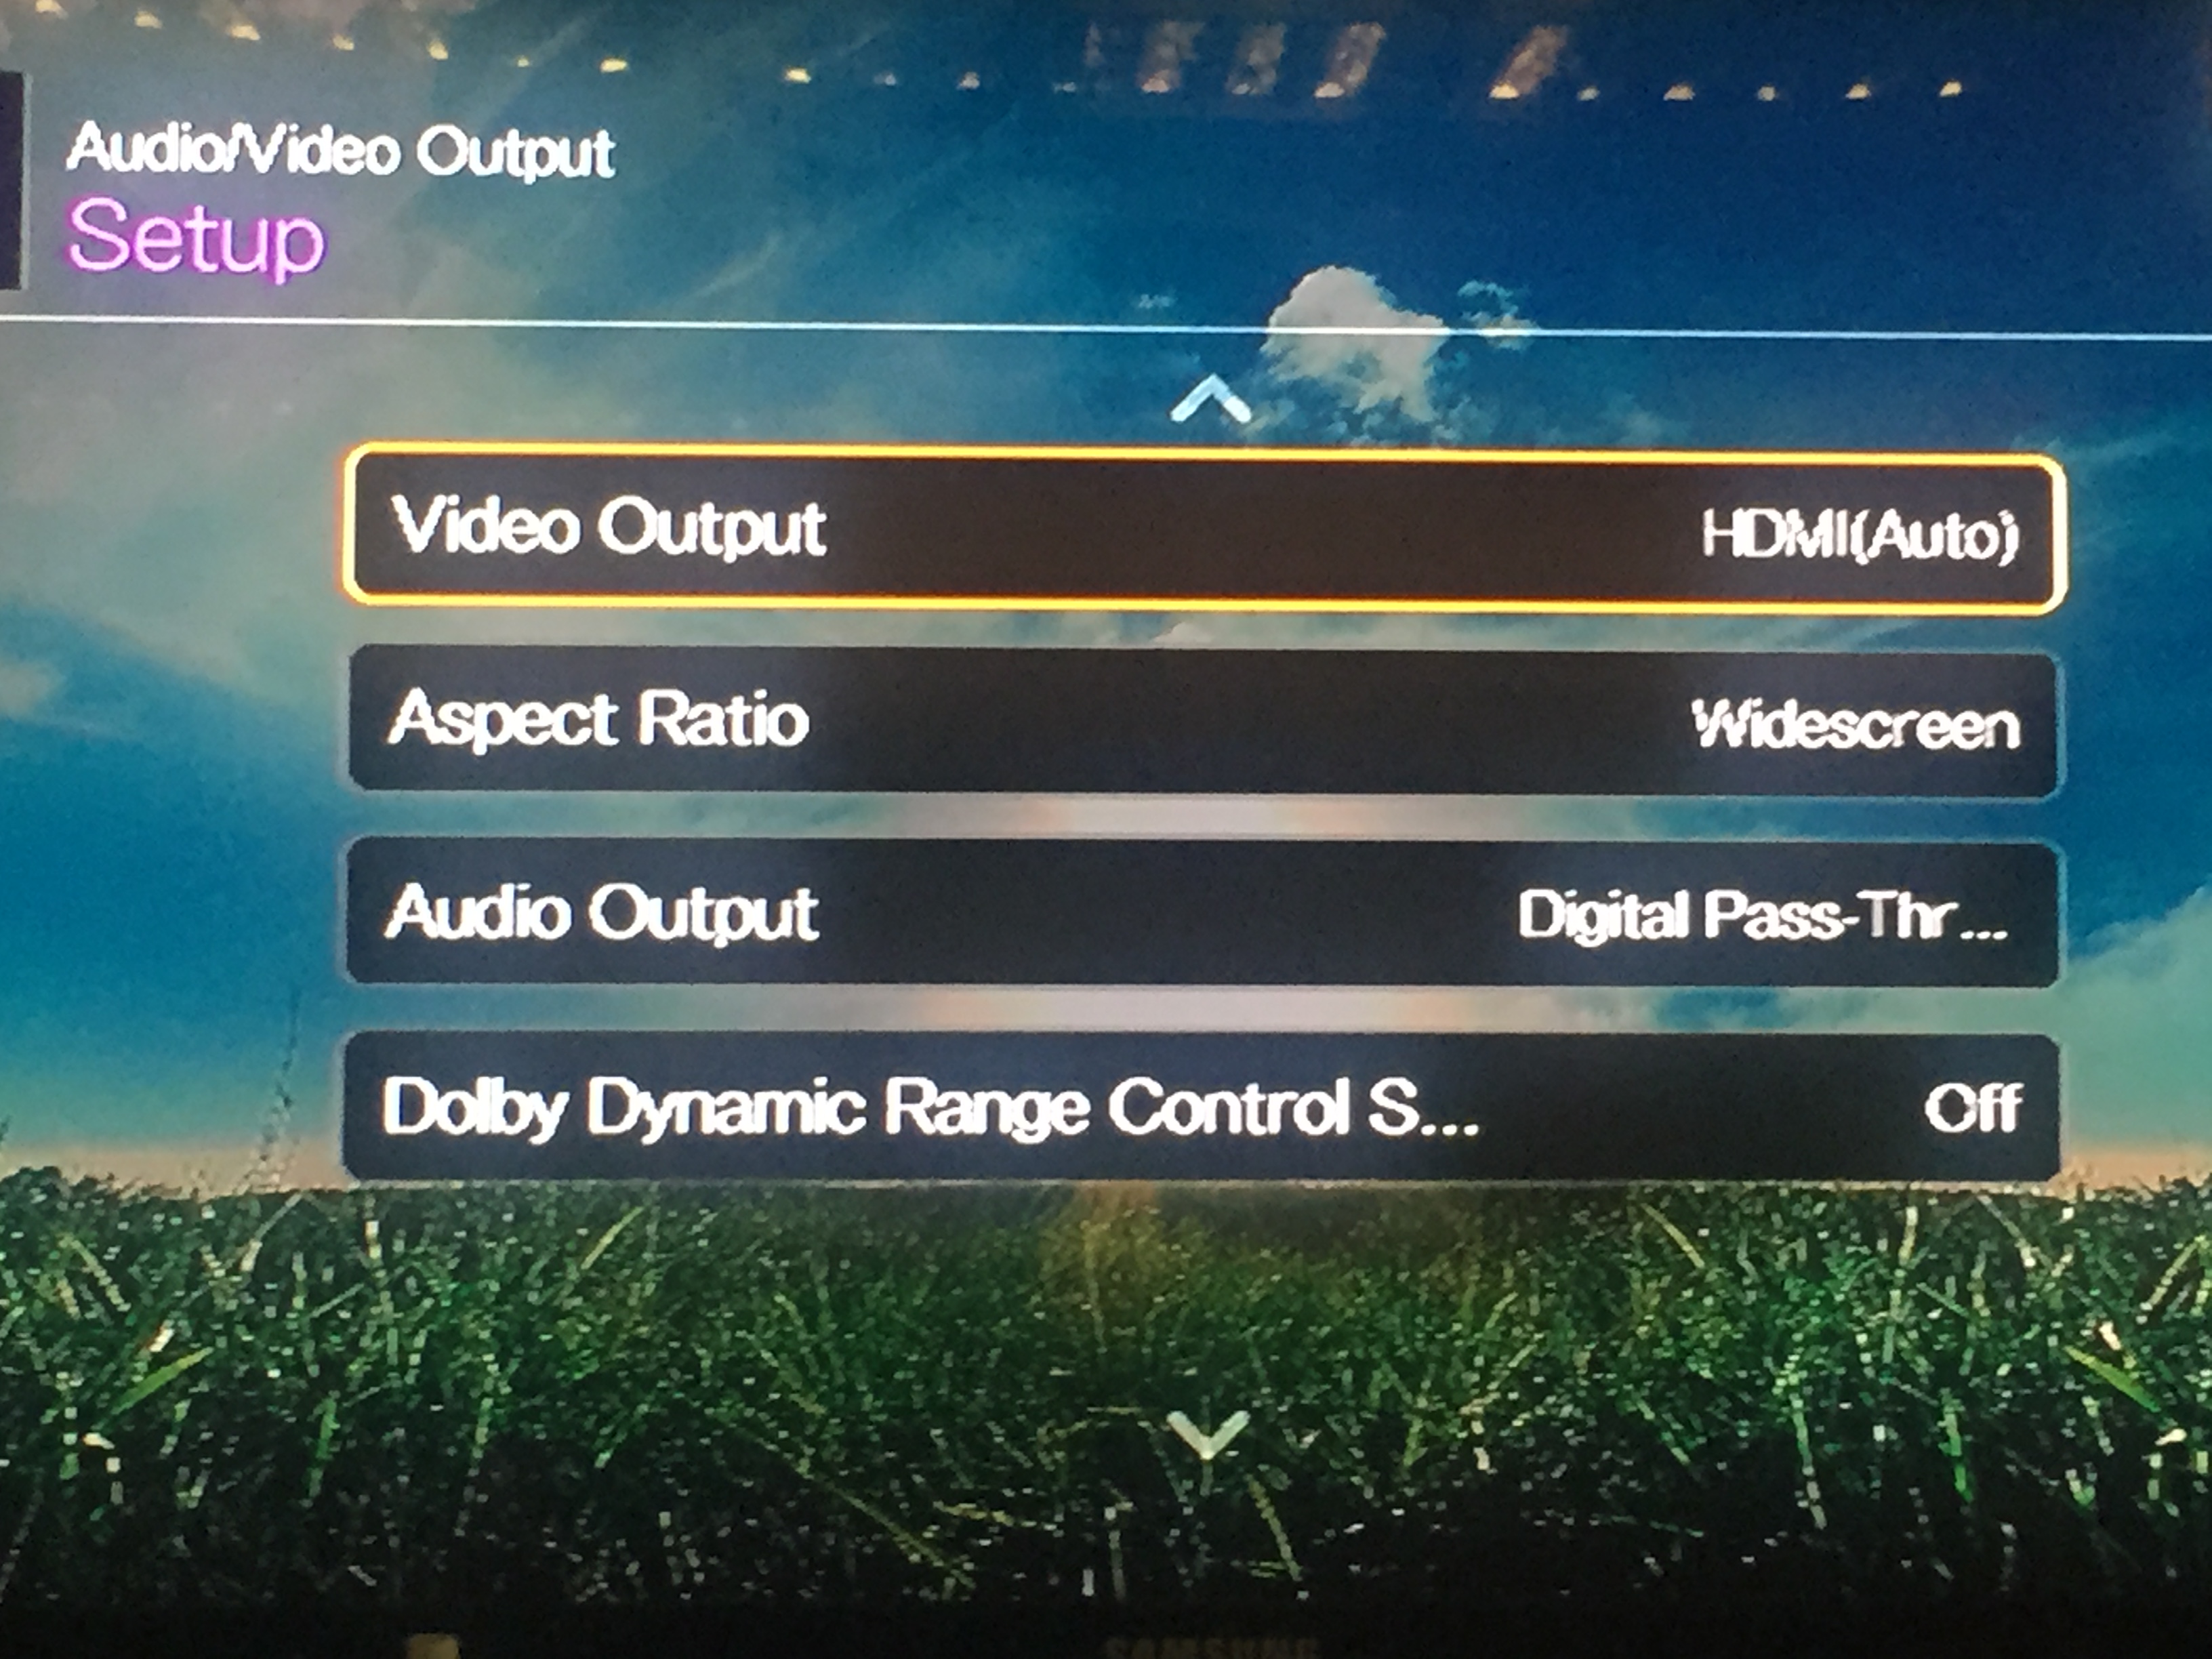 And you are now all set to go