![]()
THERE IS AN UPDATED VERSION OF THIS ARTICLE FOR FEBRUARY 2022 USING HANDBRAKE VERSION 1.5.1 HERE
This is a simple easy guide on how to make the best encodes with the smallest file size in Handbrake without having to know or understand all of the settings. Just copy my settings and you’re done!
**NOTE** – These settings are for DVD Video ONLY – You can find a Blu Ray Tutorial HERE.
Video encoding is a topic a lot of people are very passionate about. Factors like TV size, Viewing distance, hardware, drive space restrictions and a plethora of other concerns are all valid. But if you are like me, and just want to reduce your episodes to a more manageable size, whilst retaining most of the quality, here’s how to do it.
PLEASE NOTE – This method will produce very nice quality videos, that will look good on 1080p TV’s, but may take 2 hours or more to process each hour of video, so my advice is to let it run whilst you are sleeping each night.
Once you have ripped your Disks to MKV files with Make MKV, Open Handbrake (You can download the latest version for free HERE) then press the source button and select the file you want to convert, or if you want to do a batch of files, select the folder that contains all of your ripped MKV’s. Handbrake will import them all, but you will only see the first one. Now it’s time to make some adjustments to the settings.
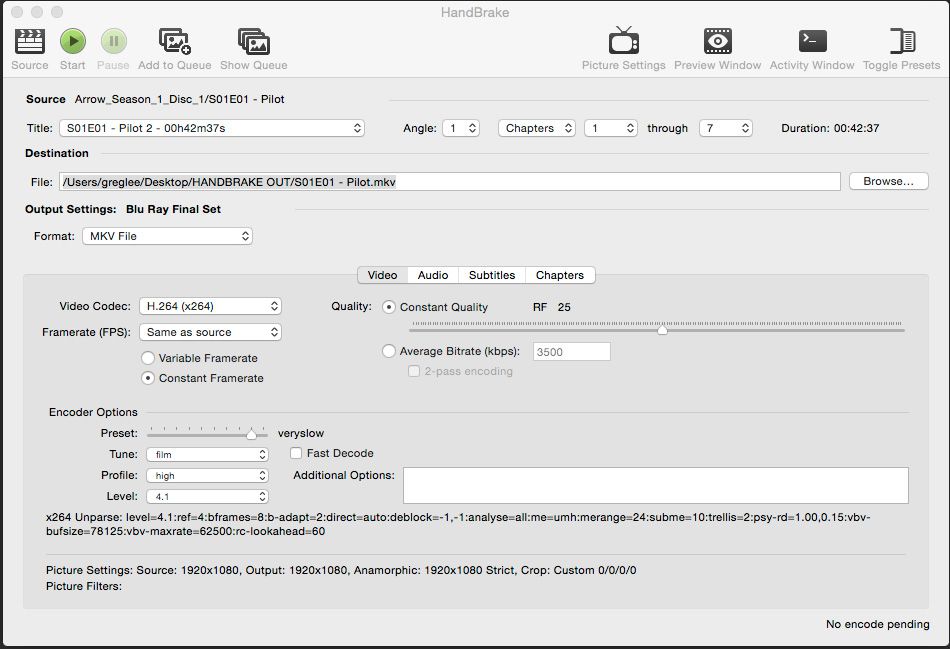
All of your settings should look like the above screen grab – Click it to enlarge.
1. Set the output format to MKV File
2. Click the button that says “Video”. Make sure the video codec is H.264 (x264)
3. The frame rate should be “Same as Source” and Constant Framerate should be selected.
4. Check Constant Quality and adjust the slider until the RF number goes to 20
5. For the encoder options, slide the preset slider to Very Slow. Trust me, it takes a while, but the quality is far superior, and usually yields a smaller file size. Unfortunately it is a trade off for speed vs quality. Like I said, run it while you are sleeping.
6. Leave “Fast Decode” unchecked.
7. Set Tune to Film
8. Set Profile to High
9. Set Level to 3.1
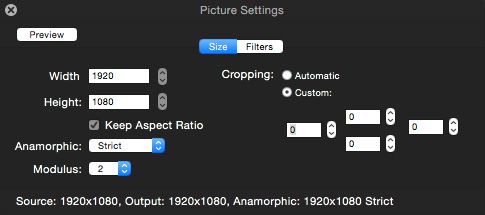
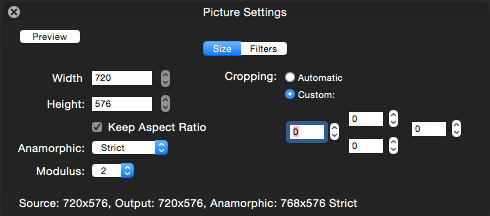
10. Now click the “Picture Settings” button in the top right side of the window.
![]() A new window will open. Change all of your settings look like this
A new window will open. Change all of your settings look like this
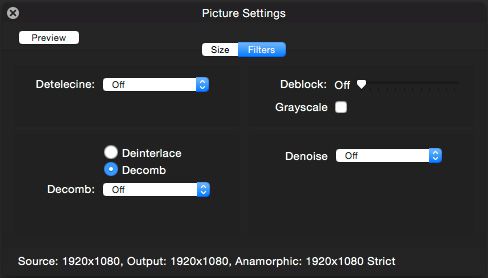
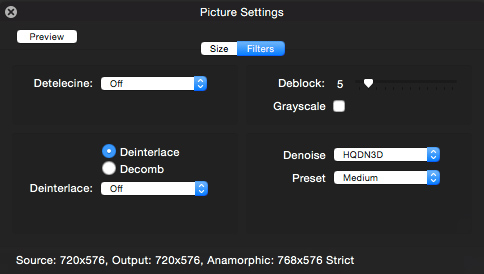
 11. Whilst in the picture settings window, click “Filters” and change all of your settings to look like these as well. Denoise and Deblock will make the picture look SO much better when viewed on larger 1080p TVs.
 **If you are in the USA you can skip this step, but for the rest of us, we need to know if our video is progressive or interlaced (the method used to draw each frame of video)**
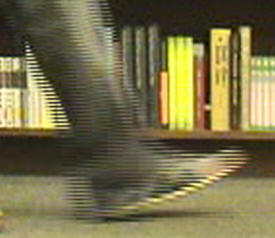
If your video is progressive, you can skip this step, but if it is interlace, you will definitely want to de-interlace the video before you watch it on a 1080 screen, otherwise you will see all kinds of ugly horizontal lines in fast moving scenes like the image below.
 (If you dont know whether your video is interlaced or progressive, Mac users can use Video Spec to find out, and Windows users can use G-Spot to find out)
If your video is interlaced, make sure “Deinterlace” is checked and select “Slower” for best results.

12. Now you can close out the Picture Settings window and select the “Audio” tab in the main window.
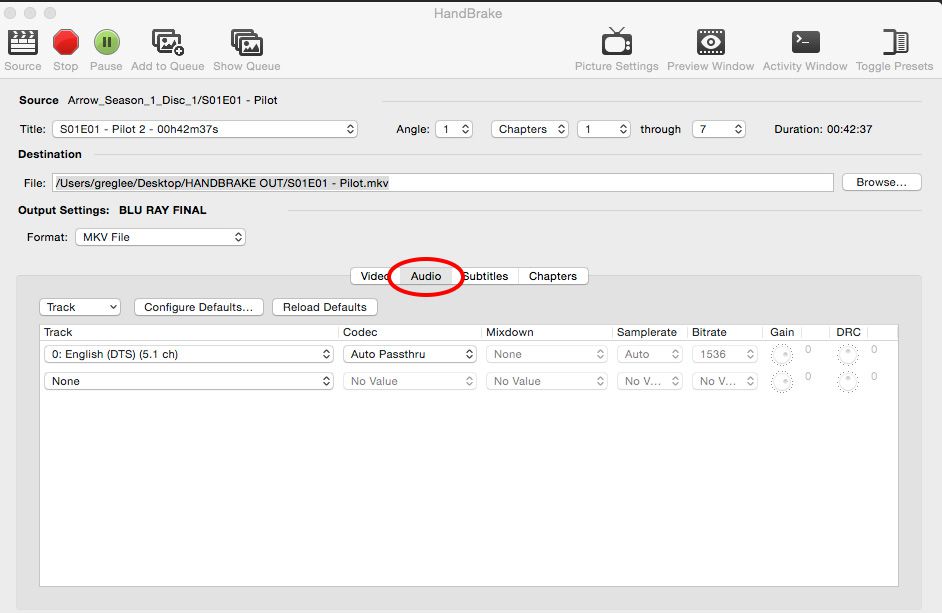 I am a real Audiofile, I love the Dolby Digital and DTS 5-7 channel audio tracks in movies, so I select “Auto PassThru”. But, if regular 2 channel Stereo is ok for you, you can configure that in this area if you want. I figure you are converting a DVD, so you might as well have the best sound quality available. Just select the Dolby Digital or DTS sound track from the drop down window, and choose “Auto Passthru”
13. Click the “Subtitles” tab and select none
14. Click the “Chapters” tab and make sure “Create Chapter Markers” is un-checked.
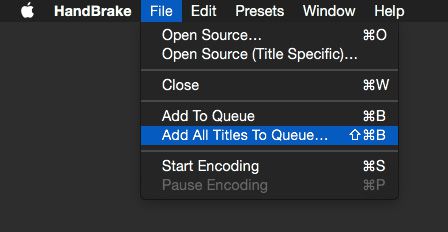
15. You are now ready to start encoding. If you are only doing one file, just press the “Start” button and Handbrake will start encoding. If you are doing a batch of files, open the File Menu and select “Add All Titles To Queue”
 16. Press the “Show Queue” button to see all your files waiting to be encoded
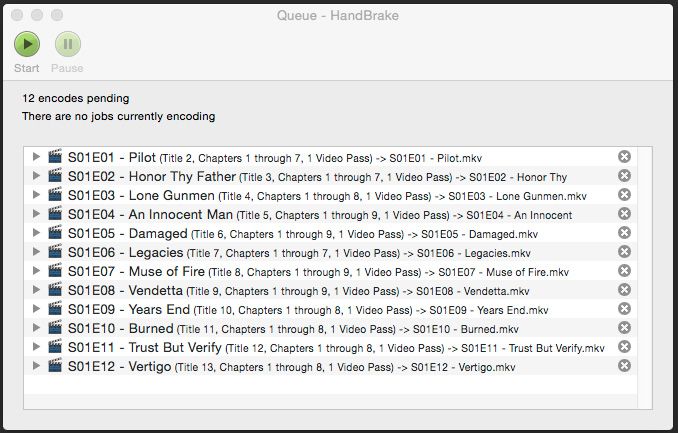 17. Press the “Start” button and your encoding session will begin.
THERE IS AN UPDATED VERSION OF THIS ARTICLE FOR FEBRUARY 2022 USING HANDBRAKE VERSION 1.5.1 HERE