THERE IS AN UPDATED VERSION OF THIS ARTICLE FOR 2023!
CLICK HERE TO BE REDIRECTED
This is a simple easy guide on how to make the best encodes with the smallest file size in Handbrake without having to know or understand all of the settings. Just copy my settings and you’re done!
**NOTE** – These settings are for Blu Ray Video ONLY – If you want to convert DVD Video see the tutorial HERE.
My Rant – (If your not interested in my rant, scroll down to where it says “Lets Get Started”)
Circa 2000 I got really pissed off at DVD’s. You start watching them, get relaxed and into the story, and when you least expect it they skip or freeze. Sometimes they even crashed completely. In my experience, the damn things were so unwatchable that I swore I would never buy another one again. Blu Ray has been around for a while now, and it started to feel like time to try again with this new technology. I did my research, and found a player that will play all regions (Regional Encoding – one of the stupidist restrictions in the history of technology), and made a somewhat hefty investment in starting a Blu Ray collection. I purchased all of the Marvel Movies, Agents Of Shield, Alcatraz, and I had been hearing a lot about Arrow, so I purchased a Season 1 and Season 2 box set for $80 AUD. I got through Episode 1 and 2 ok, but at episode 3 the old DVD issues appeared. To cut a long story short, EVERY one of the 8 discs in the set crashes about halfway through, and the last 2 episodes on each disc will not play at all. I cant believe the movie studios get away with it. Can you imagine how many bad discs there must be around the world? Again, they drive us to action that they deem illegal.
In order to watch the show I paid $80 for – I was forced to rip the discs to my hard drive. There are plenty of tutorials out there that show you how to do this, so I am not going to cover that here. Once I had ripped the episodes, each file was almost 6GB in file size. I set about trying to reduce the sizes and found thousands of different ideas and methods. It is a topic a lot of people are very passionate about. Factors like TV size, Viewing distance, hardware, drive space restrictions and a plethora of other concerns are all valid. But if you are like me, and just want to reduce your episodes to a more manageable size, whilst retaining most of the quality, here’s how to do it.
Lets Get Started
PLEASE NOTE – This method will produce very nice quality 1080p videos, but may take 2 hours or more to process each hour of video, so my advice is to let run whilst you are sleeping each night.
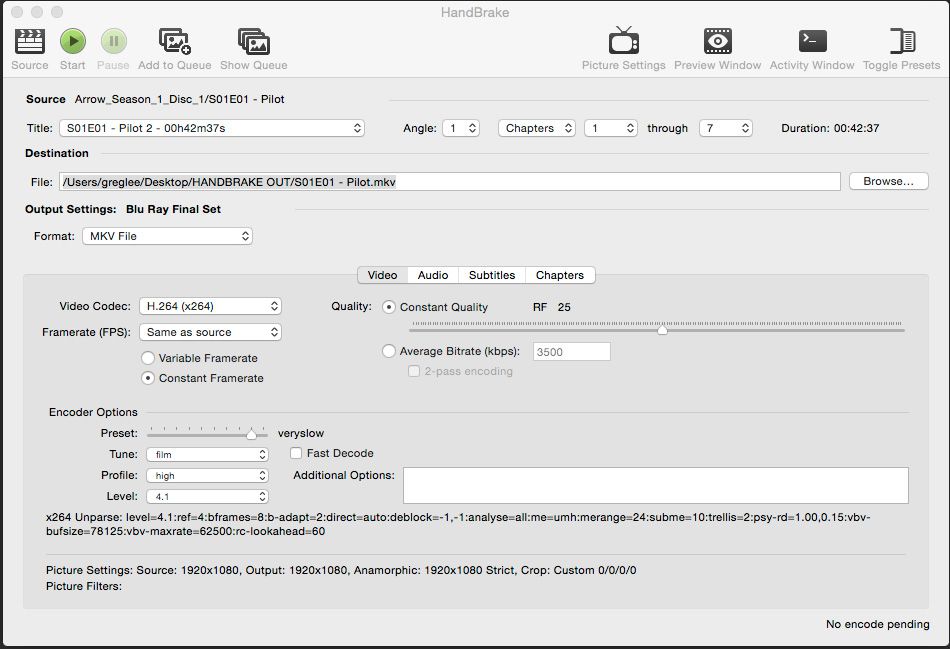
Once you have ripped your Disks to MKV files with Make MKV, Open Handbrake (You can download the latest version for free HERE) then press the source button and select the file you want to convert, or if you want to do a batch of files, select the folder that contains all of your ripped MKV’s. Handbrake will import them all, but you will only see the first one. Now it’s time to make some adjustments to the settings.
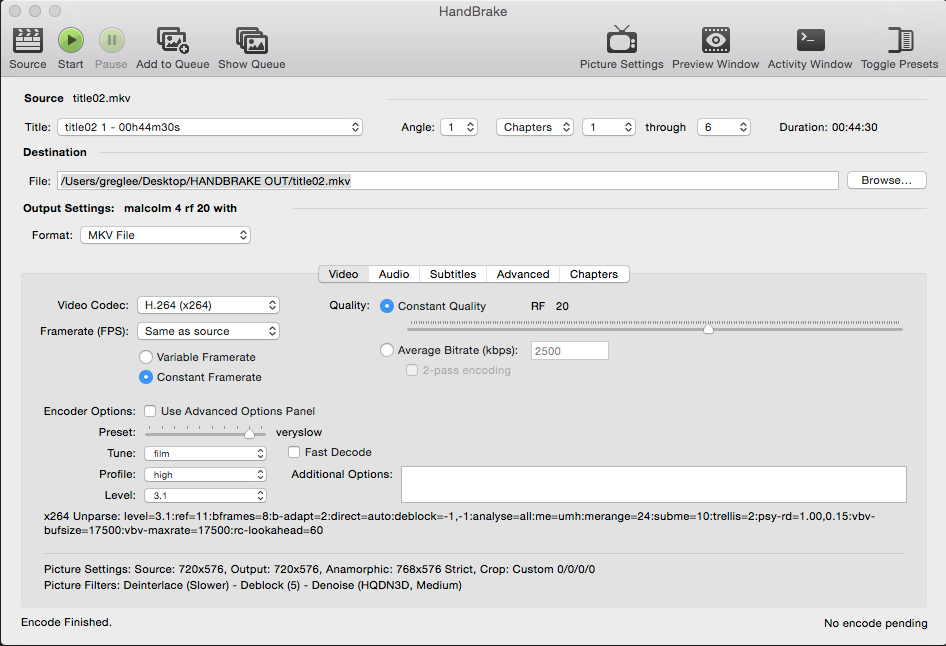
All of your settings should look like the above screen grab – Click it to enlarge.
THERE IS AN UPDATED VERSION OF THIS ARTICLE FOR 2023!
CLICK HERE TO BE REDIRECTED
1. Set the output format to MKV File
2. Click the button that says “Video”. Make sure the video codec is H.264 (x264)
3. The frame rate should be “Same as Source” and Constant Framerate should be selected.
4. Check Constant Quality and adjust the slider until the RF number goes to 25
5. For the encoder options, slide the preset slider to Very Slow. Trust me, it takes a while, but the quality is far superior, and usually yields a smaller file size. Unfortunately it is a trade off for speed vs quality. Like I said, run it while you are sleeping.
6. Leave “Fast Decode” unchecked.
7. Set Tune to Film
8. Set Profile to High
9. Set Level to 4.1
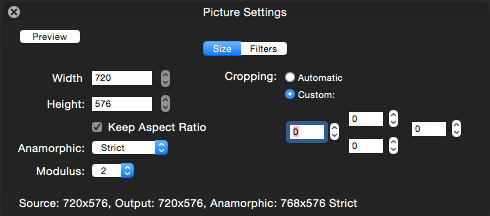
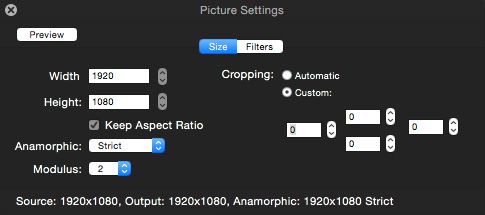
10. Now click the “Picture Settings” button in the top right side of the window.
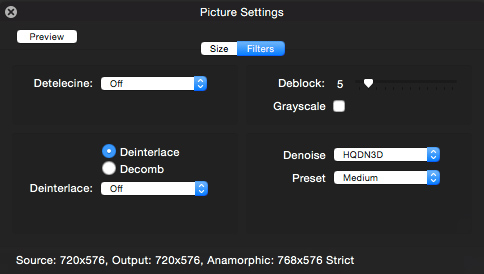
A new window will open. Change all of your settings look like this
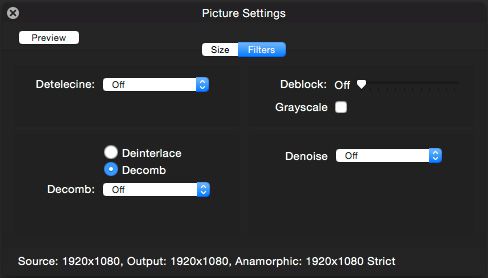
11. Whilst in the picture settings window, click “Filters” and change all of your settings to look like these as well
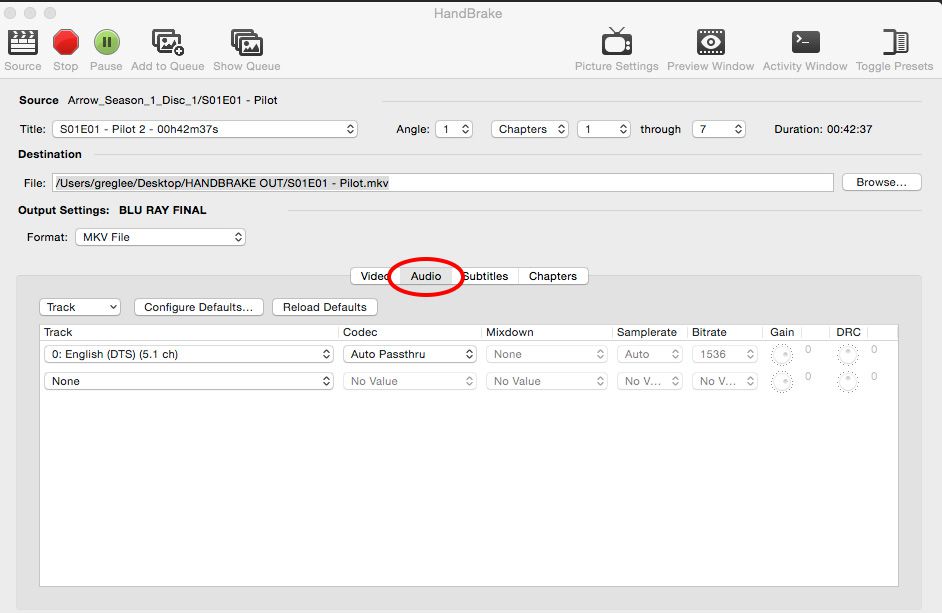
12. Now you can close out the Picture Settings window and select the “Audio” tab in the main window.
I am a real Audiofile, I love the Dolby Digital and DTS 5-7 channel audio tracks in movies, so I select “Auto PassThru”. But, if regular 2 channel Stereo is ok for you, you can configure that in this area if you want. I figure you are converting a Blu Ray, so you might as well have the best sound quality as well. Just select the Dolby Digital or DTS sound track from the drop down window, and choose “Auto Passthru”
13. Click the “Subtitles” tab and select none
14. Click the “Chapters” tab and make sure “Create Chapter Markers” is un-checked.
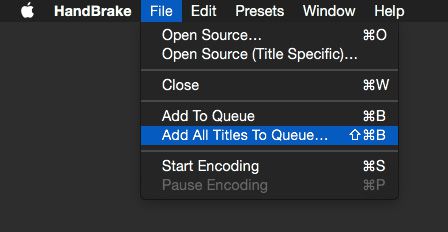
15. You are now ready to start encoding. If you are only doing one file, just press the “Start” button and Handbrake will start encoding. If you are doing a batch of files, open the File Menu and select “Add All Titles To Queue”
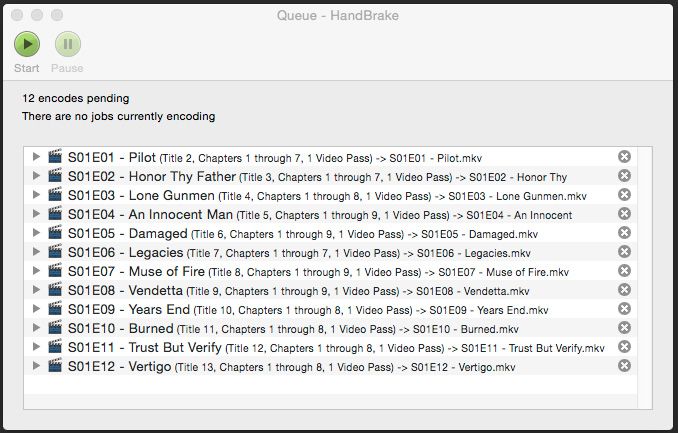
16. Press the “Show Queue” button to see all your files waiting to be encoded
17. Press the “Start” button and your encoding session will begin.
Using this method I have been able to shrink each of the episodes from about 6GB in size down to about 1.3 to 1.5GB in size, retaining the full 1080p resolution and DTS sound track. The picture quality is very nice on my 42 Inch Samsung LCD TV. I play the files off my WD TV Live Hub and connect using HDMI cables. If you have a larger TV and notice some artifacts or “Blocks” in the picture, tweak the RF number slightly to 24 or at most 23. Adjustment here affects file size and quality considerably, so tread carefully and use small increments.
THERE IS AN UPDATED VERSION OF THIS ARTICLE FOR 2023!
CLICK HERE TO BE REDIRECTED

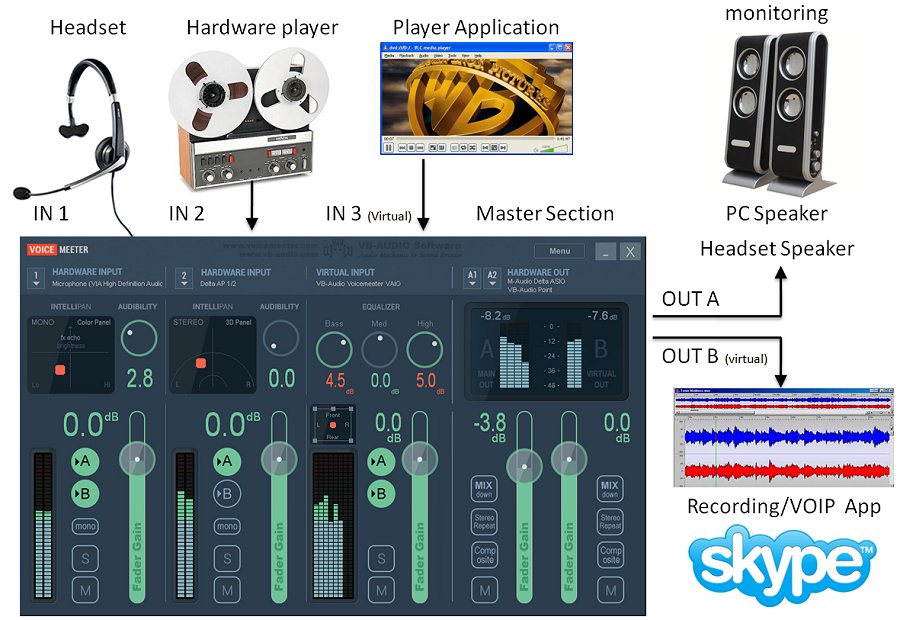
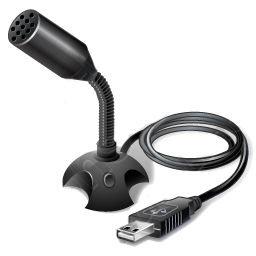 I have been reading on forums lately how some people would like to be able to run their USB Mic through their external hardware mixing desks, and it is relatively easy to do.
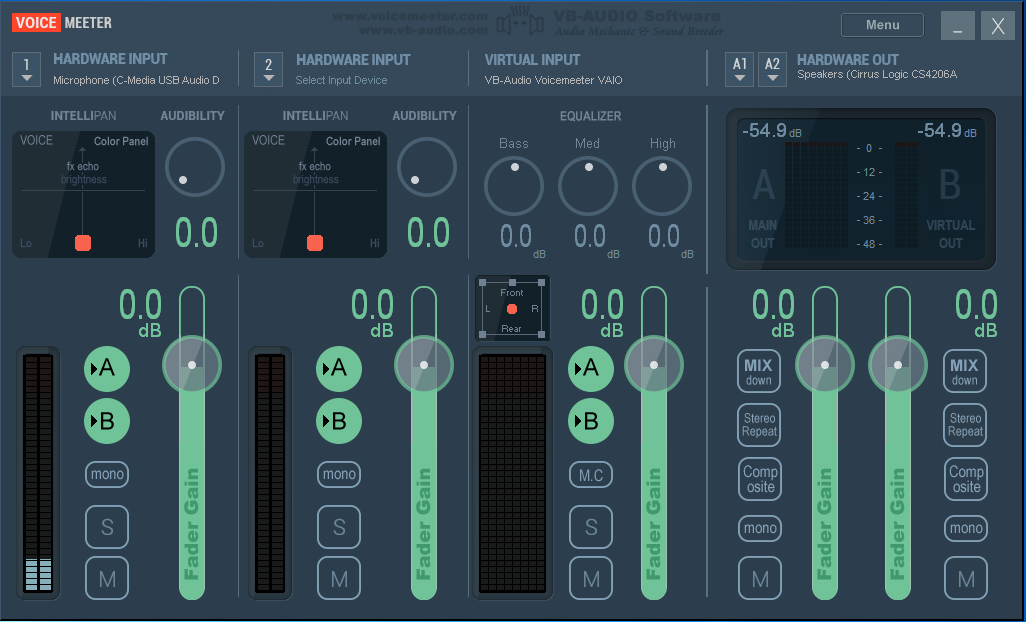
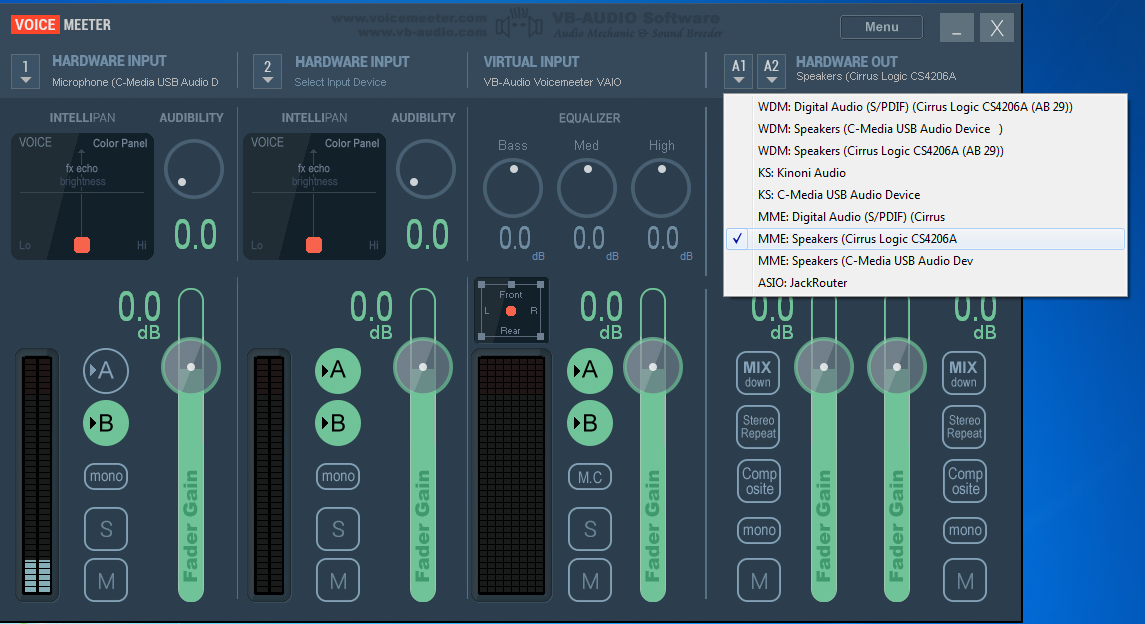
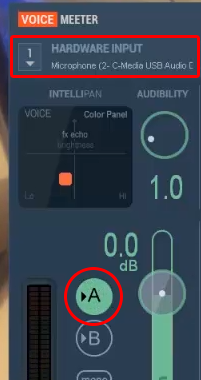 Then, select your Line Out/Headphone Out jack as the device for Voicemeeters Main Output, “A1”.
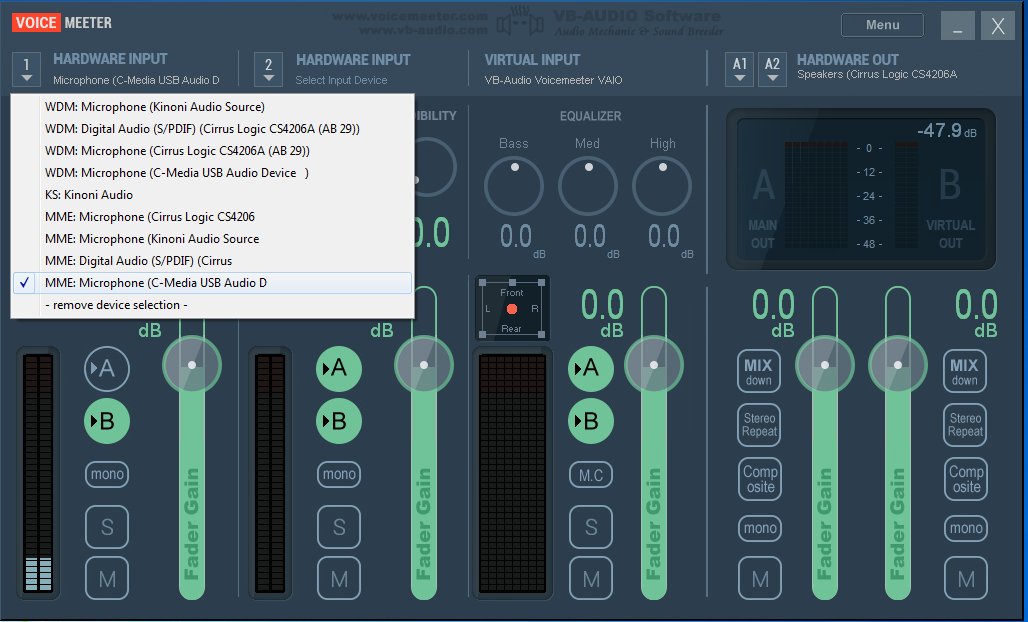
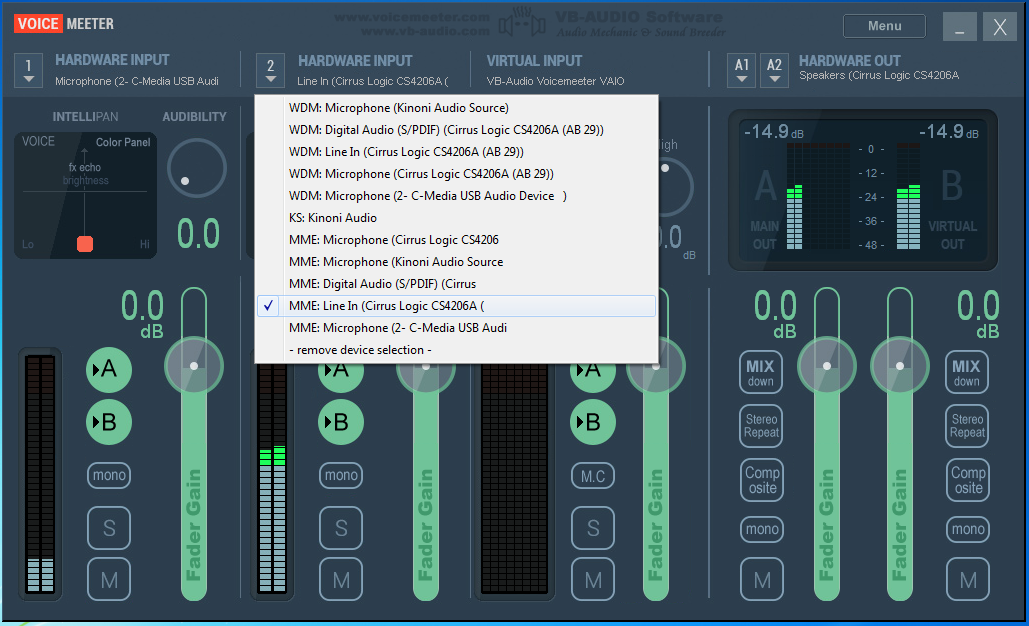
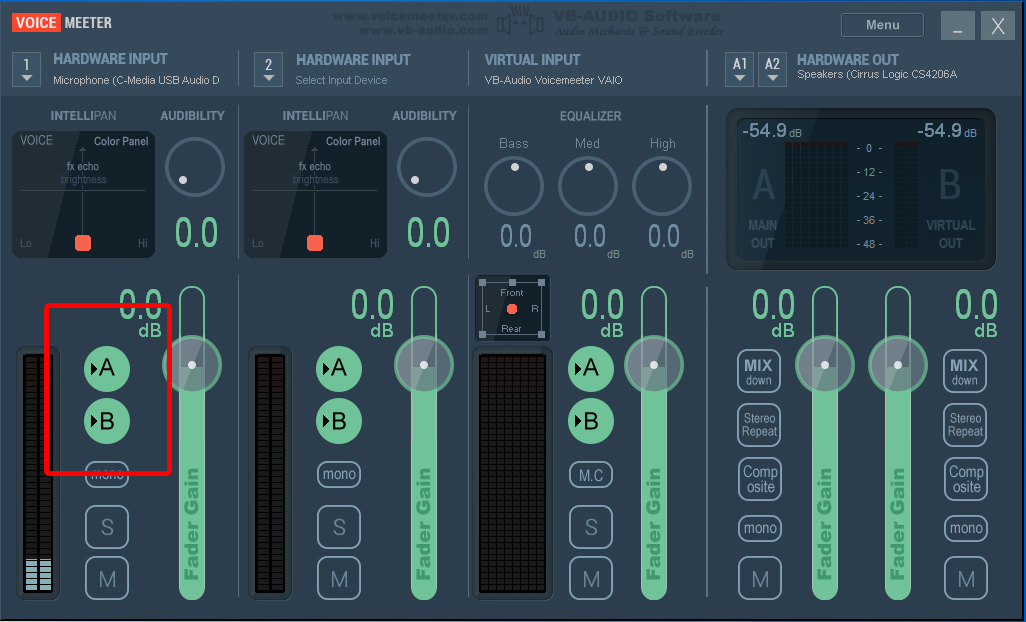
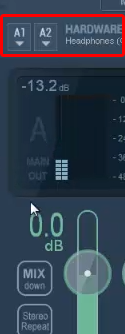 Now it is time to select your Line In/Mic in as the device for Channel 2. Make sure that “A” is not selected, and “B” is selected.
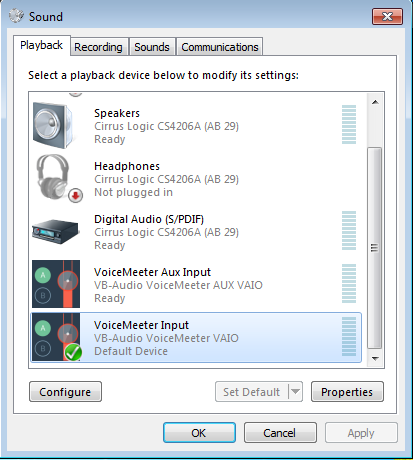
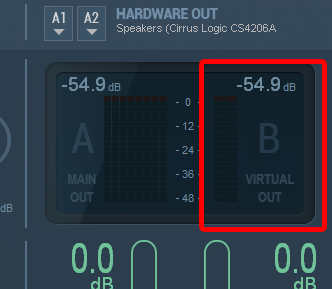
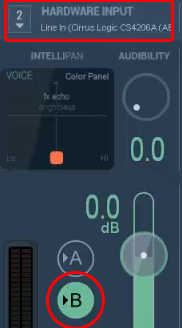 All that is left is to open up the app you want to use (eg – Skype, Vidblaster, or some other Web Cam program) and select Voicemeeter’s Virtual Device (Output “B” in Voicemeeter) as the input source audio device.
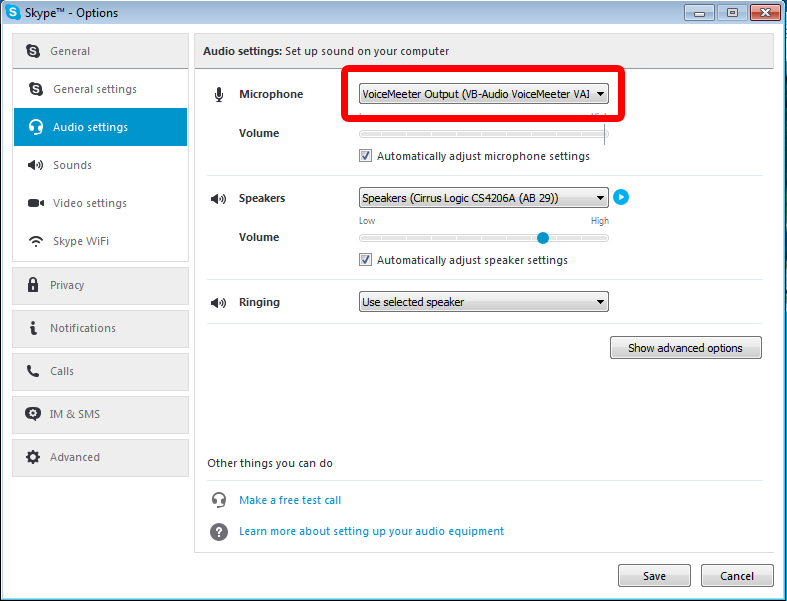 Voicemeeter can be downloaded FREE HERE at vb-audio.com. Don’t forget to make a donation – the programmer deserves a little something for a program this good!