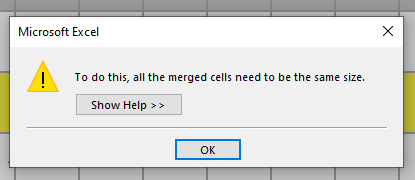
Has Microsoft Office Excel ever confronted you with the error dialogue box that says “To do this, all the merged cells need to be the same size” when you are trying to sort your columns and data? It was driving me crazy, but a little dig into the documents settings revealed the culprit. To solve it just click the little triangle in the top left hand corner of your spreadsheet once to select the whole document.
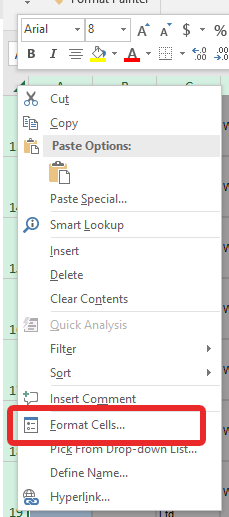
Then right click on it to reveal some options and select “Format Cells”
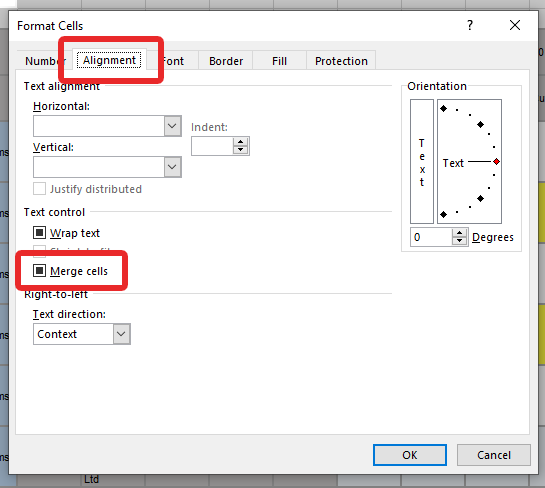
This will open another menu with six tabs. Select the “Alignment” tab. Once selected, find the “Merge Cells” option.
Once you have found it, click it a few times until the box is empty.
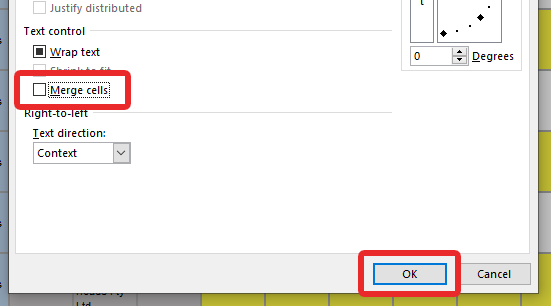
Once the check box is empty, click “OK” and you are back in the game!
This is a simple easy guide on how to make the best encodes with the smallest file size in Handbrake without having to know or understand all of the settings. Just copy my settings and you’re done!
To get started right away please scroll down to the red text that says “START HERE”.
**NOTE** – These settings are for DVD Video ONLY – You can find a updated Blu Ray Tutorial HERE.
MY RANT – By popular demand, I have decided to update my two articles on how to quickly and easily produce great quality DVD and Blu Ray video encodes with Handbrake. The program interface has changed, the H.264 codec has been refined, and the TV’s we view our movies on have evolved dramatically since writing the original articles.
THE GOAL – To produce the highest quality video with the smallest possible file size, whilst retaining the entire original 5.1 Dolby Digital sound track. DVD’s playing on todays large 4K TV’s look terrible due to their low resolution. We will also use Handbrakes filters to clean up the picture quality.
DISCLAIMER – This method will produce very nice quality DVD videos, but may take 2 hours or more to process each hour of video, so my advice is to let run whilst you are sleeping each night. Unfortunately, good quality video with small file size cant be done quickly, it just doesn’t work that way. Also, All set-ups are different. We all have different size TV’s, different size and shape rooms, different players and a plethora of other factors that could produce varying results. This is a guideline, and a great place for a beginner to start. If you feel there is something that could be done better, or should be done differently, please feel free to let us all know by leaving a comment.
THE TECHNICAL STUFF – My TV is a 65″ Samsung 4K which I absolutely love, and sit about 10-12 feet back from. I play the media from a Apple TV 4K, and use the Infuse Pro 5 player app. The video is encoded on a 3-4 year old HP desktop computer with a Intel I5 processor. The version of Handbrake used in this tutorial is v1.2.0 which is the current stable release for February 2019.
Convert BluRay to the smallest file size in Handbrake without having to know or understand all of the settings. Just copy my settings and you’re done!
H.264 Vs H.265 – Which one should I use? If you have a 4K Television and a newer media player you will want to use H.265 – See THIS ARTICLE for instructions. If you have a 1080 HD TV and an older media player H.264 is best, so use these instructions below.
*Whilst your user interface may appear slightly different than shown here (depending on if you are using Windows, Mac or Linux), the settings and results will be the same across all platforms.
**NOTE** – These settings are for 1080P BLURAY to H.264 Video ONLY Use these settings if you have a 1080 HD Television and older media player To convert 1080P BLURAY to H.265 – CLICK HERE! To convert DVD to H.265 – CLICK HERE! To convert DVD to H.264 – CLICK HERE! To convert 4K BLURAY to H.265 – CLICK HERE!
THE SHORT VERSION
1 Open source file in Handbrake and make sure you are on the “Summary” tab 2 Set file format to “MP4’ and deselect “Passthru Common Metadata” 3 Click “Dimensions” tab and set Resolution Limit to 1080p and leave Anamorphic as Automatic, leave cropping “Automatic” and borders “None” 4 Click the “Filters” tab 5 Leave Interlace Detection set to Default, De-interlace set to Decomb, and Preset at “Default” 6 Click the “Video” tab 7 Select “H.264 (x264)” from the Video Codec drop down 8 Select “Same As Source” in “Framerate” 9 Check the “Constant Framerate” button 10 Set “Encoder Preset” slider to “Very Slow” 11 Set “Encoder Tune” to “Film” 12 Set “Encoder Profile” to “High” 13 Set “Encoder Level” to “4.1” – If this wont play on your system drop it back to “3.1” 14 Set the “Constant Quality” slider to “24” 15 In the “Additional Options” box add ref=5:bframes=5 16 Click the “Audio” tab 17 Select the preferred 7.1 or 5.1 channel soundtrack 18 Set “Codec” to “AC3” and the Bitrate to 448kb 19 Set Mixdown to “5.1 Channels” and Samplerate to “48” 20 Click the “Subtitles” tab 21 Click the “X” in the circle at the right side to remove the subtitles track on Windows, or select “None” from dropdown on Mac 22 Click the “Chapters” tab 23 Uncheck the “Create Chapter Markers” option if you don’t want them or leave it checked if you do 24 Give your output file a unique name and save it somewhere easy to find 25 Make a preset to save the settings and Press the Green “Start Encode” button
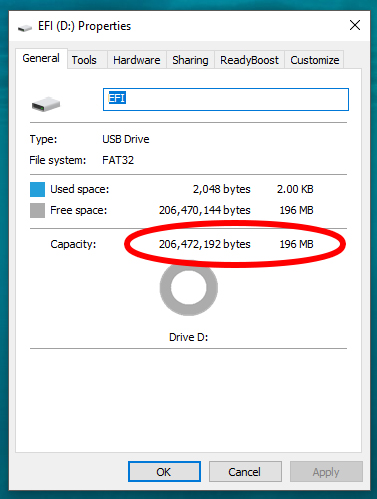
Have you ever had a large USB drive that only shows 200mb when you plug it into your Windows computer? Frustrating isn’t it!
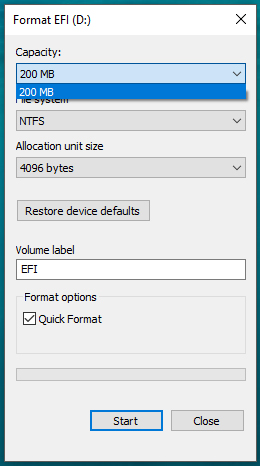
And what makes it worse is that nothing you try in the “Format” utility will change it – it always says 200mb in the capacity drop down.
The reason this happens is that in some stage in the USB Drive’s life it has been plugged into a Mac, and it has done “Mac Things” to the drive. Thankfully, there is an easy way to fix it.
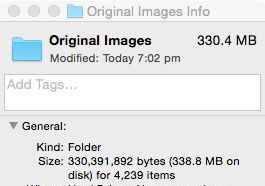
The Webernets has been running a bit slow lately, so I started looking at ways to speed things up. I stumbled on an article on WPMUDEV titled “How To Massively Reduce Your Images For A Faster WordPress Site“, and I thought I would put it to the test. I downloaded my entire images folder from my server, and here are the beginning stats.
As I am using a Mac, I downloaded the free app recommended in the article called ImageOptim (The article recommended Caesium as a free alternative for Windows users). I was impressed to read on the download page that “ImageOptim is lossless — it compresses image files without changing pixels.”
Opening the program shows a pretty familiar looking window.
I dropped the whole folder in using the default settings and away it went. It took about 50 minutes, and here is the summary it displayed when finished.
And this is the specs on the folder from the finder.
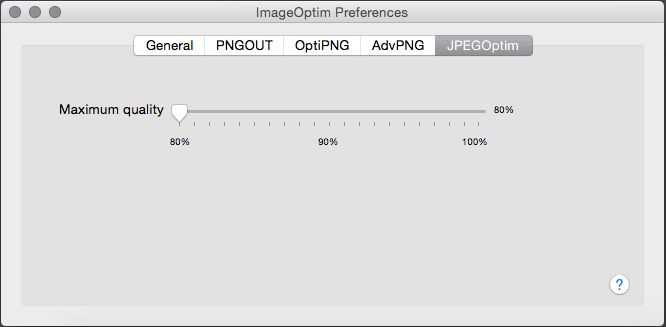
63.9 MB saving is nothing to sneeze at, but I was interested to see if I could push it any further. In the settings, I found a “Quality” slider for Jpegs. By default, it is set to 100% hence the claim to lossless, So sliding it down to 80% will obviously reduce the quality and void the lossless claim, but is the trade off for file size justifiable?
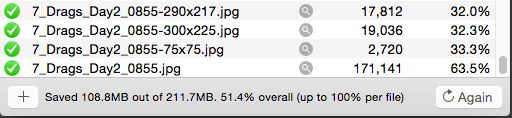
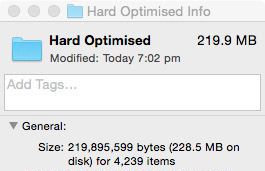
With the Jpeg Quality Slider set to 80, I ran the program again on a copy of the original folder I made before the first optimization run. It took about 60 minutes this time, and here is the summary from the window footer
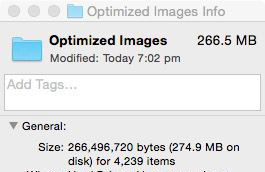
And here is how the Finder views the folder
110.5 MB Saving on a 330.4 MB original file size is impressive. That’s 1/3! I went through a number of files to check the quality, and even though there is a slight difference if you look hard, for the most part the quality is good.
This is a simple easy guide on how to make the best encodes with the smallest file size in Handbrake without having to know or understand all of the settings. Just copy my settings and you’re done!
**NOTE** – These settings are for DVD Video ONLY – You can find a Blu Ray Tutorial HERE.
Video encoding is a topic a lot of people are very passionate about. Factors like TV size, Viewing distance, hardware, drive space restrictions and a plethora of other concerns are all valid. But if you are like me, and just want to reduce your episodes to a more manageable size, whilst retaining most of the quality, here’s how to do it.
PLEASE NOTE – This method will produce very nice quality videos, that will look good on 1080p TV’s, but may take 2 hours or more to process each hour of video, so my advice is to let it run whilst you are sleeping each night.
Once you have ripped your Disks to MKV files with Make MKV, Open Handbrake (You can download the latest version for free HERE) then press the source button and select the file you want to convert, or if you want to do a batch of files, select the folder that contains all of your ripped MKV’s. Handbrake will import them all, but you will only see the first one. Now it’s time to make some adjustments to the settings.
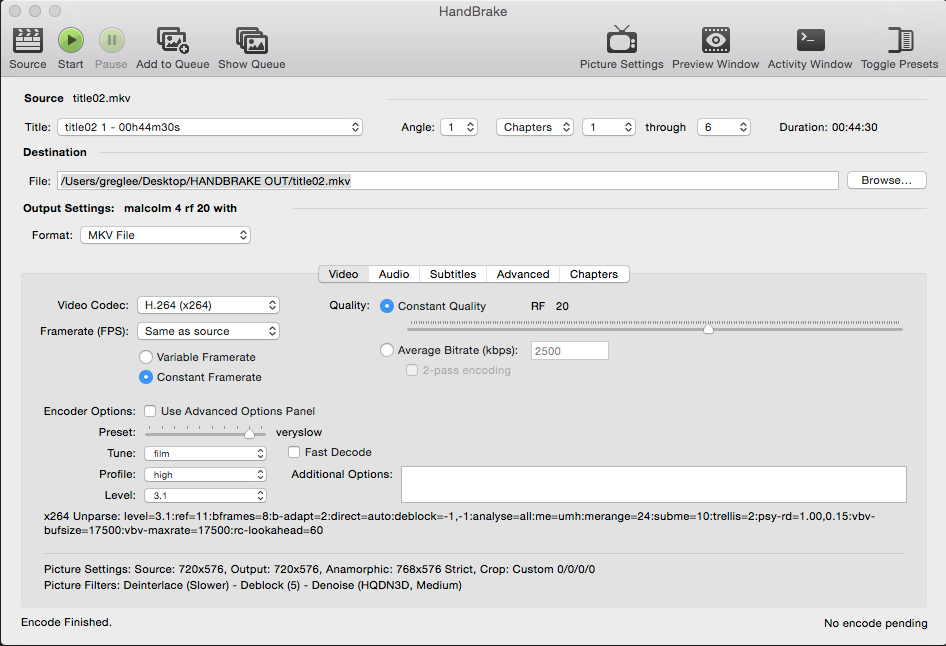
All of your settings should look like the above screen grab – Click it to enlarge.
1. Set the output format to MKV File
2. Click the button that says “Video”. Make sure the video codec is H.264 (x264)
3. The frame rate should be “Same as Source” and Constant Framerate should be selected.
4. Check Constant Quality and adjust the slider until the RF number goes to 20
5. For the encoder options, slide the preset slider to Very Slow. Trust me, it takes a while, but the quality is far superior, and usually yields a smaller file size. Unfortunately it is a trade off for speed vs quality. Like I said, run it while you are sleeping.
6. Leave “Fast Decode” unchecked.
7. Set Tune to Film
8. Set Profile to High
9. Set Level to 3.1
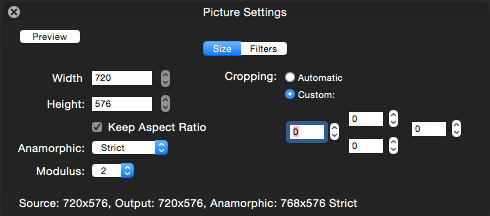
10. Now click the “Picture Settings” button in the top right side of the window.
A new window will open. Change all of your settings look like this
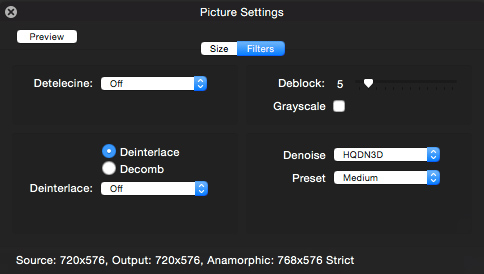
11. Whilst in the picture settings window, click “Filters” and change all of your settings to look like these as well. Denoise and Deblock will make the picture look SO much better when viewed on larger 1080p TVs.
**If you are in the USA you can skip this step, but for the rest of us, we need to know if our video is progressive or interlaced (the method used to draw each frame of video)**
If your video is progressive, you can skip this step, but if it is interlace, you will definitely want to de-interlace the video before you watch it on a 1080 screen, otherwise you will see all kinds of ugly horizontal lines in fast moving scenes like the image below.
(If you dont know whether your video is interlaced or progressive, Mac users can use Video Spec to find out, and Windows users can use G-Spot to find out)
If your video is interlaced, make sure “Deinterlace” is checked and select “Slower” for best results.
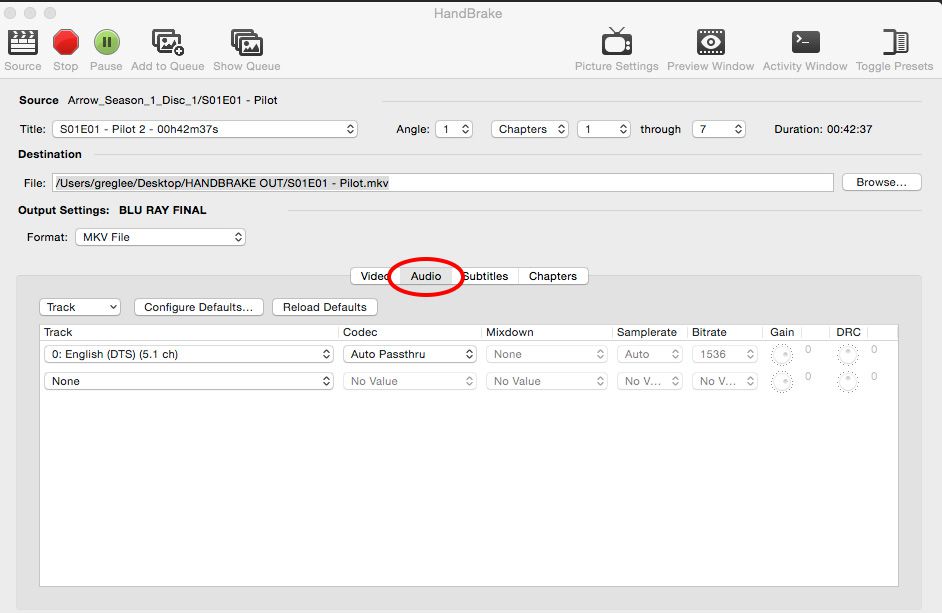
12. Now you can close out the Picture Settings window and select the “Audio” tab in the main window.
I am a real Audiofile, I love the Dolby Digital and DTS 5-7 channel audio tracks in movies, so I select “Auto PassThru”. But, if regular 2 channel Stereo is ok for you, you can configure that in this area if you want. I figure you are converting a DVD, so you might as well have the best sound quality available. Just select the Dolby Digital or DTS sound track from the drop down window, and choose “Auto Passthru”
13. Click the “Subtitles” tab and select none
14. Click the “Chapters” tab and make sure “Create Chapter Markers” is un-checked.
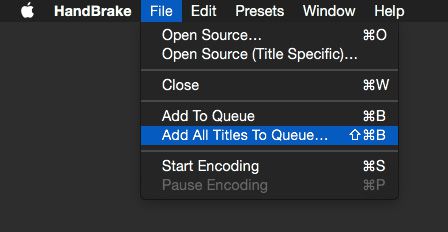
15. You are now ready to start encoding. If you are only doing one file, just press the “Start” button and Handbrake will start encoding. If you are doing a batch of files, open the File Menu and select “Add All Titles To Queue”
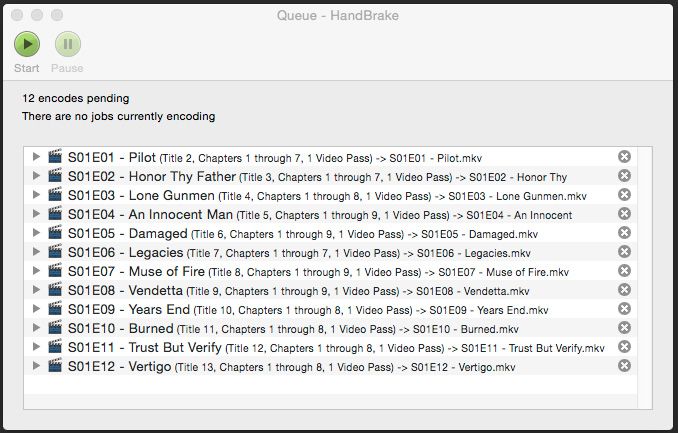
16. Press the “Show Queue” button to see all your files waiting to be encoded
17. Press the “Start” button and your encoding session will begin.
We use cookies on our website to give you the most relevant experience by remembering your preferences and repeat visits. By clicking “Accept”, you consent to the use of ALL the cookies.
This website uses cookies to improve your experience while you navigate through the website. Out of these, the cookies that are categorized as necessary are stored on your browser as they are essential for the working of basic functionalities of the website. We also use third-party cookies that help us analyze and understand how you use this website. These cookies will be stored in your browser only with your consent. You also have the option to opt-out of these cookies. But opting out of some of these cookies may affect your browsing experience.
Necessary cookies are absolutely essential for the website to function properly. This category only includes cookies that ensures basic functionalities and security features of the website. These cookies do not store any personal information.
Any cookies that may not be particularly necessary for the website to function and is used specifically to collect user personal data via analytics, ads, other embedded contents are termed as non-necessary cookies. It is mandatory to procure user consent prior to running these cookies on your website.